
Home Remedies
Home Remedies to Soften Hard Skin on Feet: A Complete, Evidence-Informed Guide

The content on this website – including articles, event announcements, personal experiences, and recommendations – is for informational and educational purposes only and is not medical advice. Always consult a qualified healthcare professional before making any changes to your diet, exercise, supplements, sleep habits, or wellness routines, especially if you are pregnant, nursing, on medication, or have any medical condition.
Disclaimer: This article is for informational purposes only and is not a substitute for professional medical advice. Hard skin on the feet is usually harmless, but people with diabetes, poor circulation, or nerve damage should consult a podiatrist before attempting any home treatment, as self-treatment can carry serious risks for these groups.
Rough, thickened patches on your heels that catch on your socks. Skin so hard on the balls of your feet that it cracks and sometimes even bleeds. Hard skin on the feet is one of the most common and most misunderstood skin issues people deal with — misunderstood because most advice treats it as a purely cosmetic annoyance, when in fact the ingredient science behind softening it properly, and knowing when it signals something that needs professional attention, both matter more than most articles let on.
This guide walks through the soaks, ingredients, and techniques that genuinely work, explains exactly why urea concentration matters far more than most people realise, and — critically — covers who should not be doing any of this at home at all.
Why Hard Skin Forms in the First Place
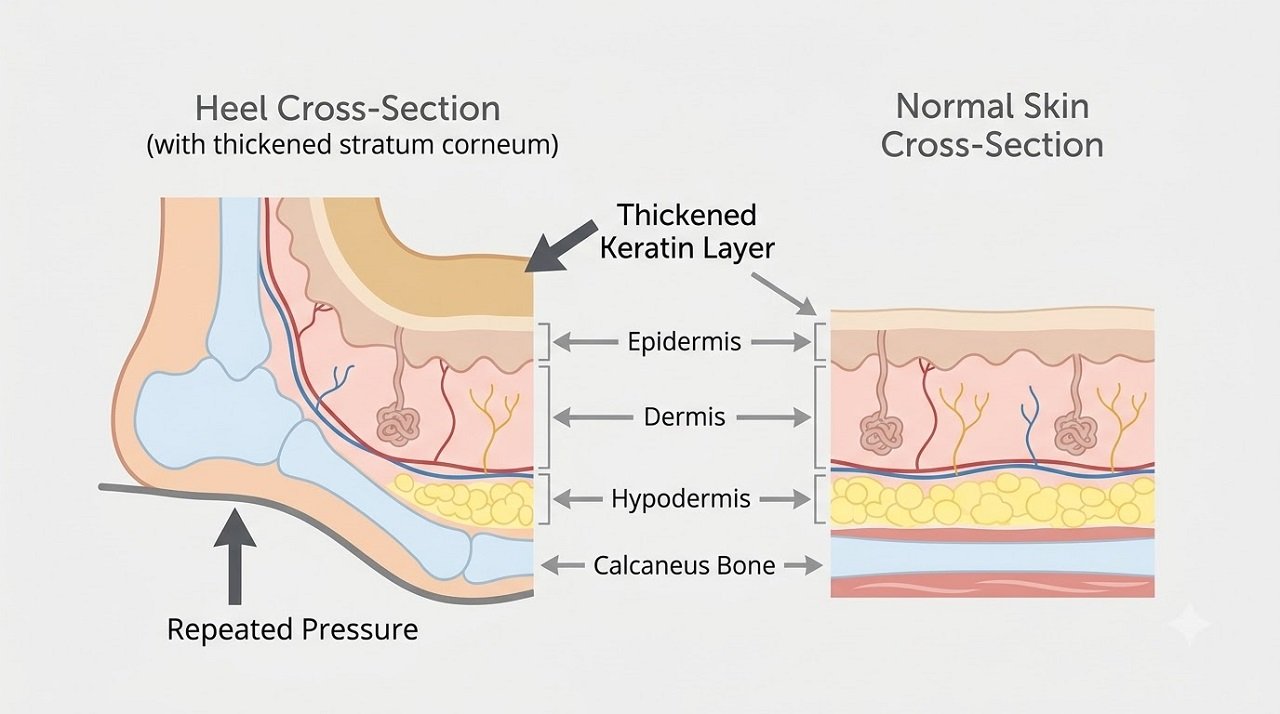
Hard skin, medically referred to as callus (a broad, flat area of thickened skin) or corn (a smaller, more concentrated area, often over a bony prominence like a toe joint), is your skin’s protective response to repeated pressure or friction. Every time an area of skin experiences the same mechanical stress repeatedly — the heel striking the ground with every step, a toe rubbing against a shoe, weight concentrated on the ball of the foot — skin cells respond by producing extra keratin, the tough structural protein that makes up the outer layer of skin. Over time, this builds into a visibly thickened, hardened patch.
The most common contributors are footwear that doesn’t fit properly (too tight, too loose, or with inadequate cushioning), a foot structure or gait pattern that concentrates pressure unevenly, prolonged standing or walking, and simply going barefoot often on hard surfaces. Dry skin makes the situation worse, because dry skin lacks the flexibility to withstand repeated pressure without hardening and eventually cracking — which is exactly why moisture-focused remedies form the backbone of effective home treatment.
Soaking: The Foundation Step Almost Every Remedy Depends On
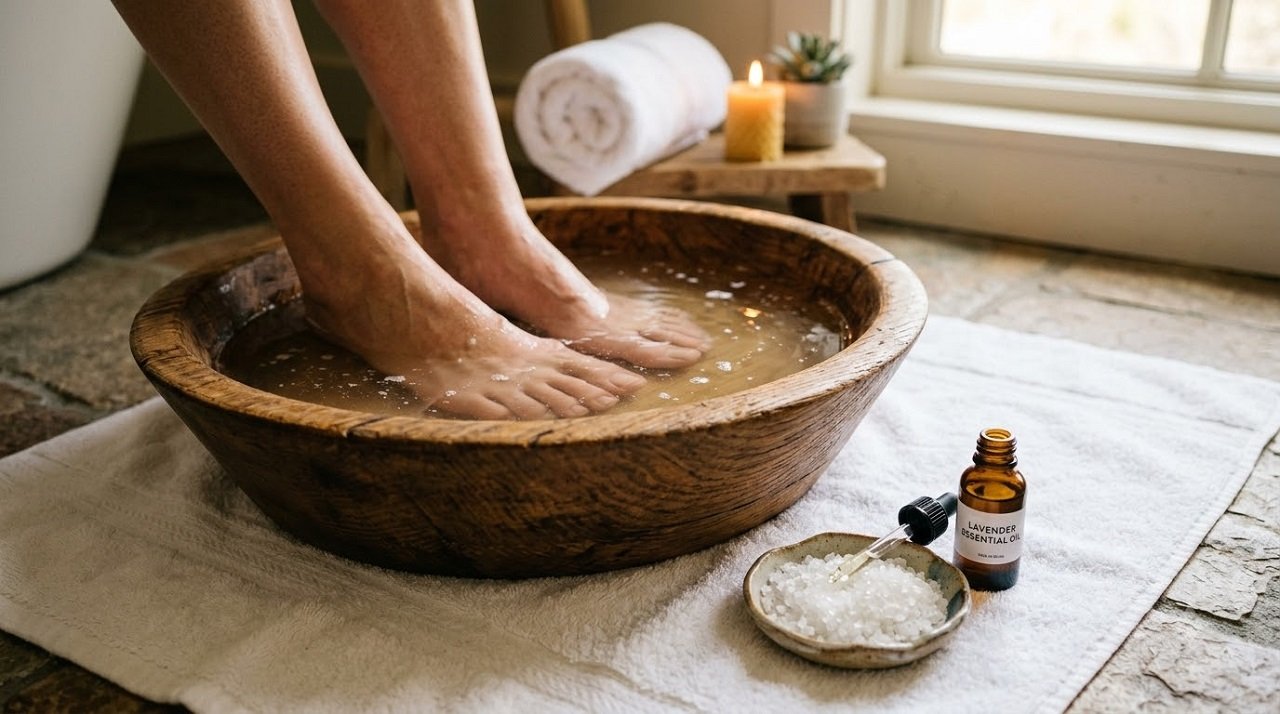
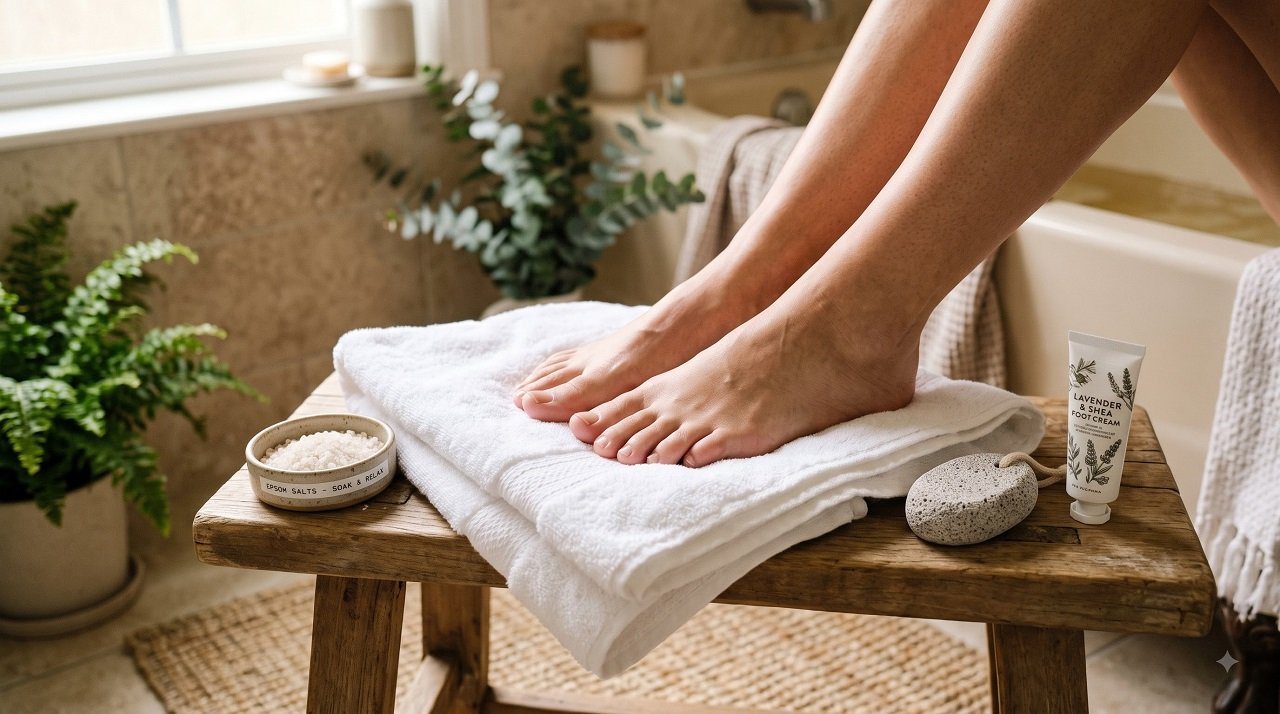
Every effective at-home approach to softening hard skin starts with a soak, because thickened, dehydrated skin needs to absorb water before it becomes pliable enough to safely exfoliate or treat further. Skipping this step and going straight to a pumice stone or file on dry, hardened skin is both less effective and more likely to cause irritation or micro-tears.
Fill a basin with comfortably warm (not hot) water — roughly 37–40°C (98–104°F) is a safe and effective range. Soak your feet for 15–20 minutes. Water any hotter than this doesn’t soften skin any faster and increases the risk of burns, particularly for anyone with reduced sensation in their feet.
Epsom salt soak: Dissolve 2–3 tablespoons of Epsom salt (magnesium sulphate) into the warm water. Beyond the relaxing, muscle-soothing effect it’s best known for, the warm water itself does the heavy lifting for skin softening — the magnesium sulphate is a pleasant addition rather than the primary active mechanism for callus softening specifically.
Baking soda soak: Add 2–3 tablespoons of baking soda to the water. Baking soda is mildly alkaline, which helps loosen and soften the outermost dead skin cells, making the subsequent exfoliation step noticeably easier. This is a genuinely useful and low-cost addition, particularly for stubborn heel callus.
Vinegar soak: Mix equal parts white vinegar and warm water. Vinegar’s acidity helps break down the bonds between dead skin cells, similarly to how alpha-hydroxy acid exfoliants work in commercial skincare, making tough skin considerably easier to remove afterward. If you have any open cracks or cuts, skip this option, since the acidity will sting on broken skin.
Exfoliation: Getting the Technique Right (Not Just the Tool)
Once your feet have soaked for 15–20 minutes and the skin is genuinely softened, gentle mechanical exfoliation removes the loosened dead skin.
Pumice stone: Use gentle, consistent circular or back-and-forth motions directly on the hardened area, applying light pressure only. Work for no more than a few minutes per area per session. The goal is gradual thinning over multiple sessions, not removing all of the hard skin in one sitting — trying to do so significantly increases the risk of over-exfoliating into healthy tissue underneath, which can cause pain, bleeding, and a higher chance of infection.
Foot files: Manual foot files work similarly to pumice stones but often provide more targeted control, particularly on the heel. Electronic foot files (the spinning-head variety) are effective and popular but require a lighter touch than people often assume — hold the device against the skin only briefly at a time and check your progress frequently rather than continuously grinding one spot.
What to avoid: Metal foot graters that resemble cheese graters, and any blade-based callus shavers, carry a meaningfully higher risk of cutting too deep, especially since it is genuinely difficult to judge exactly how much hardened tissue lies between your tool and healthy skin. These tools are best avoided for home use altogether, and any deep callus reduction is more safely handled by a podiatrist using sterile, calibrated instruments.
After exfoliating, rinse your feet, pat them completely dry, and move immediately to moisturising — this is the step that determines whether your progress actually lasts.
Moisturising: Why Urea Percentage Is the Detail Almost Every Article Skips
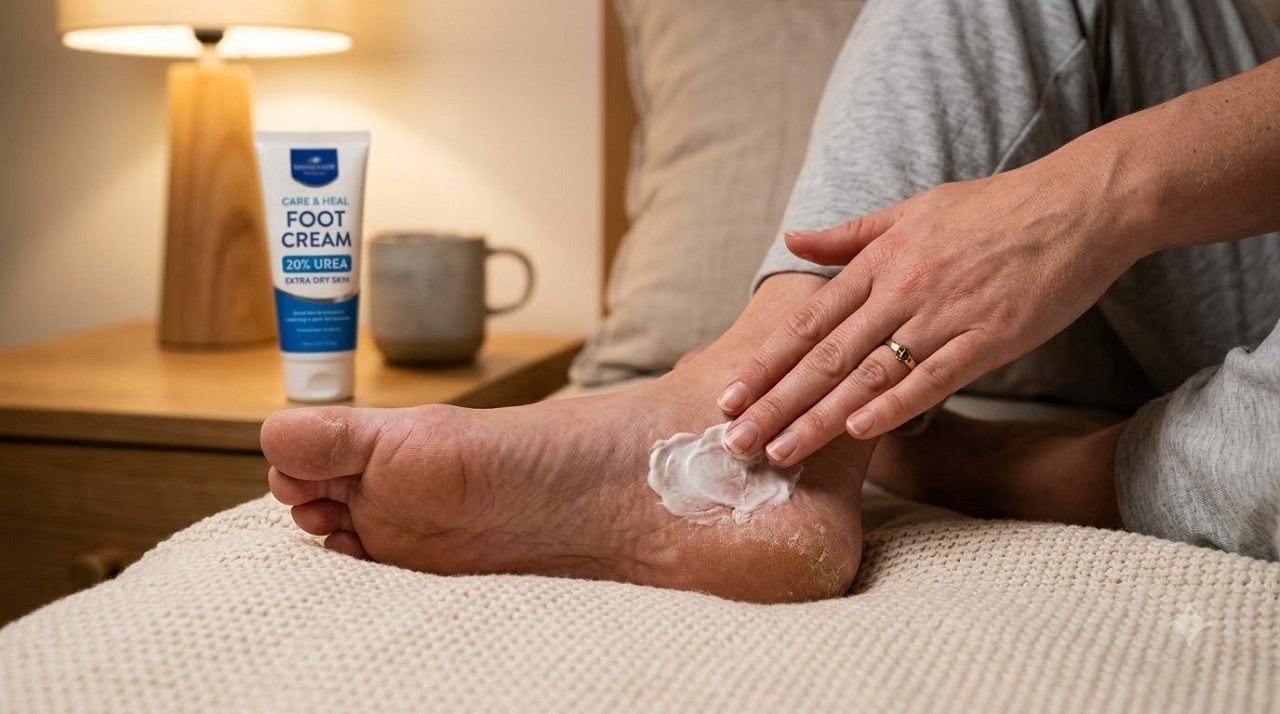
This is where the real content gap in most existing guides lies. Nearly every article says “moisturise regularly” without ever explaining that the concentration of the active ingredient in your moisturiser determines whether it functions as a basic hydrator or as a genuine keratolytic — meaning it actually helps break down and shed the hardened skin, not just temporarily plump it with water.
Urea is the best-researched and most widely used keratolytic ingredient for hard, thickened skin, and its effect changes meaningfully by concentration. At 10% concentration, urea functions primarily as a humectant and mild emollient — it draws water into the skin and softens texture, but has minimal effect on truly thick, hardened callus. At 20% concentration, urea begins acting as a genuine keratolytic, loosening the bonds between dead skin cells in the outer keratin layer; a 2024 open-label clinical study found statistically significant improvement in skin smoothness and texture after just one week of daily 20% urea use. At 30–40% concentration, urea becomes a considerably more potent keratolytic specifically suited to thick, fissured, heavily callused heel skin, and clinical literature notes this range is appropriate for severe, localized hyperkeratosis where lower concentrations have proven insufficient.
The practical implication most people miss entirely: if you’ve tried a drugstore foot cream for a few weeks with minimal results, the issue is very likely the concentration, not the ingredient. A generic lotion listing “urea” without a percentage is very often formulated at 5–10%, which functions mainly as a moisturiser rather than an active treatment for genuinely thick callus. For stubborn heel and ball-of-foot hard skin, look specifically for products labelled 20–25% urea for moderate cases, or 30–40% for severe, long-standing callus.
Salicylic acid is the other well-established keratolytic, working through a different mechanism — it dissolves the intercellular “glue” holding dead skin cells together, allowing them to shed. It is frequently paired with urea in combination formulas, where the two ingredients’ different mechanisms compound the effect.
Lactic acid, an alpha-hydroxy acid, provides gentler exfoliation alongside genuine humectant hydration, making it a reasonable choice for mild-to-moderate hard skin or for those who find higher-concentration urea slightly irritating.
A practical overnight protocol: After your evening soak and exfoliation, apply a thick layer of a 20%+ urea-based foot cream to the hardened areas, then cover your feet with clean cotton socks before bed. This “occlusion” technique meaningfully boosts absorption overnight, since the sock traps moisture against the skin rather than letting it evaporate, and is one of the most effective simple protocols for stubborn callus.
Natural Ingredient Options for Those Who Prefer a Non-Clinical Approach
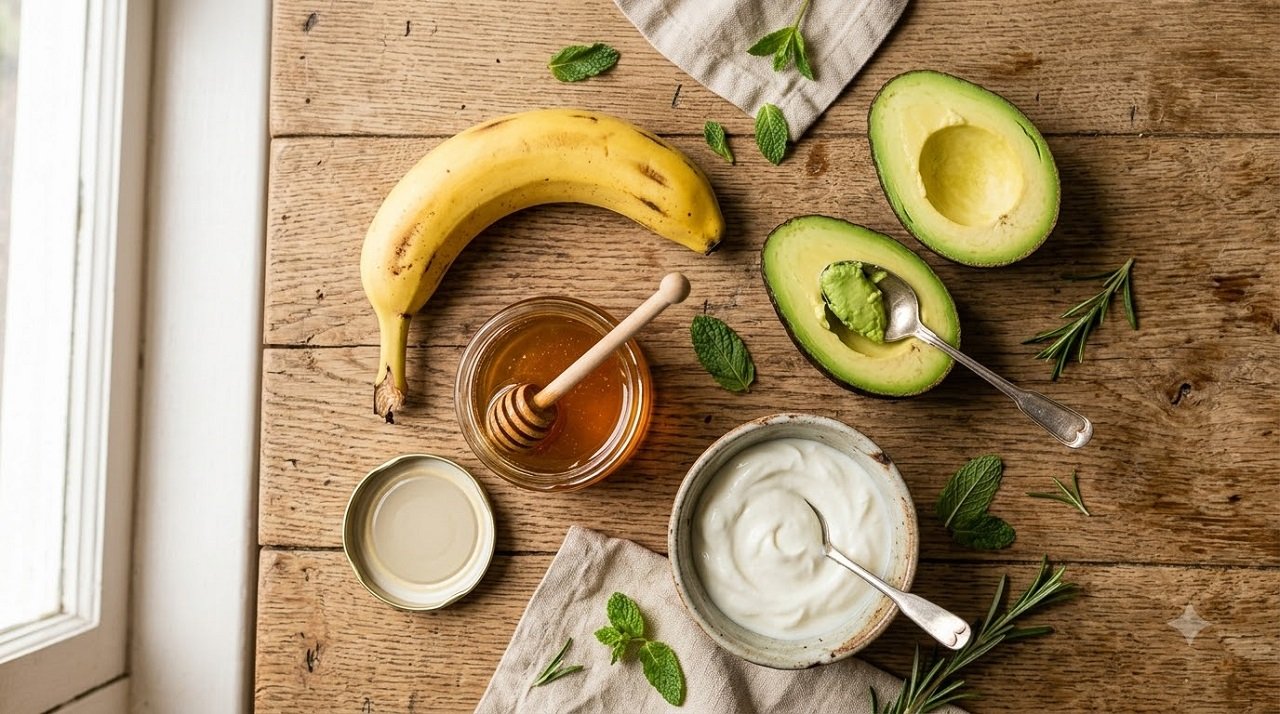
If you’d rather avoid formulated creams altogether, several kitchen-based options have a reasonable rationale behind them, though they generally work more gradually than concentration-specific urea or salicylic acid formulas.
Coconut oil contains fatty acids that support the skin’s natural lipid barrier, helping retain moisture in skin that has become dry and inflexible. Apply generously to clean, dry feet and, as with the urea protocol above, cover with socks overnight for enhanced absorption.
Banana and honey mask: Mash one ripe banana with a tablespoon of honey and apply to clean, dry feet, leaving it on for 15–20 minutes before rinsing. Ripe banana contains natural moisturising compounds, and honey has humectant properties that help draw and retain moisture in the skin.
Avocado and yoghurt mask: Combine mashed avocado with plain yoghurt. Avocado’s healthy fats support barrier repair, while the lactic acid naturally present in yoghurt provides mild exfoliation — a gentler parallel to the pharmaceutical lactic acid products described above.
These natural options are genuinely pleasant, low-risk additions to a foot care routine and provide real hydration benefit, but for established, thick callus, they generally work more slowly and less predictably than a properly concentrated urea or salicylic acid product — worth knowing so your expectations are realistic if you choose this route.
Prevention: Addressing the Cause, Not Just the Symptom
Softening existing hard skin only solves half the problem if the underlying friction or pressure pattern that created it continues unaddressed — which is why callus so often returns within weeks for people who treat the skin but never adjust the cause.
Footwear fit is the single most impactful prevention factor. Shoes that are too tight concentrate friction on specific pressure points, while shoes that are too loose allow the foot to slide and rub with every step. There should be roughly a thumb’s width of space between your longest toe and the front of the shoe, and the shoe should hold your heel snugly without slipping.
Cushioned insoles or orthotics redistribute pressure more evenly across the foot, particularly valuable for people who stand or walk for long stretches during the day, or for whom callus tends to concentrate at specific points like the ball of the foot.
Moisture-wicking socks made from natural fibres like cotton or bamboo reduce the friction that comes from feet sweating and sliding slightly inside a shoe throughout the day.
A consistent, low-effort maintenance routine — brief daily moisturising and a short weekly gentle exfoliation session — prevents the gradual re-thickening that happens when foot care becomes purely reactive (only addressed once skin is already uncomfortably hard).
When Home Treatment Is Not Appropriate: Diabetes and Circulation Issues
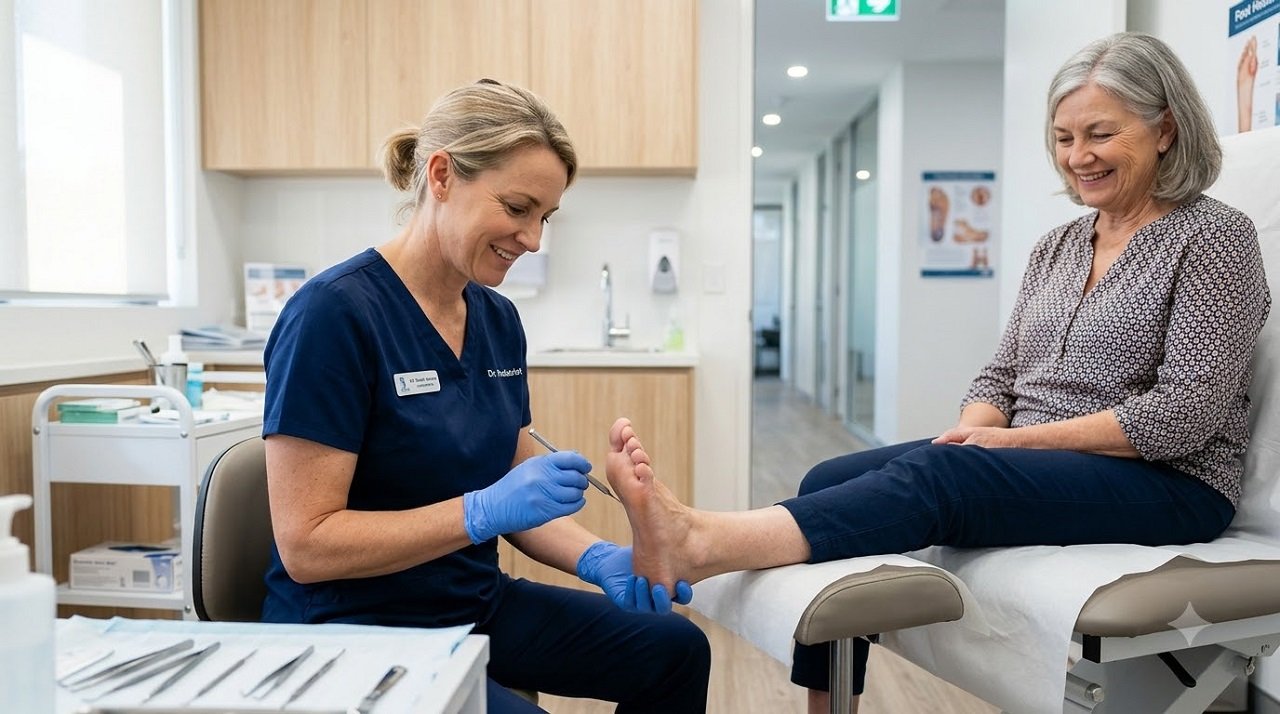
This is the section every general “hard skin on feet” article treats with a single throwaway sentence, and it deserves considerably more attention, because for a meaningful portion of readers, the advice above is actually inappropriate to follow.
If you have diabetes, particularly with any degree of diabetic neuropathy (nerve damage) or peripheral vascular disease (reduced blood flow to the feet), self-treating hard skin at home is genuinely not recommended, and this is not an overly cautious footnote — it reflects a real and well-documented clinical risk. Cleveland Clinic and multiple podiatric sources are explicit and consistent on this point: people with diabetes should not cut, file, or use over-the-counter chemical callus removers on their own feet, and should instead have any callus assessed and managed by a podiatrist.
The reason is specific to how diabetes changes the feet. Diabetic neuropathy frequently reduces or eliminates the ability to feel pain, pressure, or minor injury in the feet — which means a small nick from a pumice stone, a mild chemical burn from a keratolytic cream, or excessive pressure from continued walking on a raw area can go completely unnoticed. Combined with the poor circulation many people with diabetes experience, even a very small wound can heal slowly, become infected, and in more serious cases progress toward a diabetic foot ulcer — a condition that accounts for a significant proportion of diabetes-related hospital admissions and, in advanced cases, can lead to amputation. Clinical research has also specifically linked callus formation itself to increased plantar pressure and elevated ulceration risk in diabetic neuropathic patients, which is precisely why podiatrists routinely debride diabetic calluses using sterile, controlled techniques rather than leaving the skin to be managed at home.
If you have diabetes and notice hard, thickened skin developing on your feet, the appropriate next step is a podiatry appointment, not a pumice stone. A podiatrist can safely reduce the callus, assess for any hidden ulceration underneath it (calluses can mask early ulcers, which is a genuinely important reason not to self-manage), and identify the pressure pattern causing it so it can be addressed with proper footwear or orthotics.
When Hard Skin Isn’t Just Hard Skin: Ruling Out Other Conditions
A further gap in most guides is failing to mention that not everything that looks like a callus actually is one — and treating the wrong condition with keratolytic creams or pumice stones can occasionally make things worse.
Plantar warts, caused by a virus (HPV) entering through small breaks in the skin, can closely resemble a callus, but typically have small black dots visible within them (tiny clotted blood vessels) and are often more tender when pinched from the sides than when pressed directly, unlike a typical callus. Filing a wart can also spread the virus to surrounding skin.
Fungal infections on the feet can sometimes present as thickened, scaly patches, particularly along the soles, and are usually accompanied by itching, a distinct scaling pattern, or an unpleasant odour — features that plain callus does not typically have.
Eczema or psoriasis affecting the feet can also cause thickened, rough patches, but these are usually accompanied by more redness, itchiness, or a flaky, silvery scale (in the case of psoriasis) that differs from the uniform, painless thickening of ordinary callus.
If your hard skin is accompanied by redness, significant itchiness, small black dots, unusual odour, oozing, or pain that seems disproportionate to simple pressure-based thickening, it is worth having it looked at by a doctor or dermatologist rather than continuing with standard callus remedies, since the appropriate treatment for each of these conditions is genuinely different.
Frequently Asked Questions
Q: How long does it take to soften hard skin on feet at home?
With consistent nightly care — soaking, gentle exfoliation, and a properly concentrated urea or salicylic acid moisturiser — most people notice a meaningful improvement in texture within one to two weeks, with more significant, established callus taking three to four weeks of consistent treatment to substantially thin. Mild dryness typically responds faster than genuinely thick, long-standing callus.
Q: What percentage of urea cream should I use for very hard, cracked heels?
For moderate hard skin, 20–25% urea is typically sufficient and well tolerated. For genuinely thick, fissured, long-standing callus that hasn’t responded to lower concentrations, 30–40% urea is the concentration clinical literature associates with meaningfully faster and more complete results, though it can cause mild stinging on any cracked or broken skin, so apply carefully around fissures.
Q: Is it safe to remove hard skin with a razor blade or foot grater at home?
This is genuinely not recommended. Blade-based tools and metal foot graters carry a real risk of cutting too deep, since it’s difficult to accurately judge how much hardened tissue separates the tool from healthy skin underneath — a risk that rises considerably for anyone with diabetes or reduced sensation. A pumice stone or a proper foot file used gently after soaking is a meaningfully safer approach for home use.
Q: Can I use apple cider vinegar directly on cracked, hard skin?
Diluted vinegar soaks can help soften intact hard skin, but if you have any open cracks or fissures, the acidity will sting significantly and can further irritate already-compromised skin. In that case, skip the vinegar step and focus on a plain warm water soak followed directly by a urea-based moisturiser instead.
Q: I have diabetes — can I still use any of these home remedies?
Regular, gentle moisturising with a podiatrist-approved cream is generally fine and encouraged as part of daily diabetic foot care. However, any exfoliation involving pumice stones, foot files, or keratolytic acids, and definitely any cutting or shaving of hard skin, should be discussed with and ideally performed by a podiatrist rather than done independently, given the meaningfully elevated risk of unnoticed injury and slow-healing wounds associated with diabetic neuropathy and circulation changes.
Q: How do I know if what I have is a callus or a plantar wart?
A plain callus is typically smooth, uniformly thickened, and not especially tender when pressed directly. A plantar wart often has small black dots visible within it, tends to be more tender when squeezed from the sides than when pressed straight down, and can sometimes disrupt the normal skin lines that run across the sole. If you’re genuinely unsure, having it checked by a doctor avoids the risk of treating a wart with callus-focused remedies, which won’t resolve it and could spread it.
Scientific References
- Starace M, Alessandrini A, Piraccini BM. Clinical evidences of urea at high concentration on skin and annexes. International Journal of Clinical Practice. 2020. https://doi.org/10.1111/ijcp.13740
- Keratolytic Agent — an overview. ScienceDirect Topics, referencing clinical concentration data on urea and salicylic acid for hyperkeratosis. https://www.sciencedirect.com/topics/medicine-and-dentistry/keratolytic-agent
- Pan M, et al. Evaluation of a Moisturizing Cream with 20% Urea for Keratosis Pilaris. Referenced clinical concentration-response findings, 2024.
- Cleveland Clinic. Diabetes-Related Foot Conditions: Symptoms & Treatment. https://my.clevelandclinic.org/health/diseases/21510-diabetic-feet
- Bus SA, et al. Short-term Effect of Podiatric Callus Debridement on Plantar Pressure in Diabetic Neuropathic Patients. Clinical trial registry data on callus-associated plantar pressure and ulceration risk. https://clinicaltrials.gov/study/NCT06357884
- Virginia Foot and Ankle Center. Callus Removal for Diabetic Patients: Safe and Effective Medical Approaches. https://www.vafootandanklecenter.com/blog/1385096-callus-removal-for-diabetic-patients-safe-and-effective-medical-approaches/
- NIVEA. 3 tips to remove hard skin on the feet — causes, prevention and treatment overview. https://www.nivea.co.uk/advice/skin/removing-hard-skin-feet
- Florida Foot Specialists. Diabetes & Foot Calluses: Risks, Care, and Prevention. https://floridafootspecialists.com/foot-calluses-diabetes/
This article is for informational purposes only and is not a substitute for professional medical advice. Hard skin on the feet is usually harmless, but people with diabetes, poor circulation, or nerve damage should consult a podiatrist before attempting any home treatment, as self-treatment can carry serious risks for these groups.












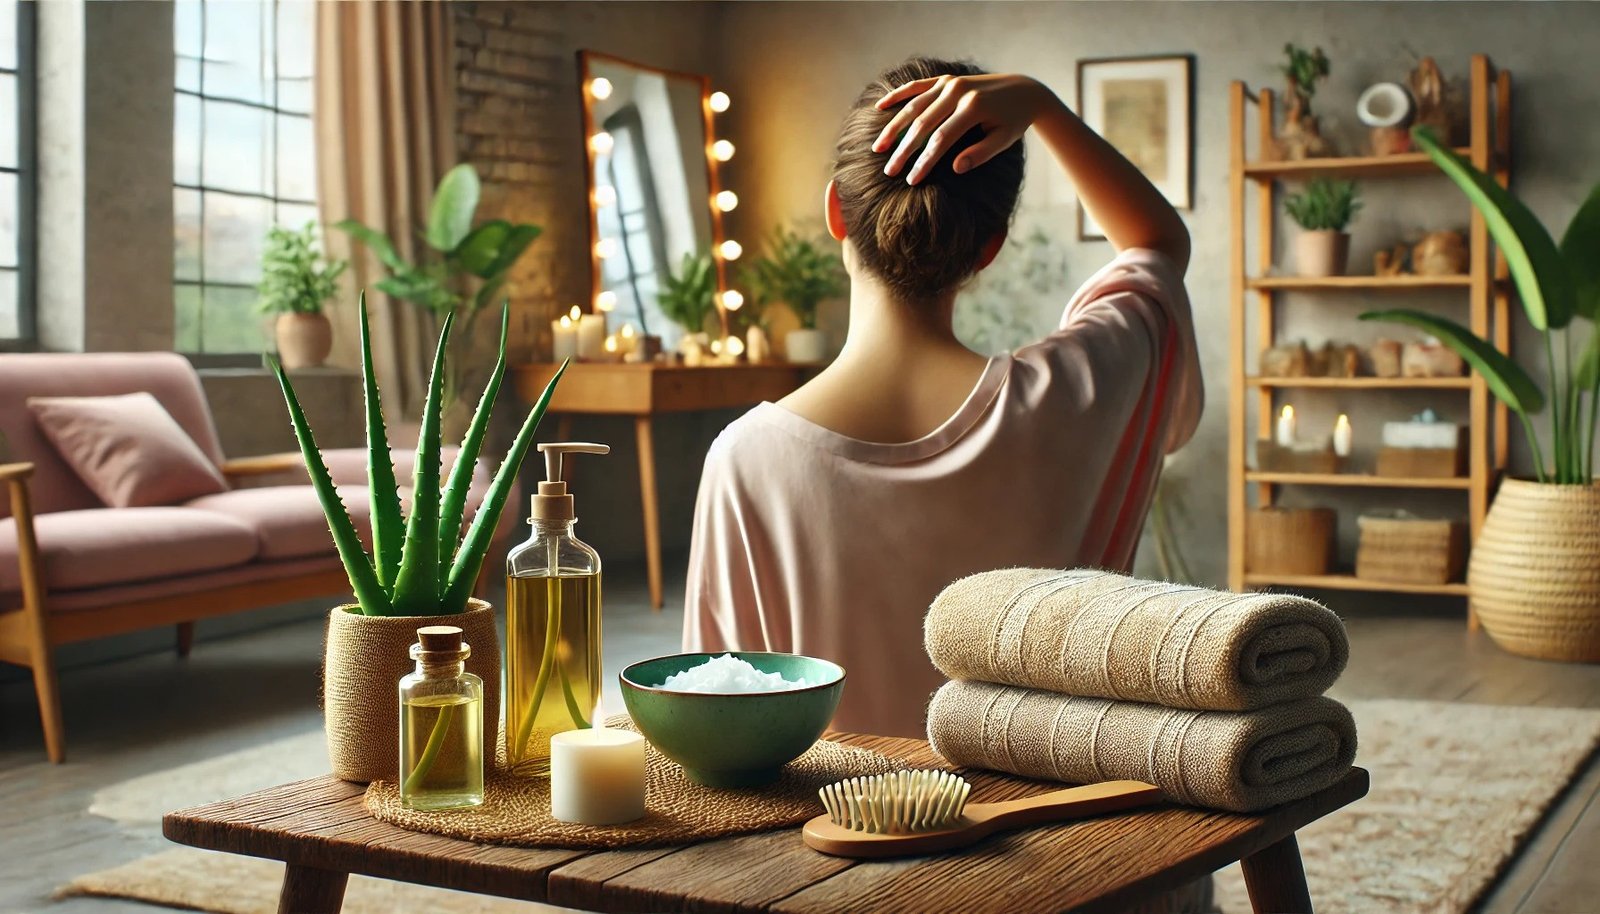
Quick answer: Hair root pain — the clinical term is trichodynia — usually responds to gentle scalp massage, properly diluted essential oils like tea tree or peppermint (never applied undiluted), and anti-inflammatory ingredients like coconut oil and aloe vera. It’s most often linked to telogen effluvium (temporary hair shedding), scalp psoriasis, seborrheic dermatitis, or tension from tight hairstyles. One important exception: in adults over 50, new scalp tenderness combined with headache or vision changes can signal giant cell arteritis, a genuine medical emergency — covered in detail further down.
That’s the short version. Below is the full picture: what’s actually happening when hair roots hurt, which home remedies have real backing, which popular ones carry real risk if used the way they’re often described online, and exactly when this needs a doctor rather than another oil.
Key Takeaways
- The medical term for hair root pain is trichodynia, and it’s most strongly linked to telogen effluvium (temporary hair shedding) — research puts its prevalence at roughly 29–34% among people experiencing hair loss
- Gentle scalp massage, coconut oil, and properly diluted tea tree oil have the most supportive evidence among home remedies
- Apple cider vinegar and essential oils should always be diluted before touching the scalp — used undiluted, both have documented cases of causing chemical burns and irritation
- Scalp tenderness in someone over 50, especially with headache or vision changes, needs same-day medical attention — it can signal a rare but serious condition
- Gentle hair care, stress management, and identifying the specific underlying condition (rather than treating “scalp pain” as one single thing) lead to better long-term relief
What’s Actually Happening When Hair Roots Hurt: Meet Trichodynia
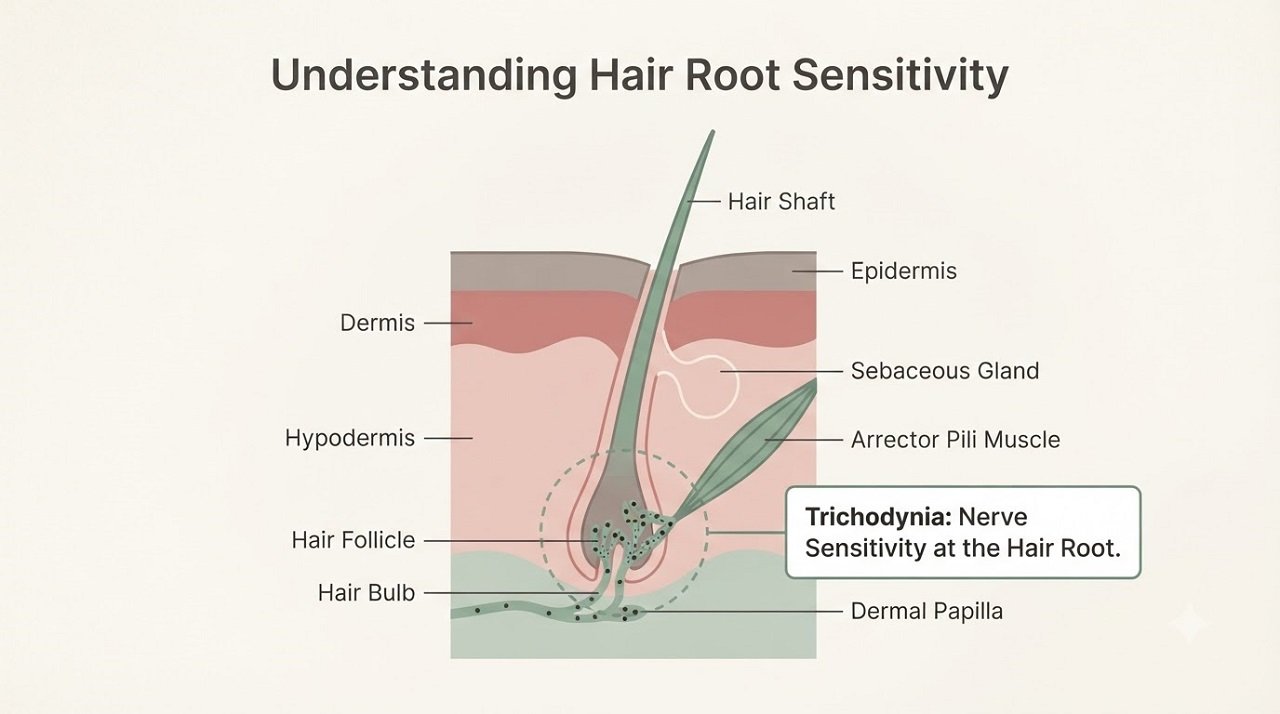
Before getting into remedies, it helps to know the actual medical term for what you’re dealing with, since it changes how you search for and evaluate information. Trichodynia — sometimes called scalp dysesthesia — is the clinical name for a painful, burning, or tender sensation in the scalp or at the hair roots, often made worse when the hair is touched or pulled. It’s classified as a form of allodynia, meaning pain triggered by something that wouldn’t normally hurt.
Research consistently links trichodynia most strongly to telogen effluvium, a condition involving temporary, diffuse hair shedding — studies have found trichodynia present in roughly 29–34% of people experiencing hair loss, and it’s reported about twice as often in women as in men. The exact mechanism isn’t fully settled, but researchers have found elevated levels of substance P, a nerve-signaling chemical involved in pain perception, in the scalp tissue of people with trichodynia — suggesting a genuine nerve-sensitivity component rather than it being “all in your head.”
That said, psychological stress and anxiety are also frequently found alongside trichodynia, and the relationship appears to run in both directions: stress can intensify scalp pain, and ongoing scalp pain can itself become a source of distress.
Trichodynia isn’t a diagnosis on its own — it’s a symptom, and understanding what’s driving it in your specific case is what actually determines which remedy makes sense.
Understanding Hair Root Pain: Causes and Symptoms
Hair root pain can be genuinely frustrating, and it’s natural to wonder why it’s happening. Scalp pain has several possible sources: sunburn, tight hairstyles, and harsh hair dye can all directly irritate the scalp. Dandruff, chronic stress, and inflammatory skin conditions like psoriasis and seborrheic dermatitis play a role too. Figuring out the underlying cause is the real first step toward lasting relief, not just symptom suppression.
Common Triggers of Scalp Pain
- Tight hairstyles, such as braids, buns, or ponytails worn repeatedly
- Hair dye application or other harsh chemical treatments
- Dandruff or underlying inflammatory scalp conditions
- Chronic stress or anxiety
- Telogen effluvium (temporary hair shedding), the condition most strongly linked to trichodynia specifically
Signs of Hair Root Inflammation
Signs of genuine inflammation include redness, swelling, and tenderness to the touch, and in more significant cases, hair loss or scarring. If scalp pain persists beyond a couple of weeks despite basic home care, it’s worth having a dermatologist take a look rather than continuing to guess at the cause.
Pain in Hair Roots Home Remedy: Essential Solutions
For everyday hair root pain, several home approaches have a reasonable case behind them. Coconut oil, properly diluted apple cider vinegar, and properly diluted peppermint oil are commonly used to ease an itchy, tender scalp.
Massaging argan oil into the scalp nourishes the skin and, through the massage action itself, boosts local blood flow, which genuinely helps with discomfort. Regular scalp massage — even without any oil at all — improves circulation and delivers more nutrients to the hair follicles, and is one of the lowest-risk, most consistently reasonable remedies on this list.
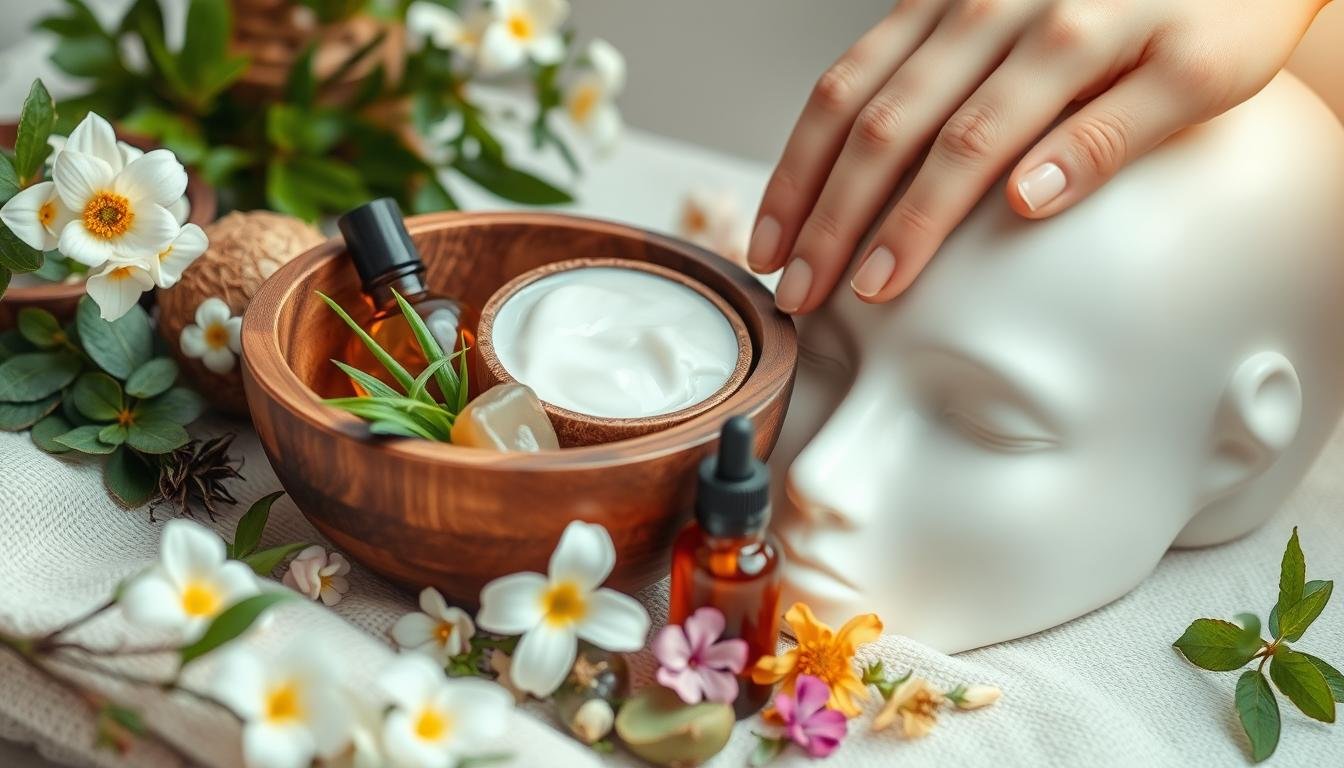
Other commonly used home remedies include:
- Applying pure aloe vera gel to reduce irritation and support the skin’s own repair process
- Using tea tree oil, properly diluted in a carrier oil, to ease itchiness and inflammation
- Combining coconut oil with properly diluted apple cider vinegar as a soothing scalp treatment
Always patch-test any new ingredient on a small area of skin first. If problems persist despite consistent home care, a dermatologist can help pinpoint what’s actually going on.
| Remedy | Benefits | Safety Note |
|---|---|---|
| Aloe vera gel | Reduces irritation, soothes itching | Use pure gel without added alcohol or fragrance |
| Tea tree oil | Eases itchiness, reduces inflammation | Always dilute in a carrier oil before scalp application |
| Coconut oil + apple cider vinegar | Soothes sore hair follicles, reduces scalp discomfort | Dilute ACV with water — undiluted use carries a real risk of chemical burns |
The Science Behind Scalp Inflammation and Discomfort
Scalp inflammation has several recognized sources, including scalp psoriasis, seborrheic dermatitis, and — far less commonly — giant cell (temporal) arteritis, covered in detail in the red-flag section below. Understanding which one applies to you genuinely changes the right approach: reducing stress, improving diet, and staying physically active all support general scalp health, but they won’t resolve an inflammatory skin condition that needs targeted treatment.
Harsh shampoos, hormonal shifts, and occasionally food sensitivities can also contribute to scalp discomfort. Rapid, unexplained hair loss alongside scalp pain is worth a doctor’s evaluation rather than continued self-treatment, since it can point to an underlying condition that benefits from a proper diagnosis.
Scalp psoriasis is common — most people with psoriasis experience scalp involvement at some point in the condition’s course — and seborrheic dermatitis, which causes a flaky, often itchy or tender scalp, is also widespread. Both conditions can produce genuine tenderness at the hair roots, and both respond better to condition-specific treatment (medicated shampoos, for instance) than to general “soothing” remedies alone.
“Trichodynia is a common symptom in patients with telogen effluvium and androgenetic alopecia, and often coexists with psychologic findings including stress and anxiety.” — Findings from clinical research on trichodynia published in the Journal of the European Academy of Dermatology and Venereology
Understanding why scalp pain happens is genuinely useful — it’s what lets you choose a remedy that targets your actual situation rather than trying everything at once.
Natural Remedies to Soothe Painful Hair Roots
For ongoing hair root pain, a few categories of natural remedies stand out, each working through a somewhat different mechanism.
Essential Oil Treatments
Coconut oil, properly diluted apple cider vinegar, and properly diluted peppermint oil are commonly used to soothe an itchy, tender scalp. Massaging these into the scalp nourishes the skin and boosts local blood flow, which can genuinely ease discomfort.
A safety point worth taking seriously:
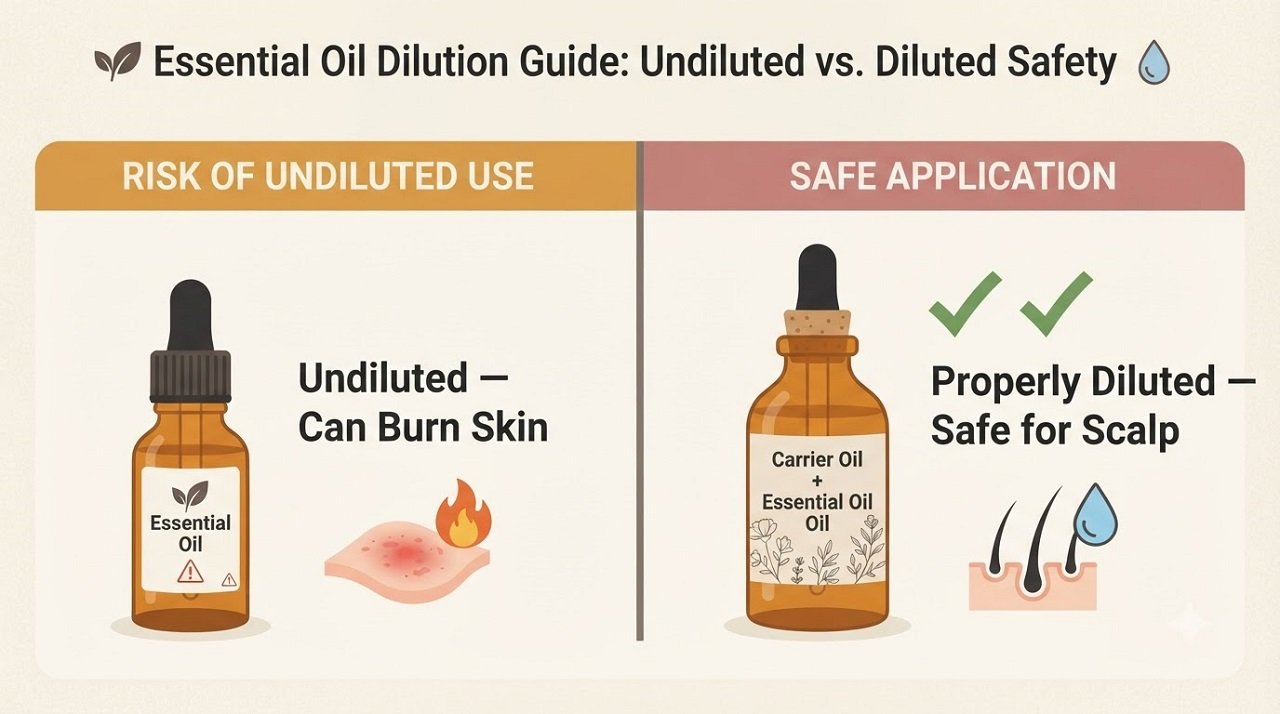
peppermint oil, tea tree oil, and other essential oils should never be applied directly to the scalp undiluted. Undiluted essential oil applied to skin — and especially to a scalp that’s already irritated from psoriasis, seborrheic dermatitis, or excessive scratching — carries a real risk of a phytochemical burn: redness, stinging, and in more severe cases, blistering.
Dilute any essential oil in a carrier oil (coconut, jojoba, or argan oil work well) at roughly a 2–3% concentration — about 10–15 drops of essential oil per ounce of carrier oil — before it touches your scalp.
Herbal Solutions
Aloe vera and tea tree oil (properly diluted, as above) are both commonly used for painful hair roots, owing to genuine anti-inflammatory properties. Used consistently and correctly, they can meaningfully reduce scalp pain and support healthier-looking hair.
DIY Scalp Massage Techniques
Scalp massage is one of the simplest and lowest-risk remedies here, and it works through a straightforward mechanism: it increases blood flow to the scalp and eases physical tension, which can genuinely reduce the sensation of pain at the hair roots. Use a dedicated scalp massager or simply your fingertips, working in gentle circular motions for several minutes, ideally as part of a daily routine rather than a one-off treatment.
| Remedy Category | Benefits |
|---|---|
| Essential oil treatments (properly diluted) | Nourish the scalp, increase circulation, reduce pain at the hair roots |
| Herbal solutions (aloe vera, tea tree oil) | Anti-inflammatory action, reduced scalp pain, support for healthy hair growth |
| DIY scalp massage | Increases blood flow, reduces physical tension, eases pain at the hair roots |
Lifestyle Changes to Prevent Hair Root Pain

Reducing stress, improving your diet, and staying physically active all genuinely support scalp health over time, and are worth treating as part of a long-term approach rather than a quick fix. Avoiding harsh chemical hair products and switching to gentler formulations also helps prevent the kind of irritation that contributes to trichodynia in the first place.
Practical steps worth adopting:
- Avoid tight hairstyles that place ongoing tension on the scalp
- Use gentle, sulfate-free hair care products
- Exercise regularly to reduce stress and support healthy blood flow to the scalp
- Prioritize adequate sleep, since poor sleep disrupts hormone regulation in ways that can worsen inflammation
| Lifestyle Change | Benefit |
|---|---|
| Reducing stress levels | Lowers inflammation, supports overall scalp health |
| Improving diet | Provides essential nutrients for healthy hair and scalp |
| Exercising regularly | Improves blood flow, reduces physical tension on the scalp |
Always talk with a healthcare professional before making significant lifestyle or dietary changes, particularly if you have an existing health condition.
Topical Treatments for Immediate Relief
For more immediate relief, coconut oil, properly diluted apple cider vinegar, and properly diluted peppermint oil can soothe sore hair follicles when applied directly and gently massaged in. Pure aloe vera gel and properly diluted tea tree oil are also widely used, applied directly to tender areas.
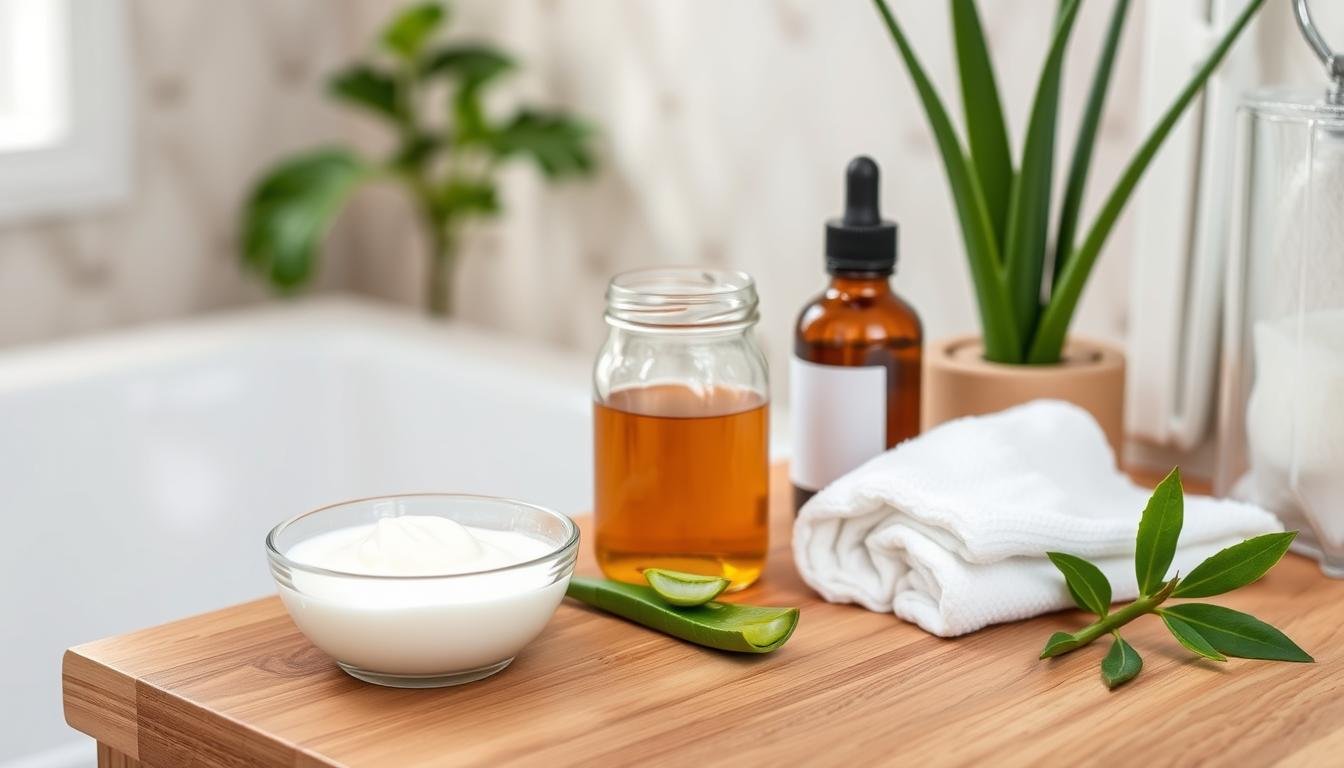
Some people also use turmeric paste or neem oil for scalp discomfort — both have documented anti-inflammatory properties in general skin research, though the evidence specific to trichodynia and scalp pain is limited, so treat these as reasonable options to try rather than guaranteed fixes.
| Remedy | Application | Frequency |
|---|---|---|
| Coconut oil | Apply directly to scalp, massage in gently | Once or twice daily |
| Apple cider vinegar | Dilute with water (roughly 1 part ACV to 4 parts water), apply to scalp, rinse after a few minutes | Up to twice daily; never leave undiluted ACV on the scalp |
| Peppermint oil | Dilute in a carrier oil before applying to scalp | Once or twice daily |
Using these consistently, and respecting the dilution guidance above, can genuinely help ease scalp pain while keeping the skin and hair follicles healthy rather than further irritated.
Proper Hair Care Techniques to Reduce Scalp Pain
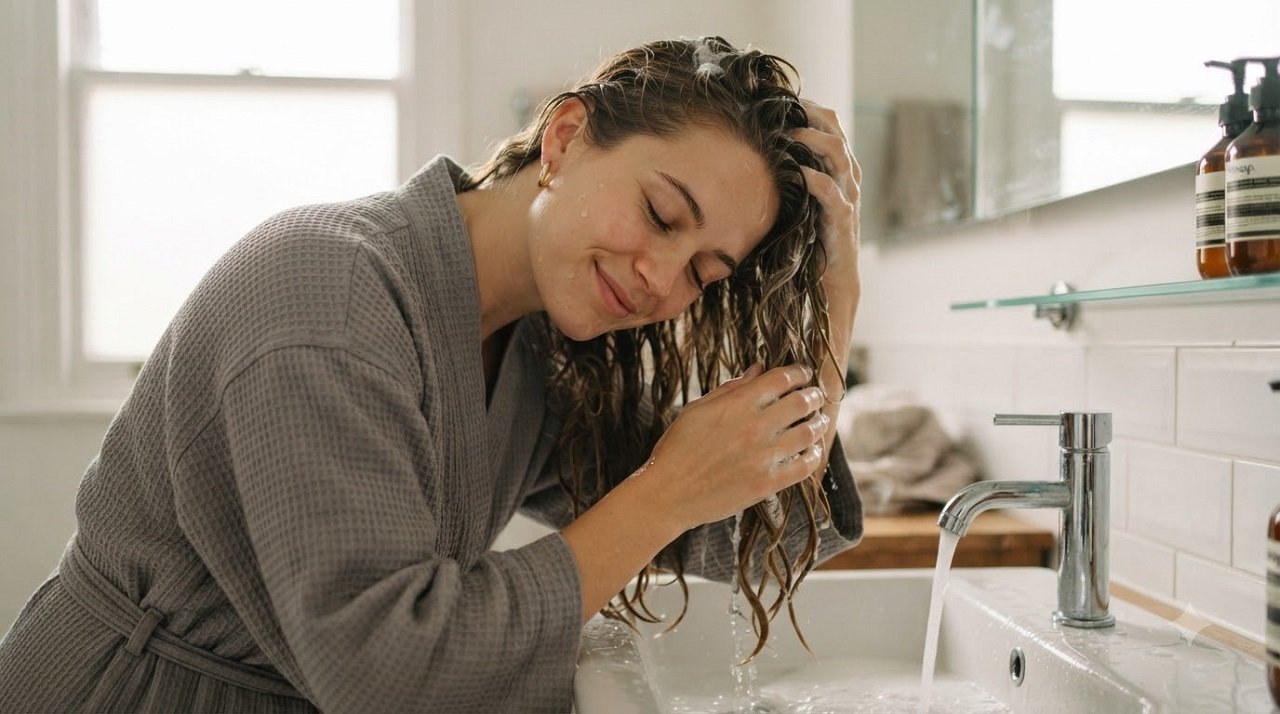
Gentle hair care genuinely helps reduce hair root pain over time. Avoid harsh chemicals that irritate the scalp, and favor simple, consistent habits:
- Wash hair with lukewarm (not hot) water, and avoid harsh, sulfate-heavy shampoos
- Avoid tight hairstyles that place ongoing tension on the scalp
- Use natural hair care products free from sulfates and parabens when possible
One nuance worth knowing: washing frequency genuinely depends on the underlying cause. If seborrheic dermatitis or dandruff is contributing to your scalp pain, more frequent washing with a medicated (anti-dandruff) shampoo is often more helpful than stretching out washes — the opposite of what a blanket “wash less often” rule would suggest. If you’re not sure which applies to you, a dermatologist can help match the washing routine to your specific scalp condition rather than a generic rule.
Dietary Adjustments to Support Scalp Health
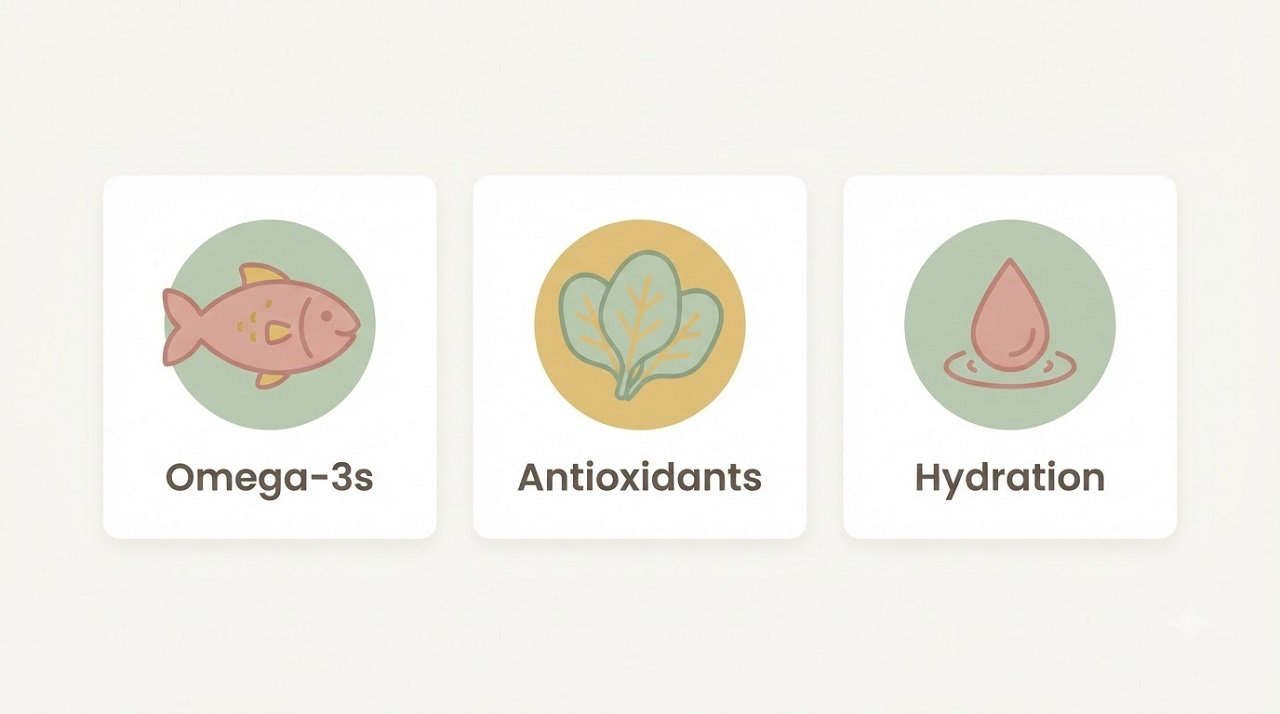
Diet genuinely supports scalp health, though it works alongside — not instead of — addressing the specific underlying cause of your pain. A balanced diet with key nutrients can meaningfully help: foods high in omega-3 fatty acids, like salmon and walnuts, help reduce inflammation and support scalp hydration.
Staying well-hydrated supports healthy hair follicles generally. Antioxidant-rich foods, like berries and leafy greens, help protect hair follicles from oxidative stress.
Foods worth prioritizing for scalp health include:
- Fatty fish, such as salmon and sardines, rich in omega-3 fatty acids
- Nuts and seeds, such as walnuts and flaxseeds, offering healthy fats and antioxidants
- Leafy greens, such as spinach and kale, rich in antioxidants and essential nutrients

| Food Group | Key Nutrients | Benefit |
|---|---|---|
| Fatty fish | Omega-3 fatty acids | Reduces inflammation, supports hydration |
| Nuts and seeds | Healthy fats, antioxidants | Supports scalp health, promotes hair growth |
| Leafy greens | Antioxidants, essential nutrients | Protects hair follicles, supports healthy growth |
Combining dietary changes with the remedies above — scalp massage, properly diluted essential oils — can meaningfully reduce scalp discomfort over time. Always talk to a healthcare professional before making significant dietary changes.
When to Seek Professional Help for Scalp Pain

Natural remedies genuinely help with much of everyday trichodynia and mild scalp irritation. But knowing when to escalate to a doctor matters just as much, and one specific scenario deserves direct, unambiguous attention here.
See a dermatologist or doctor if: scalp pain is severe, persistent, or worsening despite consistent home care; you notice significant itching, burning, or visible inflammation that doesn’t improve; hair loss accompanies the pain; or home remedies simply aren’t providing relief after a few weeks of consistent use.
A genuine medical emergency worth knowing about specifically: in adults over 50, new scalp tenderness — especially when it’s noticeable just from brushing hair or resting your head on a pillow — combined with a new, persistent headache, jaw pain while chewing, or any change in vision, can signal giant cell arteritis (also called temporal arteritis), an inflammatory condition affecting the arteries supplying the scalp and eyes. This is a genuine medical emergency: untreated, it can cause sudden and permanent vision loss. If you’re over 50 and notice this specific combination of symptoms, seek same-day medical attention rather than trying a home remedy first — this condition is treated effectively with prompt steroid therapy, but delay meaningfully raises the risk of irreversible vision loss.
Most scalp pain is far more ordinary than this — tension, dryness, product irritation, or trichodynia linked to temporary hair shedding — but this specific pattern in this specific age group is the one exception where speed genuinely matters.
Long-Term Strategies for Managing Hair Root Sensitivity
Managing ongoing hair root sensitivity works best as a combination of consistent home care and broader lifestyle habits. Coconut oil and properly diluted apple cider vinegar, used regularly, can help ease discomfort over time through their anti-inflammatory and soothing properties.
A generally healthy lifestyle also matters: lower stress, regular exercise, and a nutrient-rich diet all support healthy blood flow to the scalp, which helps reduce inflammation and supports healthy hair growth.
Additional home strategies worth incorporating:
- Using a warm compress to ease tension and improve local blood flow
- Regular gentle scalp massage to support circulation and reduce tightness
- Choosing gentle, sulfate-free hair products suited to a sensitive scalp
Adding these consistently to your routine can genuinely help manage hair root sensitivity over the long term.
Conclusion: Taking Control of Your Scalp Health
Hair root pain — trichodynia — usually responds well to a combination of targeted home remedies, thoughtful lifestyle adjustments, and professional care when the situation calls for it. Scalp discomfort is a genuinely common experience, often connected to conditions like temporary hair shedding, psoriasis, seborrheic dermatitis, or simple product and styling irritation.
With the right approach — gentle scalp massage, correctly diluted essential oils, coconut oil, and attention to the underlying cause rather than just the symptom — most people find meaningful relief. And if home treatments aren’t working, or if the specific warning signs covered above apply to you, reaching out to a professional is always the right call.
Frequently Asked Questions
How do you get rid of hair root pain?
Gentle scalp massage, coconut oil, and properly diluted apple cider vinegar are commonly used starting points. Pairing these with gentle hair care habits and a scalp-supportive diet tends to produce better, more lasting results than any single remedy alone.
What can I put on my scalp to stop it from hurting?
Coconut oil and properly diluted apple cider vinegar (never undiluted) are commonly used to soothe scalp pain. Regular scalp massage and correctly diluted essential oils like tea tree or peppermint oil can add further relief.
Why does my hair hurt at the roots?
The clinical term is trichodynia, and it’s most strongly associated with telogen effluvium (temporary hair shedding), though scalp inflammation, tension from tight hairstyles, and conditions like psoriasis or seborrheic dermatitis can all contribute.
What can I use or do to soothe sore hair follicles?
Coconut oil, properly diluted apple cider vinegar, and gentle scalp massage are reasonable starting points. Addressing contributing lifestyle factors — chronic stress in particular — tends to support longer-term relief alongside these topical approaches.
How do you get rid of inflammation in your scalp?
Natural anti-inflammatory remedies like coconut oil and aloe vera can help with mild cases. For inflammation driven by an underlying condition like psoriasis or seborrheic dermatitis, a condition-specific treatment — often a medicated shampoo — tends to work better than general soothing remedies alone, so identifying the actual cause is worth the effort.
Scientific References
- Rebora A. Trichodynia: a review of the literature. Journal of the American Academy of Dermatology. Foundational trichodynia prevalence research referenced across subsequent reviews.
- Grimalt R, et al. The presence of trichodynia in patients with telogen effluvium and androgenetic alopecia. Dermatology (PubMed). https://pubmed.ncbi.nlm.nih.gov/12956679/
- Trichodynia: An Update on Definition, Etiopathogenesis, Diagnosis, and Treatment. Journal of Skin and Stem Cell. https://brieflands.com/journals/jssc/articles/122659
- Hoss D, Segal S. Scalp dysesthesia. Archives of Dermatology — foundational work on the substance P and nerve-sensitivity component of trichodynia, referenced via Donovan Hair Clinic clinical summary. https://donovanmedical.com/hair-blog/cte-7
- Cleveland Clinic. Giant Cell Arteritis (Temporal Arteritis): Signs & Treatment. https://my.clevelandclinic.org/health/diseases/temporal-arteritis-giant-cell-arteritis
- North American Neuro-Ophthalmology Society (NANOS). Giant Cell Arteritis. https://www.nanosweb.org/GiantCellArteritis/
- Bolt Pharmacy (clinical literature summary). Cider Vinegar for Hair Loss: Evidence, Risks, and Proven Treatments — summary of published case reports on topical ACV chemical burns. https://www.boltpharmacy.co.uk/guide/cider-vinegar-hair-loss
- National Psoriasis Foundation. Scalp Psoriasis. https://www.psoriasis.org/scalp-psoriasis/
- Mayo Clinic. Seborrheic dermatitis — Symptoms and causes. https://www.mayoclinic.org/diseases-conditions/seborrheic-dermatitis/symptoms-causes/syc-20352710
This article is for informational purposes only and is not a substitute for professional medical advice. Scalp pain occasionally signals something that needs prompt medical attention — see the red-flag section above before assuming a home remedy is the right first step.

Disclaimer: This article is for informational purposes only and is not a substitute for professional medical advice. A baby’s skin is more sensitive and permeable than adult skin — check with your pediatrician before trying any new remedy, especially essential oils, and seek care promptly if the rash is severe, spreading, or accompanied by fever.
Natural Diaper Rash Remedies for Babies at Home: Gentle Ways to Soothe and Heal
Quick answer: Coconut oil and pure aloe vera gel have the most supportive evidence among natural options, while pediatric guidelines still point to zinc oxide or petroleum jelly barrier creams as the most effective first-line treatment overall. A few popular “natural” additions — undiluted essential oils and olive oil applied directly to a baby’s skin — actually carry documented risks worth knowing about before you reach for them. The single most protective habit, regardless of which remedy you choose, is frequent diaper changes paired with a thick barrier layer at every change.
That’s the short version. Below is the complete guide — what genuinely helps, what to use with caution, a homemade cream recipe with a safer essential oil swap, and exactly when a rash needs a pediatrician rather than more home care.
Key Takeaways
- Diaper rash is often caused by prolonged exposure to moisture, irritants, or friction, and can be identified by redness and discomfort in the diaper area
- Coconut oil and pure aloe vera gel have the better safety and evidence profile among natural ingredients
- Zinc oxide and petroleum jelly remain the pediatrician-recommended first-line treatment, natural or not
- Regular diaper changes, breathable diapers, and air time for baby’s skin help prevent diaper rash before it starts
- Consulting a pediatrician is necessary if the rash is severe, persistent, spreading, or accompanied by fever
Understanding Diaper Rash and Its Causes
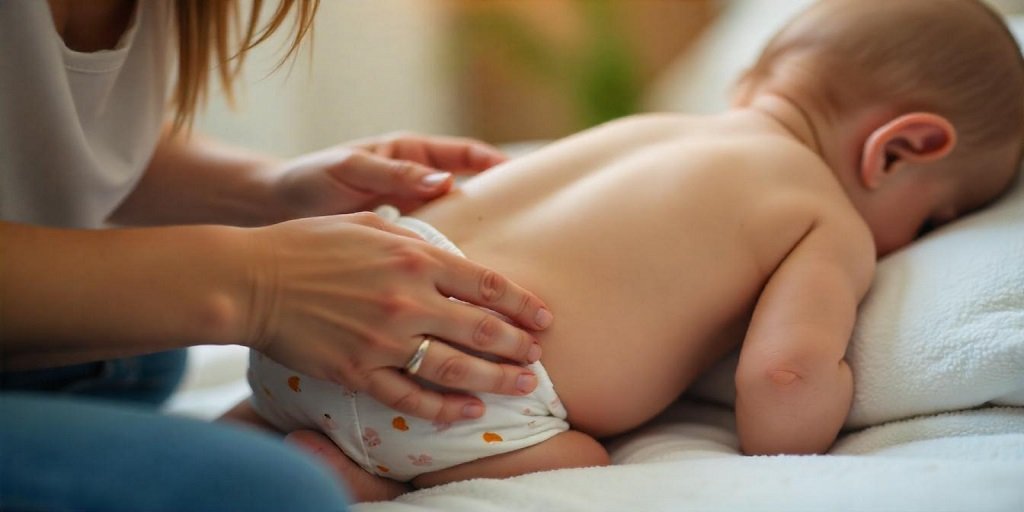
Common Causes of Diaper Rash
Diaper rash is something most parents deal with at some point. It’s mainly caused by irritation from urine and stool sitting on a baby’s skin for too long, since prolonged moisture breaks down the skin’s protective outer layer and lets irritants penetrate more easily. Friction from the diaper rubbing against the skin adds to this, and introducing new foods can change a baby’s bowel movements in ways that irritate the skin further. Other common causes include:
- Tight diapers or clothing that chafe the skin
- Reactions to new products, like wipes or laundry detergents
- Underlying sensitive skin conditions like eczema
- A yeast (candida) overgrowth, particularly with rashes that persist despite typical care
Identifying Symptoms of Diaper Rash
Spotting diaper rash isn’t usually difficult. You’ll typically see red, inflamed skin around the diaper area, sometimes looking scaly or even blistered. If your baby seems uncomfortable or fussier than usual during diaper changes, that discomfort is often a sign. Watch for:
- Redness and warmth around the diaper area
- Small bumps or blisters
- Peeling or scaly skin
Irritant Rash vs. Yeast Rash: A Distinction Worth Knowing
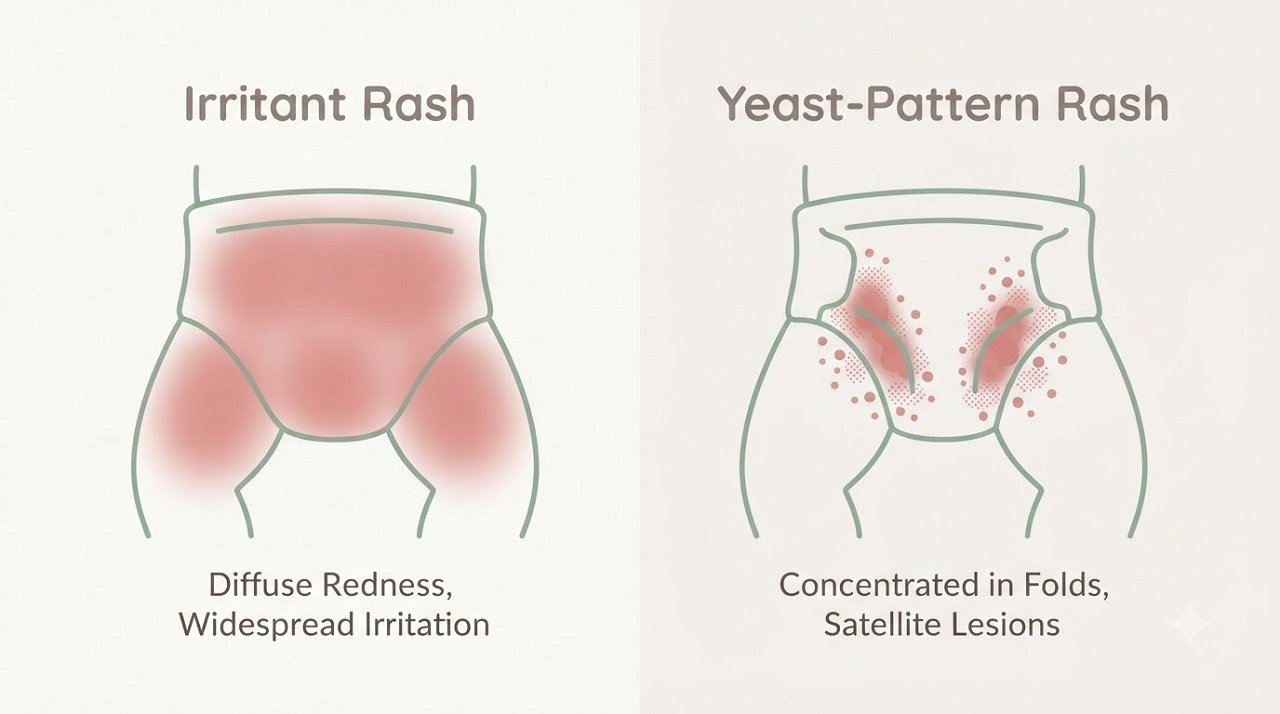
Not every diaper rash is the same underlying problem, and telling the two most common types apart genuinely changes which remedy makes sense. Irritant diaper dermatitis — the most common type — tends to affect the raised, convex surfaces that touch the diaper most directly (the buttocks, thighs, and lower belly), while typically sparing the deep skin folds.
Yeast-related diaper rash looks different: it often appears as intensely red skin concentrated in the skin folds, with small red “satellite” spots scattered just outside the main rash area — a pattern that’s a fairly reliable clue it’s yeast rather than plain irritation. This distinction matters because cornstarch and zinc oxide alone don’t treat a true yeast overgrowth, and coconut oil’s antifungal properties (covered below) make it a more logical choice specifically for a rash that looks yeast-related.
When to Seek Medical Advice
Most diaper rashes clear up with a few days of at-home care, but sometimes a visit to the pediatrician is the right call. Reach out if:
- The rash is severe or has open sores
- Your baby has a fever
- The rash spreads beyond the diaper area
- The rash doesn’t improve after three to four days of consistent treatment, or gets worse
Diaper rashes are common, but they can occasionally signal an infection or an allergic reaction. Trust your instincts as a parent, and don’t hesitate to seek help if you’re concerned.
Best Remedies for Baby Rash at Home: Natural Ingredients That Help

When it comes to soothing your baby’s sensitive skin, a handful of natural ingredients have a genuinely reasonable case behind them as home treatments for baby diaper rash.
Benefits of Coconut Oil
Coconut oil is a longtime favorite among parents, and it has real biological grounding: it contains lauric acid, a medium-chain fatty acid documented to have antimicrobial and antifungal activity, which is particularly relevant for rashes that look yeast-related based on the pattern described above. It also forms a protective, moisturizing barrier over the skin. Choose virgin, unrefined coconut oil, and apply a thin layer to clean, dry skin at each diaper change.
Using Aloe Vera Gel
Pure aloe vera gel is well known for soothing irritated skin and supporting the skin’s own repair process. The key word is pure — look for a product that’s as close to 100% aloe as possible, free of added alcohol or fragrance, both of which can sting or irritate skin that’s already compromised. Apply a thin layer to the affected area after cleaning.
A Word on Olive Oil
Olive oil is a common kitchen-cabinet suggestion for diaper rash, generally framed around its anti-inflammatory reputation. It’s worth knowing that the research on olive oil specifically doesn’t support this use on infant skin.
A controlled study published in Pediatric Dermatology found that topical olive oil actually damaged skin barrier integrity and caused mild redness after just four weeks of twice-daily use, in contrast to sunflower seed oil, which preserved the skin barrier and improved hydration in the same study.
This comes down to olive oil’s high oleic acid content, which disrupts the skin’s structural lipids in a way linoleic-acid-rich oils don’t. Given diaper rash already involves a compromised skin barrier, olive oil isn’t the ingredient this particular use case calls for — coconut oil or pure aloe vera gel are better-supported choices for this purpose.
Always patch-test any new ingredient on a small area of your baby’s skin first, and give it a day or two before assuming it’s not causing a reaction, since irritation can sometimes take a little time to show up.
DIY Diaper Rash Creams and Solutions
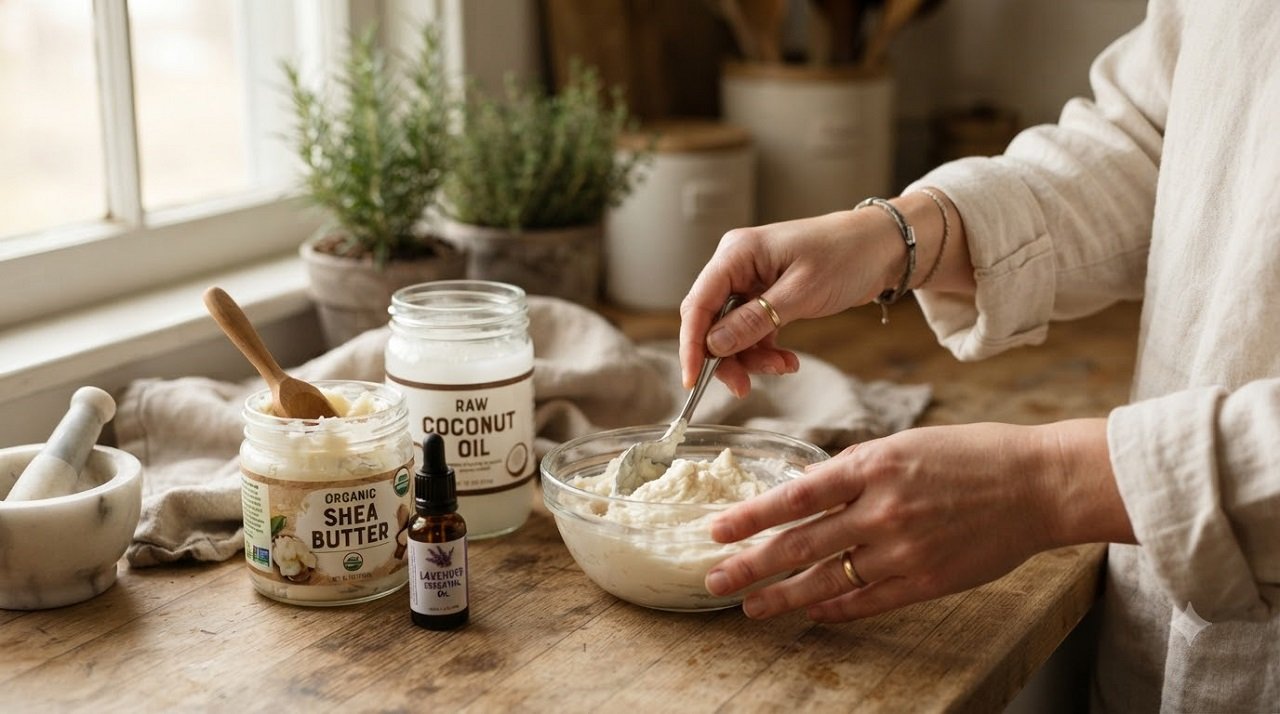
Homemade Diaper Rash Cream Recipe
Making your own diaper rash cream lets you know exactly what’s in it and tailor it to your baby’s skin. Here’s a simple recipe, with one ingredient adjustment worth explaining below:
Ingredients:
- 1/4 cup coconut oil
- 1/4 cup shea butter
- 1/4 cup beeswax
- Optional: 1 tablespoon zinc oxide powder, stirred in at the end, for extra barrier protection
Instructions:
- In a double boiler, melt the coconut oil, shea butter, and beeswax together until fully combined
- Remove from heat and, if using, stir in the zinc oxide powder until evenly distributed
- Pour the mixture into a clean container and let it cool completely before use
This cream acts as a protective barrier and soothes irritated skin. As always, test a small amount on your baby’s skin first to check for any reaction.
A note on the original lavender essential oil version of this recipe: the original version of this recipe called for lavender essential oil. It’s worth knowing why that’s been left out here. A small number of case reports, starting with a 2007 study in the New England Journal of Medicine, have described prepubertal gynecomastia (breast tissue development in young boys) linked to repeated topical use of lavender and tea tree oil-containing products, with laboratory research suggesting both oils have mild estrogenic and anti-androgenic activity.
This research isn’t fully settled — later case reviews have disputed some of the specific cases and questioned the causal link — but given that a diaper cream is applied repeatedly, directly to a young child’s skin, over an extended period, it’s a reasonable situation to apply extra caution to.
If you’d like a scent, a single drop of chamomile, which doesn’t carry this same research flag, is a gentler substitute — though the cream works perfectly well, and arguably more predictably, with no added fragrance at all.
How to Store and Apply DIY Creams
Store your homemade cream in a cool, dry place — the refrigerator works well, especially in warmer climates. Before applying, warm a small amount between your hands to make it easier to spread and more comfortable against your baby’s skin. Apply gently, ensuring full coverage over the affected area.
Home Remedies for Preventing and Soothing Diaper Rash
Using Breast Milk for Diaper Rash
Breast milk has a long history of use for minor skin irritation, including diaper rash, based on its natural antibody content. A Mayo Clinic-referenced comparison found breast milk performed about as well as a mild 1% hydrocortisone ointment in one study — a genuinely encouraging result — though a separate study found a barrier cream containing zinc oxide and cod liver oil outperformed breast milk alone. Applying a few drops to clean, dry skin is a low-risk option worth having in your toolkit, though it shouldn’t be assumed to outperform a dedicated barrier cream for more established rashes.
Apple Cider Vinegar Baths: A Word of Caution
Diluted apple cider vinegar baths are sometimes suggested for yeast-related diaper rash, based on the idea that the acidity discourages fungal growth. This isn’t well supported by controlled research specific to infant diaper rash, and there’s a genuine practical downside worth flagging: diaper rash frequently involves skin that’s already broken or extremely sensitive, and an acidic solution — even diluted — applied to compromised skin can cause real stinging and further irritation rather than relief. If a yeast-pattern rash (the skin-fold and satellite-spot presentation described above) isn’t responding to coconut oil and basic care, an antifungal cream from your pediatrician is a more direct and better-evidenced next step than an ACV bath.
Cornstarch as a Natural Powder
Cornstarch is a reasonable alternative to talc-based powders for keeping skin dry between changes, since it absorbs moisture without the inhalation and contamination concerns historically associated with talc products. Sprinkle a small amount during diaper changes, taking care to apply it away from your baby’s face to avoid creating an inhalable cloud of fine powder. One caveat worth knowing: if the rash is yeast-related, cornstarch’s moisture-trapping starch content can potentially feed fungal growth in the skin folds rather than help, so it’s better suited to plain irritant rash than to a rash with the yeast pattern described earlier.
What Pediatricians Actually Recommend First
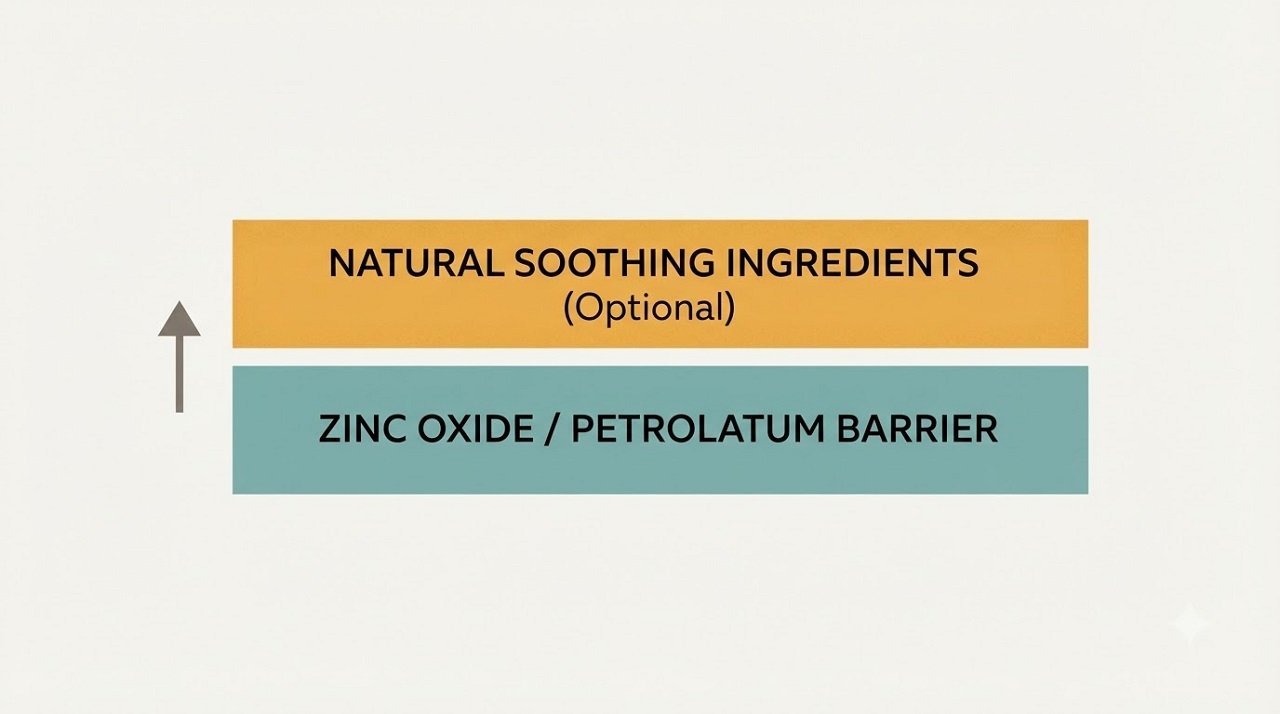
It’s worth knowing where natural remedies fit relative to what pediatric guidelines actually prioritize, since this context doesn’t usually make it into home-remedy articles.
The American Academy of Pediatrics and American Academy of Dermatology point to zinc oxide and petrolatum (petroleum jelly) as the best-evidenced active ingredients for treating an active diaper rash — a 2019 systematic review of 12 randomized controlled trials found zinc oxide creams meaningfully outperformed plain petrolatum for treating active rash, while both worked comparably well as preventive barriers.
A thick layer applied at every diaper change is the core recommendation, and it’s often paired with the natural ingredients above rather than used instead of them — for example, applying aloe vera gel first, then a zinc oxide barrier cream over it, combines soothing relief with the strongest evidence-backed protection.
“The key to treating diaper rash quickly is to have a strong barrier that will prevent liquid — urine and stool — from coming into contact with irritated skin, giving the skin time to heal.” — Reflecting guidance from the American Academy of Pediatrics on diaper rash barrier treatment
If a rash looks yeast-related (the skin-fold, satellite-spot pattern) and isn’t responding to barrier care, a pediatrician can prescribe an antifungal cream, which treats the actual cause rather than just protecting the skin while it persists.
Daily Practices to Prevent Diaper Rash
The Importance of Frequent Diaper Changes
Changing diapers regularly is one of the single most effective things you can do to prevent rash in the first place, since it stops moisture from building up and breaking down the skin barrier. Aim to change diapers every two to three hours, and promptly after a bowel movement, even if that means a night-time check. It’s a bit of a hassle, but it’s genuinely one of the highest-impact habits for keeping a baby’s skin healthy.
Choosing the Right Diapers and Wipes
Choose diapers that are genuinely absorbent and wick moisture away from the skin quickly, and make sure they fit snugly without leaving marks or feeling tight. For wipes, unscented and alcohol-free options are gentler on sensitive skin — some parents find plain warm water and a soft cloth works just as well, particularly during an active rash.
Air Time for Baby’s Skin

Letting your baby go diaper-free for a short stretch each day allows the skin to breathe and dry naturally, which meaningfully reduces rash risk. After a bath or during tummy time both work well for this — just keep a towel handy for the occasional accident.
“A little fresh air can work wonders for your baby’s skin. Letting them be diaper-free for a short time each day helps keep diaper rash at bay.” — Common pediatric guidance on diaper-free air time for infant skin health
The Role of Diet in Diaper Rash Prevention
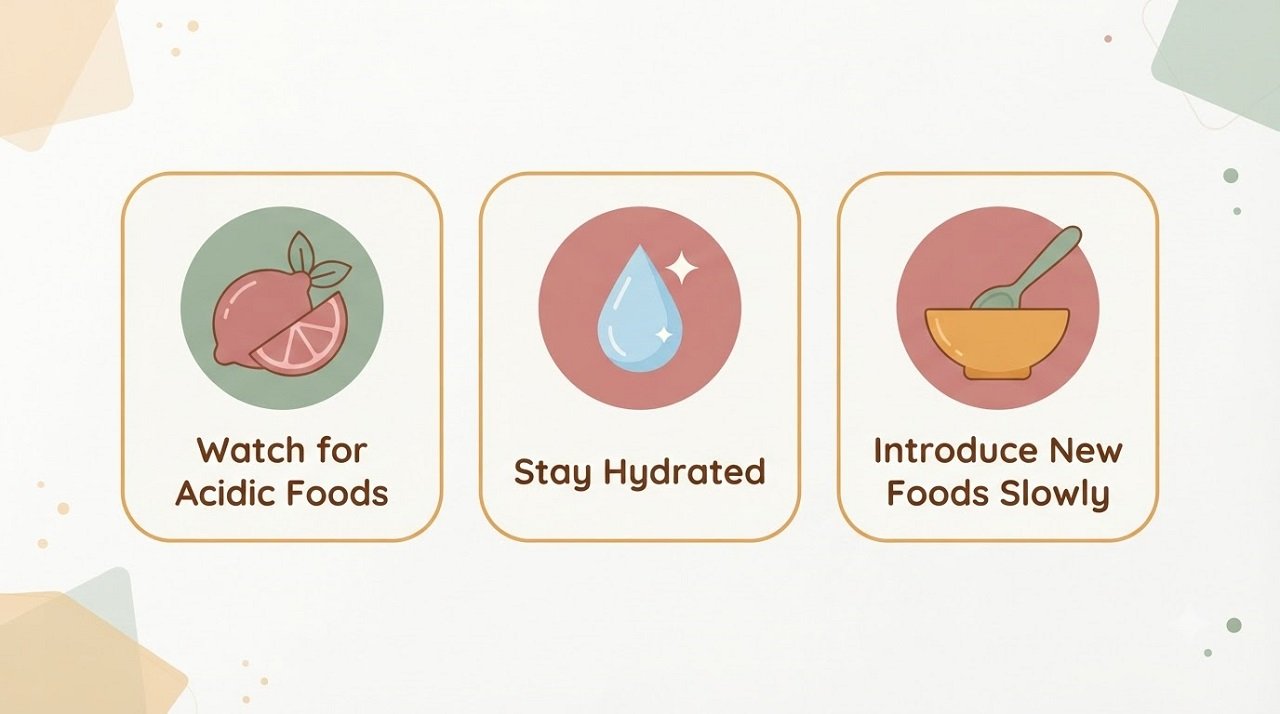
Foods That May Worsen Diaper Rash
Diet doesn’t directly cause diaper rash the way prolonged moisture or friction does, but it can make an existing rash worse indirectly — certain foods change stool acidity and frequency, and more acidic or more frequent stools sitting against the skin can aggravate irritation. Citrus fruits, tomatoes, and strawberries are commonly reported culprits for this reason, and introducing new solid foods can temporarily increase how often a baby has a bowel movement. Keeping a simple food diary alongside any skin changes can help you spot a pattern specific to your baby.
Hydration and Skin Health
Adequate hydration supports healthy, resilient skin generally. For breastfeeding babies, this means nursing on a normal, responsive schedule; for formula-fed babies, following the recommended feeding amounts for their age.
Introducing New Foods Safely
When starting solids, introduce one new food at a time and wait a few days before adding another — this makes it much easier to identify whether a specific food is contributing to skin changes, rather than guessing after several new foods have been introduced at once.
When to Consult a Pediatrician
Signs of Severe Diaper Rash
If a rash isn’t improving after three to four days of consistent home treatment, it’s time to check in with your pediatrician. Bright red or oozing skin, open sores, or a rash accompanied by fever are all clear signals to seek care rather than continue home treatment alone. If your baby seems especially uncomfortable during diaper changes — more than typical mild fussiness — that’s worth mentioning to your doctor too.
Understanding Allergic Reactions and Yeast Infections
A rash spreading beyond the diaper area, or appearing alongside other symptoms like a runny nose or watery eyes, can point toward an allergic reaction to a new product — a diaper brand, wipes, or laundry detergent are worth reviewing if this pattern shows up. Separately, some babies develop a genuine yeast infection in the diaper area, sometimes alongside oral thrush (white patches inside the mouth) — a connection worth mentioning to your pediatrician if you notice both together.
Persistent Rashes and Infections
Most diaper rashes resolve with home care, but a rash that persists despite consistent treatment may point to a more significant infection or underlying skin condition that benefits from a pediatrician’s evaluation and, if needed, a prescription treatment.
Conclusion
Dealing with diaper rash is part of the parenting journey, and it usually responds well to a combination of patience and genuinely well-suited remedies. Coconut oil, pure aloe vera, and a thick barrier cream (natural or zinc-oxide-based) cover most of what a typical irritant rash needs, while a rash with the yeast-pattern satellite spots described above may need an antifungal approach your pediatrician can prescribe.
Every baby’s skin responds a little differently, so it’s worth watching closely and adjusting rather than assuming one remedy will work identically for every baby. And if a rash doesn’t clear up or seems to be getting worse, reaching out to your pediatrician is always the right call — that’s exactly what they’re there for.
Frequently Asked Questions
What exactly is diaper rash?
Diaper rash is a common skin irritation in babies, most often caused by prolonged contact with wet or soiled diapers, skin sensitivity, or friction against the diaper.
How can I tell if my baby has diaper rash?
Look for red, inflamed skin in the diaper area, sometimes with small bumps or a scaly texture. Your baby might also seem fussier than usual, particularly during diaper changes.
Can I use coconut oil to treat diaper rash?
Yes — coconut oil has genuine antifungal and moisturizing properties from its lauric acid content, making it a reasonable choice, particularly for rashes with a yeast-related pattern.
When should I call a doctor about diaper rash?
Call your pediatrician if the rash doesn’t improve after three to four days of home treatment, if it worsens, spreads beyond the diaper area, or is accompanied by fever or open sores.
Is it safe to use cornstarch for diaper rash?
Cornstarch works well for keeping skin dry during a typical irritant rash, but it’s best avoided if you suspect a yeast infection, since its starch content can potentially support fungal growth in the skin folds rather than help.
How often should I change my baby’s diaper to prevent diaper rash?
Change your baby’s diaper as soon as it’s wet or soiled, aiming for roughly every two to three hours. Frequent changes are one of the single most effective ways to prevent rash from developing in the first place.
Is olive oil safe to use for diaper rash?
It’s popularly suggested, but a controlled study found olive oil actually weakened skin barrier function and caused mild redness with regular use, in contrast to sunflower oil, which preserved the barrier. Coconut oil or pure aloe vera gel are better-supported natural choices for diaper rash specifically.
How do I know if my baby’s diaper rash is caused by yeast?
A yeast-related rash typically shows up as intensely red skin concentrated in the skin folds, with small red “satellite” spots just outside the main rash area — a different pattern than the more evenly spread redness of typical irritant diaper rash on the flatter, more exposed skin surfaces.
Scientific References
- Danby SG, AlEnezi T, Sultan A, et al. Effect of olive and sunflower seed oil on the adult skin barrier: implications for neonatal skin care. Pediatric Dermatology. 2013. https://pubmed.ncbi.nlm.nih.gov/22995032/
- Henley DV, Lipson N, Korach KS, Bloch CA. Prepubertal gynecomastia linked to lavender and tea tree oils. New England Journal of Medicine. 2007. https://www.nejm.org/doi/full/10.1056/NEJMoa064725
- Ramsey JT, Li Y, Arao Y, et al. Lavender Products Associated With Premature Thelarche and Prepubertal Gynecomastia: Case Reports and Endocrine-Disrupting Chemical Activities. Journal of Clinical Endocrinology & Metabolism. 2019. https://pmc.ncbi.nlm.nih.gov/articles/PMC7263747/
- Bonifazi E, et al. Pediatricians’ Knowledge, Attitudes, and Therapeutic Approaches Regarding Diaper Dermatitis. Clinical, Cosmetic and Investigational Dermatology. 2023. https://pmc.ncbi.nlm.nih.gov/articles/PMC10083022/
- Mayo Clinic. Diaper rash — Diagnosis and treatment. https://www.mayoclinic.org/diseases-conditions/diaper-rash/diagnosis-treatment/drc-20371641
- HealthyChildren.org (American Academy of Pediatrics). Why is my baby always getting diaper rashes? https://www.healthychildren.org/English/tips-tools/ask-the-pediatrician/Pages/Why-is-my-baby-always-getting-diaper-rashes.aspx
- Blume-Peytavi U, et al. Systematic review of diaper rash treatments comparing zinc oxide and petrolatum efficacy. Pediatric Dermatology. 2019 (referenced systematic review of 12 RCTs).
- Cleveland Clinic. Diaper Rash: Causes, Symptoms & Treatment. https://my.clevelandclinic.org/health/diseases/15328-diaper-rash
This article is for informational purposes only and is not a substitute for professional medical advice. A baby’s skin is more sensitive and permeable than adult skin — check with your pediatrician before trying any new remedy, especially essential oils, and seek care promptly if the rash is severe, spreading, or accompanied by fever.
Disclaimer: This article is for informational purposes only and is not a substitute for professional medical advice. Herbal remedies and essential oils can interact with medications or carry risks for certain people — check with a healthcare provider before starting any new remedy, particularly if pregnant, breastfeeding, or treating a child.
Natural Remedies for Allergies and Sinus Congestion: What Actually Helps
Quick answer: Nasal saline irrigation, a HEPA air purifier, and herbal options like butterbur (PA-free only) and quercetin have the strongest evidence behind them for allergy and sinus congestion relief, while local honey and essential oils are more popular than proven — the research on both is genuinely mixed. Before trying any remedy, it helps to know which condition you’re actually dealing with: allergic rhinitis (triggered by pollen, dust, or pet dander) and sinus congestion from a cold or sinus infection respond somewhat differently, and knowing which one you have shapes which remedies are worth trying first.
That’s the short version. Below is the full breakdown — what’s genuinely backed by research, what to watch out for with specific herbs and oils, and when symptoms mean it’s time to see a doctor rather than keep experimenting at home.
Key Takeaways
- Allergic rhinitis and sinus congestion from a cold or infection are related but distinct — telling them apart helps you choose the right remedy
- Butterbur and quercetin have the most research support among herbal options, though butterbur carries specific safety caveats worth knowing
- The local honey theory is popular but not well supported by controlled trials
- Peppermint and eucalyptus essential oils are not recommended for infants and young children
- Nasal irrigation, HEPA filtration, and allergen-reduction habits at home are consistently useful across almost every cause of congestion
Allergic Rhinitis vs. Sinus Congestion: Why the Distinction Matters
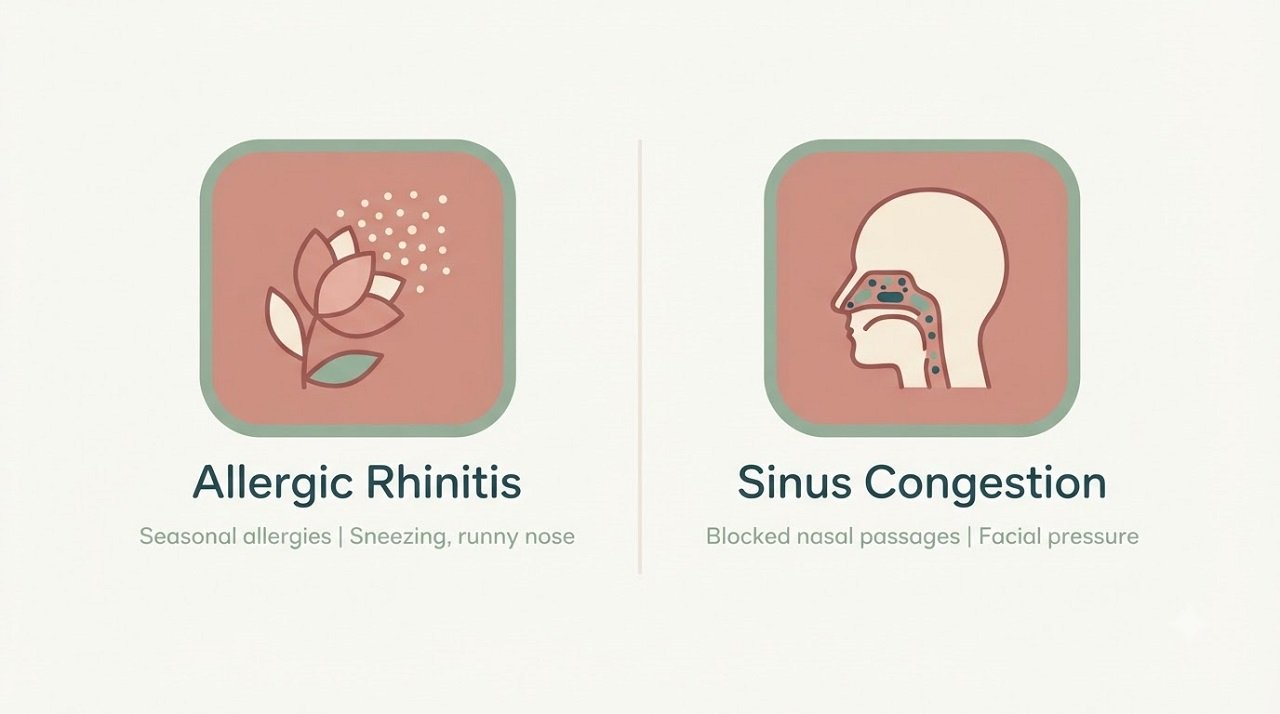
Before reaching for a remedy, it’s worth pinning down what’s actually causing your symptoms, since “allergies” and “sinus congestion” get used almost interchangeably but aren’t quite the same thing.
Allergic rhinitis happens when your immune system overreacts to something harmless — pollen, dust mites, pet dander, or mold — releasing histamine and triggering sneezing, itchy or watery eyes, a runny or blocked nose, and often a scratchy throat. It tends to follow a pattern: seasonal (tied to specific pollen periods) or perennial (year-round, often from indoor allergens like dust or pet dander).
Sinus congestion, on the other hand, is usually a symptom of the sinuses themselves becoming inflamed or infected — most often from a viral cold, but sometimes from a bacterial sinus infection (sinusitis). It typically comes with facial pressure or pain, thicker nasal discharge, and sometimes a mild fever, features that plain allergic rhinitis usually doesn’t produce.
The overlap is real — allergies can trigger sinus inflammation, and a cold’s congestion can look a lot like allergy symptoms in the moment — which is exactly why this distinction gets blurred so often. But it matters practically: antihistamine-focused remedies like butterbur and quercetin target the allergic pathway specifically, while saline irrigation and steam work well for both. If your congestion is thick, colored, or accompanied by facial pain and fever, that leans toward infection rather than allergy, and the herbal antihistamine options covered below aren’t going to be the right tool for that.
Herbal Treatments for Sinus Issues: What the Research Actually Shows
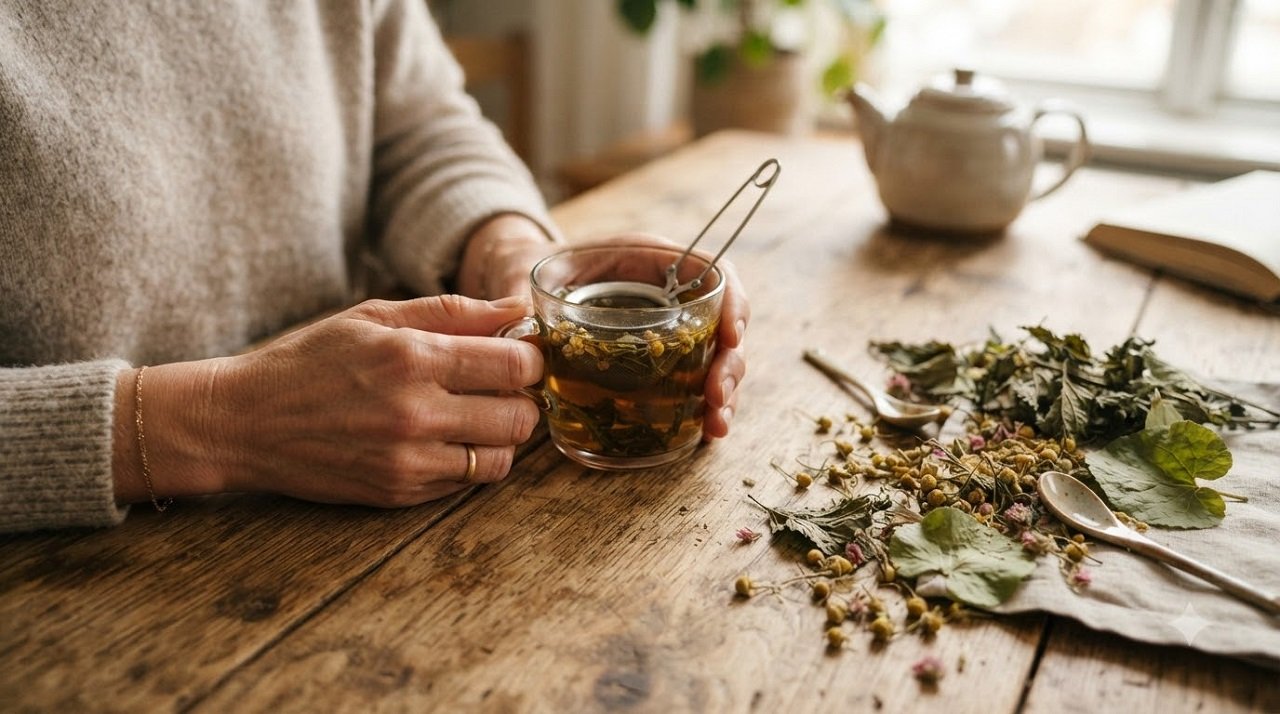
Butterbur: Genuine Evidence, but Real Caveats Worth Knowing
Butterbur has some of the better research support among herbal allergy remedies. According to the National Center for Complementary and Integrative Health (NCCIH), a systematic review of six randomized controlled trials found butterbur performed better than placebo, and comparably to non-sedating antihistamines, for intermittent allergic rhinitis. A separate randomized trial found it worked similarly to cetirizine (a common antihistamine) with less associated drowsiness.
That said, there are safety details worth taking seriously rather than treating as fine print. Raw butterbur contains pyrrolizidine alkaloids (PAs), compounds linked to liver damage, so only products explicitly labeled “PA-free” should ever be considered — and even then, NCCIH notes that rare liver injury has still been reported with PA-free products, which is why occasional liver function monitoring is sometimes recommended for longer-term use. Butterbur belongs to the same plant family as ragweed, chrysanthemums, marigolds, and daisies (Asteraceae), so anyone with a ragweed allergy specifically can have a cross-reaction to butterbur — a detail that matters given it’s being suggested as an allergy remedy in the first place. It’s also not recommended during pregnancy or breastfeeding, and isn’t advised for anyone with liver disease.
Quercetin: A Reasonable, Lower-Risk Option
Quercetin is a natural flavonoid found in apples, onions, and berries, and works through a different mechanism than butterbur — it helps stabilize mast cells, the immune cells responsible for releasing histamine during an allergic reaction, which may reduce the intensity of the allergic response before it fully develops. It generally carries a milder safety profile than butterbur, without the same liver or cross-reactivity concerns, though — as with any supplement — it’s still worth checking with a healthcare provider before starting it regularly, particularly if you’re on other medications.
Stinging Nettle: Traditional Use, Thinner Evidence
Stinging nettle has a long history of traditional use for respiratory and allergy symptoms, taken as a tea or in capsule form. The clinical evidence behind it is considerably thinner than for butterbur or quercetin — it’s a reasonable, low-risk option to try, but it shouldn’t be expected to perform as reliably as the better-studied options above.
Always check with a healthcare provider before starting any herbal remedy, particularly if you’re pregnant, breastfeeding, managing a chronic condition, or taking other medications, since herb-drug interactions are a genuine possibility even with “natural” remedies.
Always consult with a healthcare provider before starting any herbal remedies to ensure they’re safe for your individual needs.
Essential Oils for Congestion Relief — and Who Should Avoid Them

Peppermint and eucalyptus oils are among the most commonly reached-for essential oils for congestion relief, and there’s a real mechanism behind why they feel effective: peppermint’s menthol content stimulates cold receptors in the nose, creating a cooling sensation that can make breathing feel easier even without physically clearing congestion, while eucalyptus’s active compound, 1,8-cineole, has documented expectorant properties that support natural mucus clearance.
A safety point that matters for any household with young children: these same oils are specifically flagged as unsafe for infants and toddlers. Poison control resources note that peppermint’s high menthol content and eucalyptus’s cineole content can trigger reflex laryngospasm — a sudden closing of the airway — in infants and very young children, and general guidance is to avoid diffusing or applying either oil near the face of children under about 6 years old. If you have young kids at home, this is worth factoring in before using either oil in a shared space, not just when applying directly to a child.
For adults, both oils are broadly considered safe when used appropriately:
- Add a few drops to a bowl of hot water and inhale the steam (keep eyes closed and maintain a safe distance to avoid irritation)
- Use a diffuser to disperse the aroma through a room
- Always dilute with a carrier oil such as coconut or almond oil before any skin application — never apply undiluted essential oil directly to skin
- Avoid contact with eyes and mucous membranes
- Patch-test a new oil on a small area of skin before broader use
- If pregnant, breastfeeding, or managing a medical condition, check with a healthcare provider first
A few drops of the right essential oil can make a world of difference during allergy season. Whether you choose to inhale, diffuse, or apply them topically, these natural remedies can provide much-needed relief from stubborn symptoms.
Natural Antihistamines for Seasonal Allergies: Separating What’s Proven From What’s Popular\

Local Honey: A Popular Theory With Weaker Evidence Than It’s Given Credit For
The idea behind local honey is intuitive — consume small amounts of local pollen, and your body gradually builds tolerance to it. It’s a genuinely appealing theory, but it runs into a practical problem: most seasonal allergies are triggered by lightweight, wind-pollinated plants like grasses, trees, and ragweed, while honeybees primarily collect pollen from bright, flowering plants that rely on insects for pollination rather than wind. That mismatch means the specific pollen causing your symptoms often isn’t the pollen ending up in local honey in any meaningful concentration.
The clinical research reflects this uncertainty. A well-known double-blind study from the University of Connecticut compared local raw honey, commercial pasteurized honey, and a honey-flavored placebo syrup, and found no statistically significant difference in allergy symptom relief between the three groups. Some smaller trials point the other way — a 2011 pilot study of birch pollen-specific honey found modestly better symptom control compared to conventional allergy medication — but NCCIH describes the overall evidence for honey and seasonal allergies as preliminary and not convincing at this stage.
“There is no convincing scientific evidence that honey relieves seasonal allergies.” — National Center for Complementary and Integrative Health (NCCIH), National Institutes of Health
None of this means honey is unsafe to try — it carries minimal risk for most adults and is a pleasant addition to tea or toast regardless. It just means it shouldn’t be relied on as a primary allergy strategy, and the “local” and “raw” framing in particular doesn’t have strong evidence backing its specific claims. One firm exception: honey should never be given to a baby under 12 months old, due to a genuine risk of infant botulism.
Vitamin C: A Modest, Overstated Claim
Vitamin C is sometimes described as a natural antihistamine, based on laboratory research suggesting it can influence histamine metabolism at a cellular level. In practice, the evidence that typical dietary or supplemental vitamin C intake produces a meaningful, noticeable reduction in real-world allergy symptoms is considerably weaker and more mixed than the “natural antihistamine” framing suggests. Eating vitamin C-rich foods like citrus, berries, and bell peppers is a reasonable, generally healthy habit on its own merits — just not one to count on as a primary allergy treatment.
Nasal Saline Irrigation: The Best-Supported Remedy on This List
If one home remedy deserves genuine confidence, it’s saline nasal irrigation. Using a neti pot or a saline rinse kit with sterile, distilled, or previously boiled and cooled water flushes mucus, allergens, and irritants directly out of the nasal passages — addressing the problem mechanically rather than relying on any single active ingredient. It works for allergic and infection-related congestion alike, has a strong safety record when done correctly, and is inexpensive and easy to repeat as often as needed.
Simple Lifestyle Changes That Reduce Allergen Exposure
Reducing how many allergens you’re exposed to in the first place is one of the most consistently effective things you can do, regardless of which specific remedy you pair it with.
Keeping your home allergen-reduced:
- Vacuum carpets and rugs weekly using a vacuum with a HEPA filter
- Wash bedding in hot water weekly to reduce dust mites
- Keep windows closed on high-pollen days, relying on air conditioning instead
- Wipe down frequently overlooked surfaces — ceiling fans, blinds, baseboards — where dust and allergens accumulate
Using air purifiers effectively:
- Choose a purifier with a genuine HEPA filter, which is specifically designed to trap pollen, mold spores, and pet dander
- Place it in the room where you spend the most time, such as the bedroom
- Replace filters on the manufacturer’s recommended schedule — an overdue filter loses much of its effectiveness
- Consider a dehumidifier in damp areas of the home to reduce mold growth, which is itself a common allergen
Effective At-Home Techniques for Sinus Congestion
Steam inhalation loosens mucus and helps open nasal passages quickly — a hot shower with the door closed is often the simplest way to do this, and adding a few drops of eucalyptus or peppermint oil to a bowl of hot water (for adults) can enhance the effect.
Acupressure offers a tool-free option some people find helpful for sinus drainage: gentle pressure on the bridge of the nose, the point between the eyebrows, and the sides of the nostrils, held for a minute or two, may ease that heavy, congested feeling for some people, though this is based more on traditional practice than controlled research specific to acupressure.
Staying hydrated helps keep mucus thin enough to drain naturally rather than thickening and worsening congestion — water is the simplest option, but warm herbal teas offer the added benefit of steam when sipped.
Feeling congested doesn’t mean you’re out of options. These at-home remedies are simple, effective, and free of side effects, making them a great first step toward relief.
Acupuncture for Allergies: What the Evidence Actually Shows
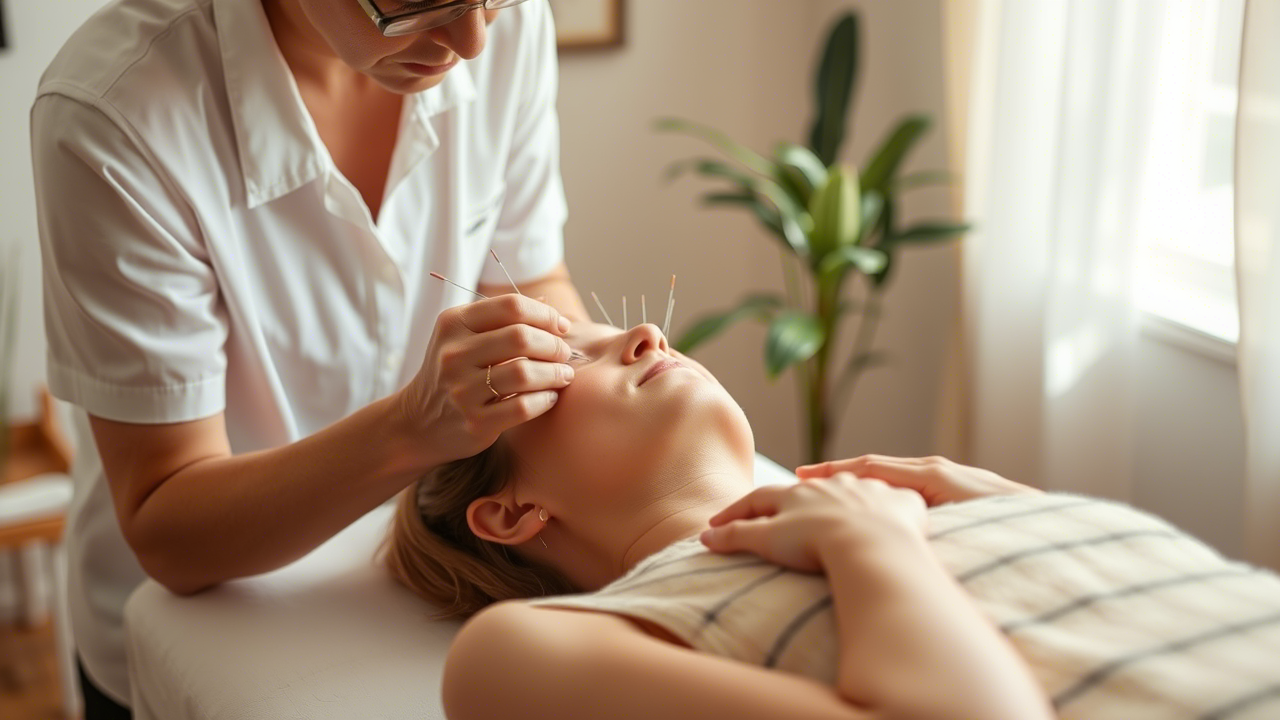
Acupuncture is sometimes suggested for allergic rhinitis specifically, and unlike several remedies on this list, it has a reasonably substantial body of research behind it. A 2022 systematic review and meta-analysis published in the European Journal of Medical Research, pooling 30 randomized controlled trials with 4,413 participants, found acupuncture improved nasal symptom scores and allergy-related quality of life compared to no intervention. American clinical practice guidelines on allergic rhinitis have listed acupuncture as an optional adjunct therapy since 2015.
It’s worth being precise about what this evidence does and doesn’t establish: most of the strongest comparisons are against no treatment or added onto standard therapy, evidence quality across the pooled trials is generally rated as low to moderate, and it isn’t positioned as a replacement for standard allergy management so much as a reasonable complementary option for people who want to try it, ideally administered by a licensed acupuncture practitioner.
If you’re curious about how acupuncture might help you, consider consulting an expert. Acupuncture professionals can tailor treatments to your specific allergy concerns, offering a natural and non-invasive approach to relief.
Probiotics and Immune-Supporting Habits
Probiotics — found in yogurt, kefir, and fermented foods like sauerkraut, or taken as a supplement — support a balanced gut microbiome, which plays a genuine role in overall immune regulation. Research into probiotics specifically for allergy symptom reduction is ongoing and shows some promise, though it’s a supportive habit rather than a primary treatment.
Daily habits worth maintaining during allergy season include staying well-hydrated (which also helps keep nasal passages moist), prioritizing 7–8 hours of quality sleep, since sleep deprivation measurably affects immune function, and eating a nutrient-rich diet with a good mix of fruits, vegetables, and whole foods.
Foods that can worsen congestion for some people include dairy, which some individuals find thickens mucus, alcohol — particularly beer and wine, which contain histamines and sulfites that can worsen symptoms in sensitive individuals — and heavily processed foods high in preservatives, which may contribute to a general inflammatory load.
When to See a Doctor
Most allergy and sinus congestion symptoms respond well to a combination of the remedies above alongside basic allergen avoidance. But certain signs suggest it’s time for a medical evaluation rather than continued home management.
See a doctor if symptoms persist beyond 10 days without improvement, if you develop a fever, facial pain, or thick yellow-green discharge (suggesting a possible bacterial sinus infection rather than plain allergies), if over-the-counter and natural remedies aren’t providing meaningful relief, or if allergy symptoms are significantly affecting your sleep, work, or quality of life on an ongoing basis — in which case an allergist can help identify your specific triggers and discuss additional treatment options, including prescription antihistamines or allergen immunotherapy.
Seek prompt medical care if you experience difficulty breathing, swelling of the face or throat, or symptoms that seem to be rapidly worsening, since these can indicate a more serious reaction requiring immediate attention.
Frequently Asked Questions
What are some natural remedies for sinus congestion?
Steam inhalation, nasal saline irrigation with sterile or distilled water, and essential oils like eucalyptus or peppermint (for adults) are among the most commonly used natural approaches for clearing nasal passages and easing congestion.
How does local honey help with allergies?
The theory is that consuming small amounts of local pollen in honey helps build tolerance over time. In practice, controlled research — including a well-known University of Connecticut trial — hasn’t found honey to outperform a placebo for allergy symptom relief, and most seasonal allergens come from wind-pollinated plants that rarely end up in honey in meaningful amounts.
What are the best herbal remedies for allergies?
Butterbur (PA-free only) and quercetin have the strongest research support among herbal options. Stinging nettle is a traditional option with thinner clinical evidence. Always check with a healthcare provider before starting any herbal remedy, particularly given butterbur’s specific safety considerations.
Are essential oils safe for managing sinus issues?
For most adults, yes, when properly diluted and used as directed. Peppermint and eucalyptus oils are not recommended for infants and young children under about 6 years old, since they can trigger breathing difficulties in that age group specifically.
Can dietary changes really help with allergies?
Diet plays a supportive role — staying hydrated, eating a nutrient-rich diet, and noticing whether dairy, alcohol, or processed foods worsen your personal symptoms can genuinely help, though diet alone typically isn’t sufficient for moderate-to-severe allergy symptoms.
How effective is acupuncture for allergy relief?
A 2022 meta-analysis of 30 randomized trials found acupuncture improved nasal symptoms and quality of life for people with allergic rhinitis compared to no treatment. The evidence quality is generally rated low to moderate, and it’s best considered a complementary option rather than a primary treatment.
How do I know if I have allergies or a sinus infection?
Allergic rhinitis tends to come with sneezing, itchy or watery eyes, and clear nasal discharge, often following a seasonal or environmental pattern. A sinus infection more often involves facial pain or pressure, thicker discolored discharge, and sometimes fever. If you’re genuinely unsure, or symptoms last beyond 10 days, a doctor can help clarify which you’re dealing with.
Scientific References
- National Center for Complementary and Integrative Health (NIH). Seasonal Allergies and Complementary Health Approaches: What the Science Says. https://www.nccih.nih.gov/health/providers/digest/seasonal-allergies-and-complementary-health-approaches-science
- Schapowal A. Randomised controlled trial of butterbur and cetirizine for treating seasonal allergic rhinitis. BMJ. 2002. https://pubmed.ncbi.nlm.nih.gov/11834559/
- Rajan TV, et al. A randomized, controlled trial of local honey for the treatment of seasonal allergic conjunctivitis. Annals of Allergy, Asthma & Immunology. University of Connecticut. https://pubmed.ncbi.nlm.nih.gov/12452208/
- Helsper JPFG, et al. Comparison of the effects of pre-seasonal local honey and conventional allergy medication on birch pollen allergy. European Journal of Clinical Nutrition. 2011 pilot study, referenced via NCCIH. https://www.nccih.nih.gov/health/providers/digest/seasonal-allergies-and-complementary-health-approaches-science
- He M, Qin W, Qin Z, Zhao C. Acupuncture for allergic rhinitis: a systematic review and meta-analysis. European Journal of Medical Research. 2022. https://pmc.ncbi.nlm.nih.gov/articles/PMC9036742/
- Poison Control (National Capital Poison Center). Eucalyptus oil: Is it safe? https://www.poison.org/articles/eucalyptus-oil
- Poison Control (National Capital Poison Center). Essential oils: Poisonous when misused. https://www.poison.org/articles/essential-oils
- Centers for Disease Control and Prevention (CDC). Infant Botulism. https://www.cdc.gov/botulism/infant-botulism.html
- Mayo Clinic. Nasal irrigation: Is it safe? https://www.mayoclinic.org/diseases-conditions/common-cold/expert-answers/nasal-irrigation/faq-20058031
- Cleveland Clinic. Allergic Rhinitis (Hay Fever): Symptoms, Causes & Treatment. https://my.clevelandclinic.org/health/diseases/8622-allergic-rhinitis
This article is for informational purposes only and is not a substitute for professional medical advice. Herbal remedies and essential oils can interact with medications or carry risks for certain people — check with a healthcare provider before starting any new remedy, particularly if pregnant, breastfeeding, or treating a child.

Cancer, Chemo, Supplements, and the Immune System

Food Sensitivity Summit

Passionflower Tea for Sleep: Benefits & How It Works

PEMF Webinar

HBOT ( Hyperbaric Oxygen Therapy ) Webinar

The 4-7-8 Breathing Technique: Step-by-Step Guide and What the Research Actually Shows
-
 Events3 weeks ago
PEMF Webinar
-
 Events2 weeks ago
HBOT ( Hyperbaric Oxygen Therapy ) Webinar
-
 Natural Sleep Remedies5 months ago
The 4-7-8 Breathing Technique: Step-by-Step Guide and What the Research Actually Shows
-

 Events4 months ago
Why You Can’t Trust Big Pharma
-

 Events4 months ago
The Anti-Cancer Body with Dr. Michael Karlfeldt
-

 Events4 months ago
The Cancer Conversation Your Oncologist Cannot Have in 15 Minutes
-

 Events5 months ago
Beyond the Brain
-
 Home Remedies4 months ago
Natural Home Remedies for Restless Legs at Night