
Home Remedies
Aloe Vera Gel vs. Cream for Sunburn: Which Is Actually Better?

The content on this website – including articles, event announcements, personal experiences, and recommendations – is for informational and educational purposes only and is not medical advice. Always consult a qualified healthcare professional before making any changes to your diet, exercise, supplements, sleep habits, or wellness routines, especially if you are pregnant, nursing, on medication, or have any medical condition.
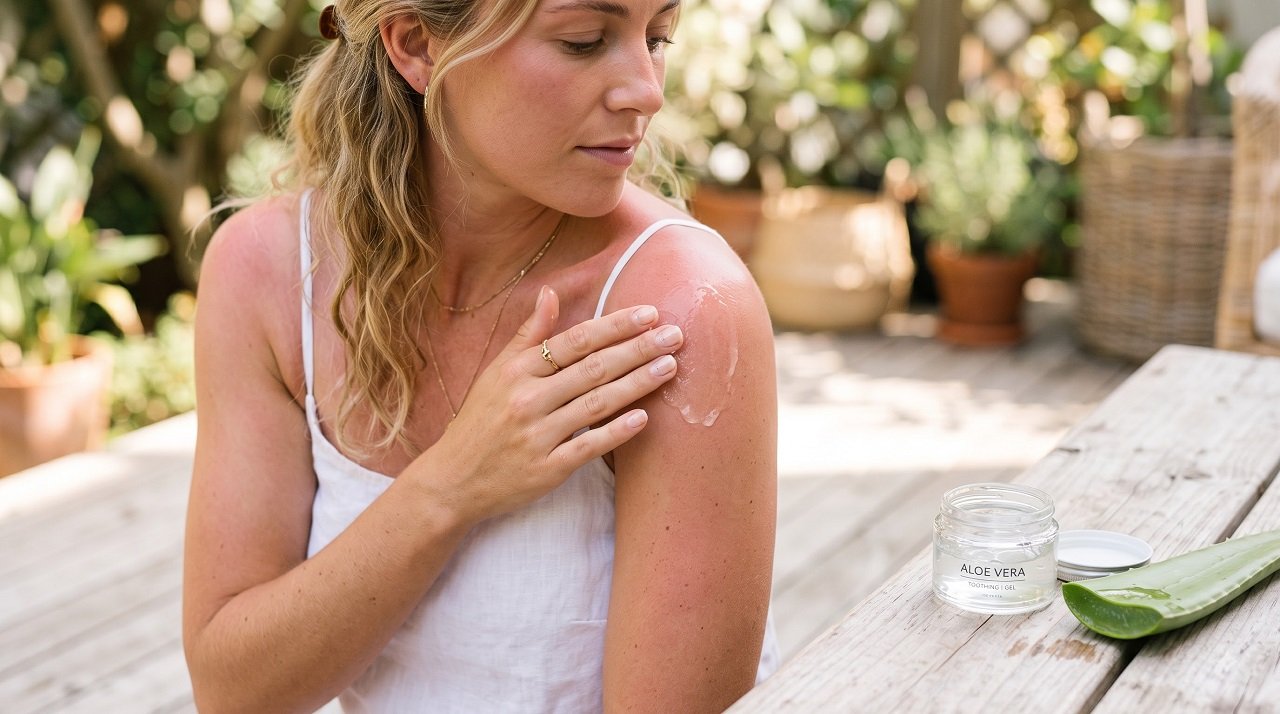
Disclaimer: This article is for informational purposes only and is not a substitute for professional medical advice. Aloe vera can soothe mild sunburn discomfort but does not treat sun damage itself. Severe burns, blistering, fever, or signs of infection require prompt medical attention.
Quick answer: For the first 24–48 hours after a sunburn, a lightweight, water-based aloe vera gel is the better choice — it cools the skin instantly and won’t trap heat the way heavier, oil-based creams can. Once the burn moves into the peeling and repair stage, usually from day 2 or 3 onward, switching to a richer aloe vera cream or moisturizer helps rebuild the skin barrier and manage flaking. Neither product treats the underlying UV damage — they manage symptoms while your skin does the actual healing.
That’s the short version. Below is the full breakdown of why the formulation matters as much as the aloe itself, what the clinical research actually shows, and exactly when to switch from one to the other.
Aloe Vera Gel vs. Cream: Comparison Table
| Factor | Aloe Vera Gel | Aloe Vera Cream |
|---|---|---|
| Base formulation | Water-based, lightweight, often 90%+ pure aloe | Oil-in-water emulsion, contains oils/butters alongside aloe |
| Immediate cooling effect | Strong — evaporative cooling as the water base dries on skin | Mild — oils slow evaporation, so less immediate cooling |
| Risk of heat trapping | Low, especially alcohol-free formulas | Higher — occlusive ingredients can trap surface heat if applied too soon on an actively hot burn |
| Skin barrier repair | Moderate — hydrates but doesn’t replace lost lipids | Stronger — added emollients help rebuild the lipid barrier during peeling |
| Best healing stage | Hours 0–48, the acute inflamed stage | Day 2 onward, the repair and peeling stage |
| Absorption speed | Fast, non-greasy | Slower, richer feel |
| Suitability for peeling skin | Adequate but can feel drying on already-flaking skin | Better — richer texture cushions and softens flaking skin |
| Common irritants to check for | Added alcohol, fragrance, menthol | Fragrance, certain preservatives, thick occlusive waxes on very fresh burns |
Why the Formulation Matters as Much as the Aloe Itself
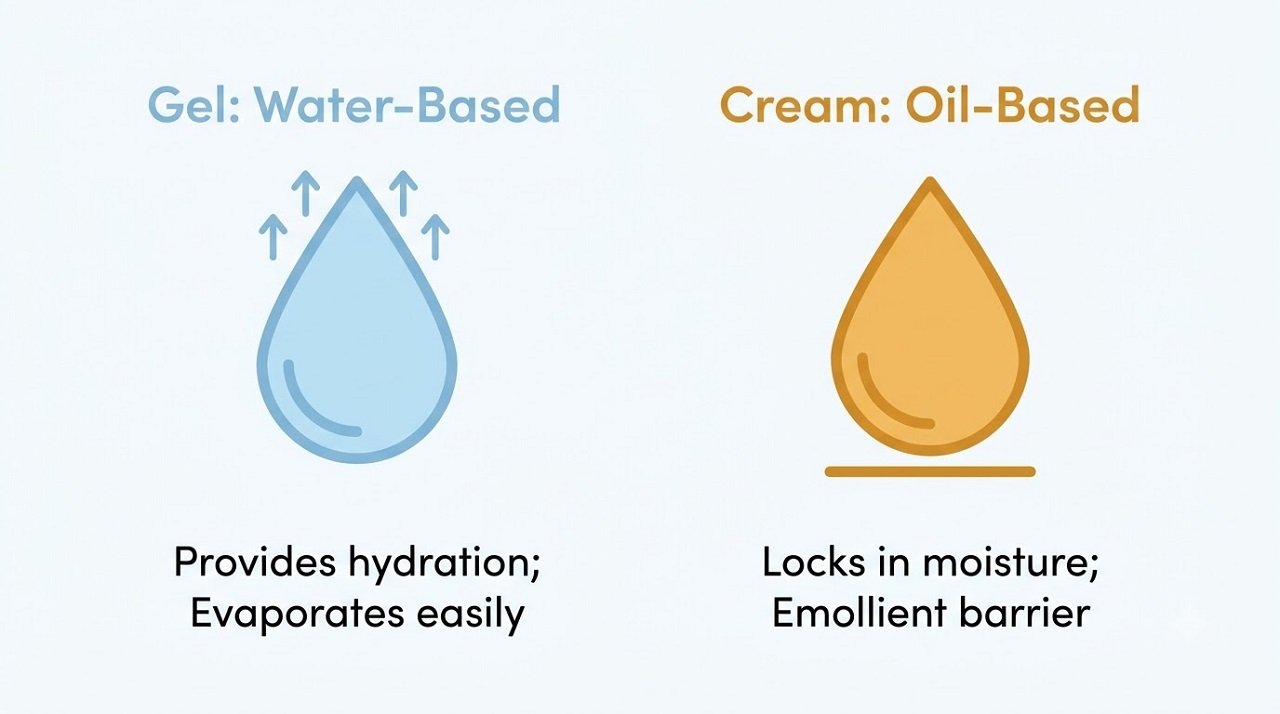
Nearly every article on this topic treats “aloe vera gel” and “aloe vera cream” as basically the same product in a different bottle, since both list aloe as the headline ingredient. But the vehicle — meaning the base formulation the aloe is suspended in — meaningfully changes how the product behaves on sunburned skin, and this is the detail that actually answers the “gel vs. cream” question.
A gel is typically a water-based, lightweight formulation. When applied to hot, sunburned skin, the water content begins evaporating almost immediately, and that evaporation pulls heat away from the skin surface — the same cooling principle behind why a wet cloth feels cooler than a dry one. This is why gel produces that instant, soothing, cooling sensation people associate with aloe vera specifically.
A cream, by contrast, is generally an oil-in-water emulsion — it contains oils, butters, or other emollient ingredients alongside water and aloe. These ingredients are more occlusive, meaning they sit on the skin surface and slow moisture loss rather than evaporating quickly. That’s genuinely useful for locking hydration into skin during the repair phase, but applied to an acutely hot, actively inflamed sunburn in the first few hours, a heavier occlusive layer can trap surface heat rather than helping release it — which is why dermatologists commonly steer people toward gel first and cream second, rather than treating the two as interchangeable.
What the Research Actually Shows About Aloe Vera and Burn Healing
This is worth covering directly, because it’s the part most consumer articles either skip or overstate. A 2024 systematic review and meta-analysis published in the Journal of Burn Care & Research, which pooled nine randomized controlled trials, found that topical aloe vera significantly reduced burn wound healing time by an average of 3.76 days compared to other topical treatments. A separate 2022 meta-analysis focused specifically on second-degree burns, involving 133 patients across multiple trials, found aloe vera reduced healing time by an average of 4.44 days compared to alternative treatments.
Two nuances from this same research are worth being upfront about, since they temper the more sweeping claims often made about aloe.
First, the same 2024 meta-analysis found no statistically significant difference in pain reduction between aloe vera and control treatments — meaning while aloe measurably speeds healing, its pain-relieving effect specifically hasn’t been clearly demonstrated in pooled trial data, even though many people report it feels soothing in the moment.
Second, and directly relevant to this comparison: this research base is built almost entirely around aloe vera gel and raw aloe applied to burns and wounds, not commercial aloe-containing creams or lotions. A frequently cited 2005 study specifically found that a 70% aloe vera lotion showed no measurable benefit for sunburn compared to a placebo lotion — a meaningful finding, since it suggests that once aloe is diluted and blended into a heavier, more complex cream or lotion formulation, its concentration and the surrounding ingredients matter considerably, and the healing benefit doesn’t automatically transfer just because “aloe vera” appears on the label.
The practical takeaway: if you want the aloe itself to be doing genuine work, look for a high-concentration, simple aloe vera gel — ideally 90% or higher pure aloe content — during the acute stage, rather than assuming any product with aloe listed among ten other ingredients will provide the same effect.
Phase-by-Phase: When to Use Which
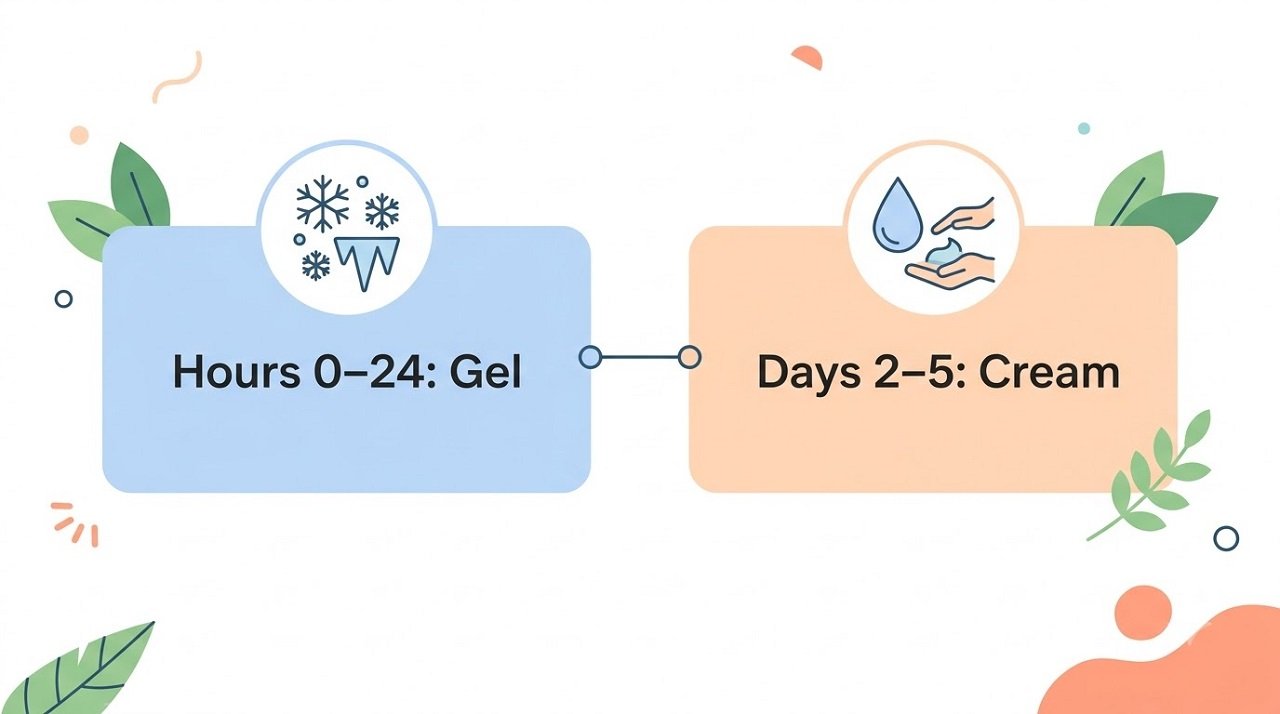
Phase 1 (Hours 0–24): Gel Is the Right Choice
In the first 24 hours, sunburned skin is actively inflamed, often genuinely warm to the touch, and highly sensitive. This is where a water-based aloe vera gel does its best work — the evaporative cooling effect provides real, immediate relief, and its lightweight texture won’t add an occlusive layer on top of skin that’s still radiating heat. Apply a generous, even layer of alcohol-free, fragrance-free aloe vera gel directly to the affected area every few hours, and store the gel in the refrigerator if you’d like an extra cooling boost on application.
Avoid anything oil-heavy, thick, or occlusive during this window — this includes most traditional creams, petroleum-based ointments, and heavier body butters, since these can trap heat against skin that’s still trying to release it.
Phase 2 (Days 2–5): Transition to Cream
Once the acute heat and initial inflammation have settled — typically by day two or three — the skin’s priorities shift toward repair, and this is where peeling commonly begins as damaged surface cells shed. This is the point to transition toward a richer aloe vera cream or a plain, fragrance-free moisturizer with aloe as one of several barrier-supporting ingredients.
The oils and emollients that were a liability in Phase 1 become genuinely useful here — they help replace lipids in a skin barrier that UV damage has disrupted, and the thicker texture physically cushions and softens flaking, peeling skin rather than letting it feel tight and dry. Continue moisturizing generously through the peeling process; resist the urge to pick at peeling skin, since this is simply your body clearing away UV-damaged cells and interfering with it can slow healing or increase irritation.
Ingredients to Avoid on Sunburned Skin
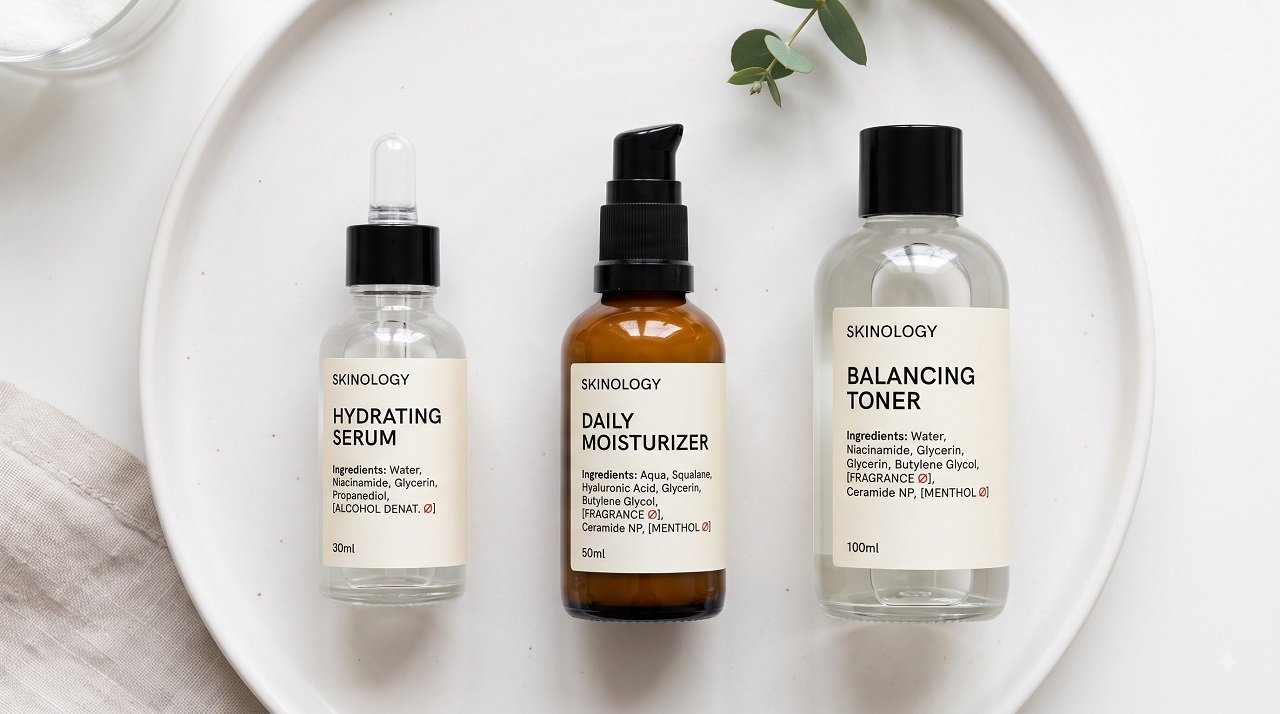
Regardless of whether you choose gel or cream, certain ingredients can make sunburned skin considerably more uncomfortable and should generally be avoided while skin is actively healing.
Alcohol, listed on labels as denatured alcohol, isopropyl alcohol, or similar, has a drying and often stinging effect on already-compromised skin — some aloe gels include it for a quicker-drying finish, which is worth checking for on the ingredient list. Fragrance and added dyes are common irritants on sensitive, inflamed skin and offer no functional benefit.
Menthol or “cooling” additives beyond aloe itself can occasionally cause a stinging sensation on broken or very sensitive skin, even though they’re marketed for their cooling effect. Petroleum-based occlusive ointments applied too early, similarly to heavy creams, can trap heat during the acute inflammatory stage, though they become more reasonable once skin has cooled and moved into the repair phase.
People Also Ask
Is gel or lotion better for a sunburn?
Gel is generally the better choice, particularly in the first 24–48 hours. Its water-based formulation cools skin through evaporation and won’t trap heat the way a heavier lotion or cream can on freshly burned, still-warm skin.
Does cream trap heat in a sunburn?
It can, if applied too soon. Cream’s oil-based, more occlusive formulation is designed to slow moisture loss and lock in hydration, which is genuinely helpful once the acute heat has settled, but applied directly to actively hot, inflamed skin in the first several hours, it can trap surface heat rather than allowing it to release.
Can I mix aloe vera gel and cream together?
There’s no harm in it, though it somewhat defeats the purpose of using each at its intended stage. If you’d like, use plain gel during the acute cooling phase, then switch fully to cream once the burn has settled and peeling begins, rather than combining them simultaneously.
How long should I use aloe vera gel before switching to cream?
Roughly 24–48 hours for most mild-to-moderate sunburns, or once the skin no longer feels acutely hot or actively inflamed. From that point through the peeling and repair stage — often another 3 to 5 days — a richer aloe vera cream or moisturizer generally serves the skin better.
Does real aloe vera plant gel work better than store-bought gel?
Fresh gel scooped directly from an aloe leaf is genuinely effective and was the basis for much of the traditional and early clinical use of aloe for burns. Store-bought gel works comparably well provided it has a high aloe concentration (ideally 90%+) and is free of alcohol, fragrance, and unnecessary additives — the concentration and purity matter more than whether it came from a bottle or a leaf.
When Aloe Vera Isn’t Enough
Aloe vera, whether in gel or cream form, is appropriate for mild-to-moderate sunburns — the kind that cause redness, warmth, and surface discomfort without deeper tissue involvement. It is not a substitute for medical care in more serious cases.
Seek medical attention if your sunburn involves blistering over a significant area, is accompanied by fever, chills, nausea, or a headache (signs of possible sun poisoning or heat illness), causes significant swelling, shows signs of infection such as increasing pain, pus, or spreading redness, or covers a large percentage of your body, particularly in a young child or older adult. In these cases, aloe vera can still be used for comfort on unaffected surrounding skin, but the burn itself needs professional evaluation rather than home management alone.
Frequently Asked Questions
Q: Will aloe vera prevent my sunburn from peeling?
Not entirely — peeling is your body’s natural process of shedding UV-damaged skin cells and will happen to some degree with any sunburn beyond the mildest cases. However, keeping skin consistently moisturized with a good aloe vera cream during the repair phase can reduce how dry, tight, and uncomfortable the peeling process feels, and may help it happen more evenly.
Q: Is 100% aloe vera gel better than gel with other ingredients?
For the acute cooling stage, simpler is generally better — a high-concentration aloe gel with minimal added ingredients reduces the chance of irritation on already-sensitive skin and reflects the concentration levels used in the clinical research showing genuine wound-healing benefit.
Q: Can I use aloe vera gel on a sunburned face?
Yes, aloe vera gel is generally safe for facial sunburn, provided it’s a gentle, fragrance-free formulation. Be mindful around the eyes, and patch-test on a small area first if you have particularly sensitive skin or a history of reactions to aloe.
Q: How often should I apply aloe vera gel to a fresh sunburn?
Every 2–3 hours during the first day is a reasonable frequency for most mild-to-moderate sunburns, tapering to 2–3 times daily as the acute heat and redness settle and you transition toward a richer cream for the remaining healing period.
Scientific References
- Dat AD, Poon F, Pham KB, Doust J. Aloe vera for treating acute and chronic wounds. Cochrane Database of Systematic Reviews. https://pubmed.ncbi.nlm.nih.gov/25742221/
- Effects of Aloe vera on Burn Injuries: A Systematic Review and Meta-Analysis of Randomized Controlled Trials. Journal of Burn Care & Research. 2024. https://pubmed.ncbi.nlm.nih.gov/38605441/
- Second-Degree Burns and Aloe Vera: A Meta-analysis and Systematic Review. Advances in Skin & Wound Care. 2022. https://pubmed.ncbi.nlm.nih.gov/36264753/
- Cleveland Clinic. Is Aloe Vera Good for Sunburn? Interview with Lindsey Moore, MD. https://health.clevelandclinic.org/aloe-vera-for-sunburn
- American Academy of Dermatology Association. How to Treat Sunburn. https://www.aad.org/public/everyday-care/injured-skin/burns/treat-sunburn
- National Center for Complementary and Integrative Health (NIH). Aloe Vera. https://www.nccih.nih.gov/health/aloe-vera
This article is for informational purposes only and is not a substitute for professional medical advice. Aloe vera can soothe mild sunburn discomfort but does not treat sun damage itself. Severe burns, blistering, fever, or signs of infection require prompt medical attention.













Disclaimer: This article is for informational purposes only and is not a substitute for professional medical advice. Infants are a medically vulnerable group — always consult your pediatrician before trying any home remedy, and seek immediate medical care if your baby shows any signs of breathing difficulty.
Quick answer: The safest, most evidence-supported home remedies for infant nasal congestion are saline nasal drops followed by gentle bulb syringe suctioning (used up to four times in 24 hours), a cool-mist humidifier to keep air moist, and extra breastmilk or formula to maintain hydration. Babies breathe primarily through their nose for the first few months of life, so even mild congestion can meaningfully disrupt feeding and sleep — but it’s almost always manageable at home. Avoid over-the-counter cold medicines, vapor rub under age 2, honey under 12 months, and any inclined or elevated sleep surface, since all of these carry documented safety risks for infants specifically.
That’s the short version. Below is the complete guide: what causes infant congestion, exactly how to use each remedy safely, the safe sleep guidance that matters most while your baby is congested, and the warning signs that mean it’s time to call your pediatrician.
Key Takeaways
- Nasal congestion in infants can make breathing and feeding difficult, and must be addressed safely
- Saline drops, humidifiers, and gentle suctioning are the home remedies with the clearest safety profile for infants
- Avoid over-the-counter cold medicines for children under 4, and avoid honey entirely under 12 months due to infant botulism risk
- Always prioritize safe, flat back-sleeping, even when dealing with congestion — elevated or inclined sleep positions are not recommended for infants
- Seek medical attention if the baby is struggling to breathe or showing signs of airway obstruction
Understanding Infant Nasal Congestion and Its Causes
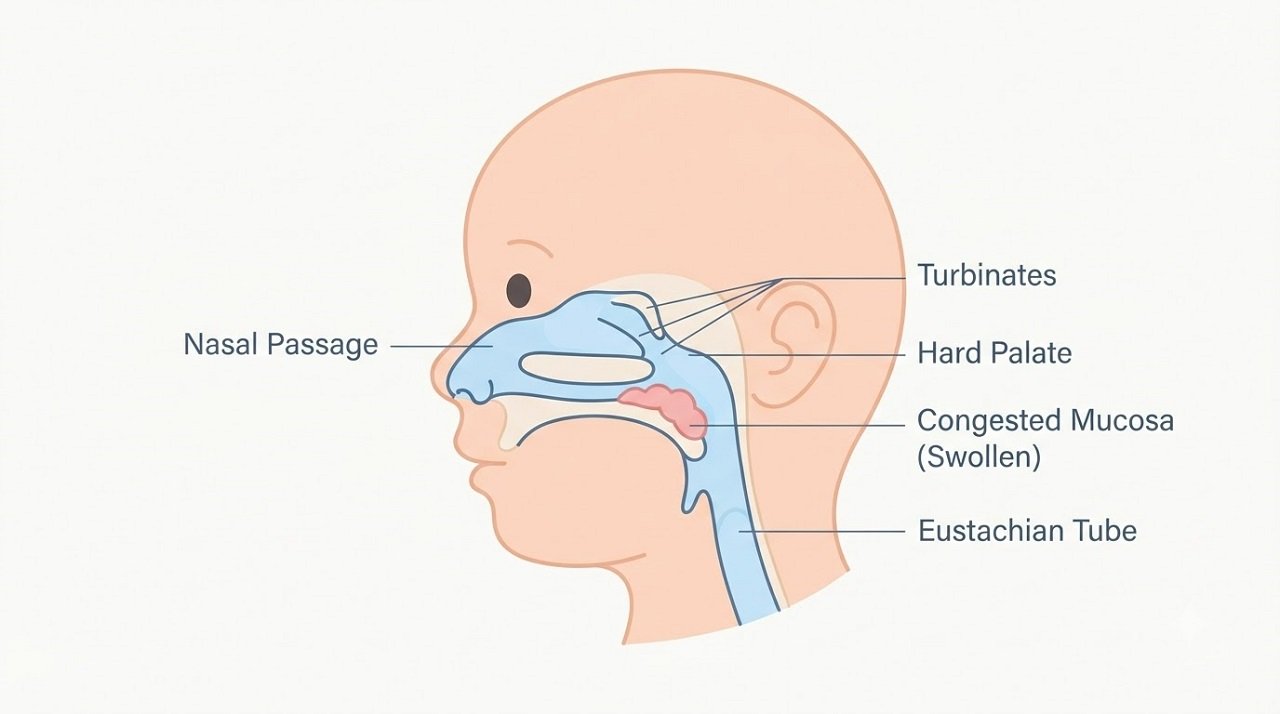
Nasal congestion happens when the blood vessels and tissue lining an infant’s tiny nasal passages swell with fluid, narrowing the already small airway. Because babies are largely obligate nose-breathers for the first few months of life — meaning they rely on nasal breathing far more than adults do, especially during feeding — even congestion that would feel minor to an adult can genuinely interfere with a baby’s ability to nurse, bottle-feed, and sleep comfortably.
Common Triggers of Nasal Congestion in Babies
Several things can cause nasal congestion in infants, including:
- Viral infections, such as the common cold or flu
- Allergies to environmental irritants like dust, pollen, or pet dander
- Exposure to cigarette smoke or other air pollutants
- Dry indoor air, particularly during winter heating season
- Structural factors in the nose or sinuses
- A foreign object lodged in the nasal passage (more common in older infants who can reach and explore with their hands)
Signs and Symptoms to Watch For
The main sign of nasal congestion in infants is audible or visible trouble breathing through the nose. Other common signs include:
- Trouble feeding or sucking due to blocked nasal passages
- Disturbed sleep patterns and increased irritability
- Persistent sniffling, snorting, or sneezing
- Visible nasal mucus or discharge
- A raspy or “snuffly” sound during breathing, particularly noticeable at night
When Congestion Becomes a Concern
Most infant nasal congestion is mild and manageable at home. But certain signs suggest it may be more serious and require prompt medical evaluation, including:
- Difficulty breathing, or rapid, labored breathing
- Bluish discoloration of the lips, face, or skin
- Persistent fever, or thick, yellow-green nasal discharge lasting more than 10 days
- Refusal to feed or drink due to nasal obstruction
If you notice any of these signs, contact your pediatrician promptly. They can rule out other underlying issues and guide the right next steps for your baby specifically.
The Importance of Safe Breathing for Infants
Proper breathing is foundational to an infant’s health, feeding, and sleep. Nasal congestion can interfere with all three, which is exactly why finding genuinely safe relief methods — ones that don’t introduce new risks while addressing the congestion — matters so much for this age group specifically.
“Prioritize timing it before feedings and bedtime, when clear breathing matters most.” — Advice from a pediatric care provider on the practical timing of nasal clearing routines, as reported by The Bump
Always place babies on their backs to sleep, on a firm, flat surface, free of soft bedding, positioners, or inclines — this single practice is the cornerstone of safe infant sleep and remains true even when your baby is congested, a point covered in more depth in the safe sleep section below. Combining this safe sleep foundation with gentle, evidence-informed remedies like saline solution gives parents a way to genuinely ease their baby’s discomfort without compromising on safety.
Home Remedies for a Stuffy Nose in Infants
As a parent, watching your baby struggle with a stuffy nose is genuinely hard — but there are several well-established, low-risk approaches that can meaningfully ease the discomfort of infant congestion relief.
Saline Solution Applications
Nasal saline spray or drops are one of the gentlest, most broadly recommended ways to clear a stuffy nose. Saline solution thins out thickened mucus and soothes irritated nasal tissue, making it considerably easier for a baby to breathe and feed. It’s covered in full detail, including exact technique, in the dedicated section below.
Natural Moisture Treatments
Keeping the air around your baby appropriately humid supports the nasal passages in staying moist rather than becoming dry and irritated, which can otherwise worsen mucus buildup. A cool-mist humidifier is the safest way to do this consistently; a steamy bathroom session can also provide short-term relief, covered separately below with the relevant safety precautions.
Gentle Physical Relief Methods
- Gently patting or lightly massaging your baby’s back can help loosen chest congestion that sometimes accompanies nasal symptoms, making breathing more comfortable
- Carefully wiping away any dried mucus around the outside of the nose with a soft, damp cotton cloth can add comfort, without inserting anything into the nostril itself
- Maintaining hydration is key — offer breastmilk or formula more frequently in smaller amounts if congestion is making full feeds difficult
Always use caution with any home remedy, and stop if it causes visible discomfort or an adverse reaction. If your baby’s stuffy nose doesn’t improve or gets worse, contact your pediatrician for guidance.
Using Saline Drops Effectively
Saline nasal drops, typically a 0.65% sodium chloride solution, are widely regarded as safe for infants and work by thinning mucus so it can drain or be suctioned more easily.
To use them effectively, place 2–3 drops of saline in each nostril, ideally timed before feedings or before sleep so the drops do their work when your baby needs clear breathing most. Tilt your baby’s head back very gently to help the drops reach the nasal passages, then wait about 30–60 seconds before suctioning, giving the saline time to loosen the mucus.
Saline drops are generally considered safe for babies of all ages, including newborns, since they contain no medication — just salt water. Some babies sneeze or show brief nasal irritation the first few times, which typically settles quickly. If your baby’s congestion isn’t improving or seems to be getting worse despite consistent saline use, check in with your pediatrician.
Proper Techniques for Nasal Suctioning
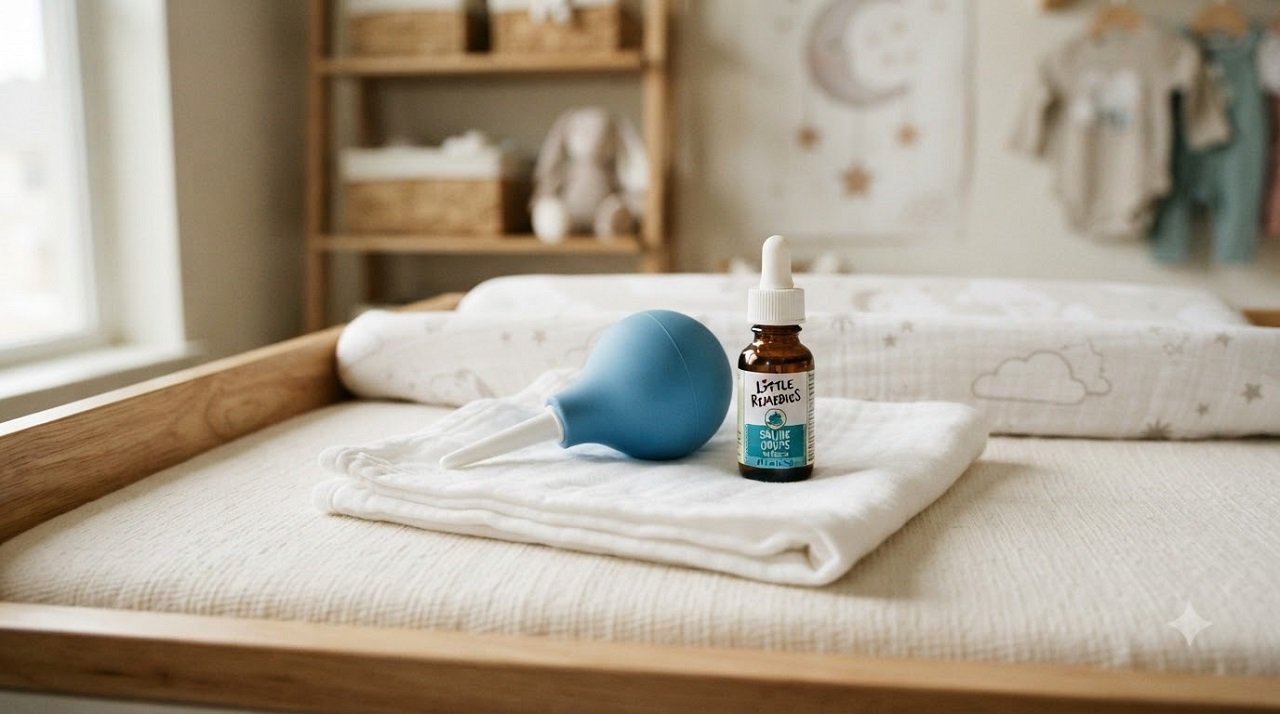
Learning the correct nasal suctioning technique helps you clear your congested infant’s airway effectively without causing irritation.
Bulb Syringe Usage Guide
Start by placing a few saline drops in your baby’s nose to loosen the mucus, and wait about a minute before suctioning — this single step makes the entire process meaningfully more effective and more comfortable for your baby.
To use the bulb syringe: squeeze the bulb first to push the air out, gently place the tip just inside one nostril (never insert it deeply), and slowly release your grip on the bulb to draw the loosened mucus out. Repeat on the other side as needed.
“You can use a bulb syringe up to four times within 24 hours to clear out baby’s nose.” — Danelle Fisher, MD, pediatrician at Providence Saint John’s Health Center, Santa Monica, CA
This four-times-in-24-hours guidance reflects a broad pediatric consensus, since infant nasal tissue is thin, delicate, and rich in small blood vessels — suctioning more frequently than this can irritate the lining and paradoxically make congestion feel worse rather than better. Use the bulb syringe only when your baby is visibly congested, not on a fixed schedule regardless of symptoms, and prioritize timing sessions before feeds and before sleep, when clear breathing matters most.
A note on aspirator choice: some pediatric practices now recommend nasal aspirators (including narrow-tip manual or electric styles) over traditional wide bulb syringes, since a bulb syringe’s shape can make it hard to see exactly where the tip sits inside a small nostril. If you find a bulb syringe difficult to use precisely, a soft-tip nasal aspirator is a reasonable, widely available alternative that works on the same saline-first, gentle-suction principle.
Common Suctioning Mistakes to Avoid
- Don’t insert the syringe or aspirator tip too far into the nostril, as this can irritate the delicate nasal passage or cause minor bleeding
- Avoid over-suctioning beyond the up-to-four-times-daily guidance, since this can inflame the nasal lining rather than relieve it
- For babies who resist suctioning strongly, saline drops alone — without following up with suction — can still provide meaningful relief by thinning mucus so it drains more naturally
Always clean the syringe or aspirator thoroughly with warm soapy water after each use, rinse well, and let it dry completely before the next use, since trapped moisture can encourage mold growth inside the device.
Humidifier and Vaporizer Solutions
Humidifiers and vaporizers add moisture to the air, which helps thin mucus and makes it easier for a congested baby to breathe. Cool-mist humidifiers are generally considered the safer choice for infant nurseries, since they eliminate the burn risk that comes with warm-mist devices and hot water.
Place the humidifier in your baby’s room but out of reach of the crib, clean it daily following the manufacturer’s instructions to prevent mold and bacterial growth, and keep the room at a comfortable, moderate temperature — overheating a baby’s room can worsen discomfort rather than help it.
| Humidifier Type | Pros | Cons |
|---|---|---|
| Cool-Mist | Safer for infants due to no hot water or steam; may help ease coughing and congestion | Requires more frequent cleaning to prevent mold growth |
| Warm-Mist | Equally effective at adding moisture to the air | Hot water and steam pose a genuine burn risk around infants and should be used with particular caution, if at all, in a nursery |
Choosing between a cool-mist humidifier and a warm-mist vaporizer largely comes down to safety around a curious, mobile baby — cool-mist is the more broadly recommended option for infant rooms specifically. Whichever you choose, consistent daily cleaning is what determines whether the device helps or ends up circulating mold and bacteria into the air your baby breathes.
Safe Sleep Positions for Congested Infants

It’s especially important to keep a baby’s sleep environment genuinely safe when they’re congested, since the instinct to prop a baby up or elevate their head to help them “breathe easier” is common — but it runs directly against established infant safe sleep guidance.
Understanding SIDS Risk Factors
Sudden Infant Death Syndrome (SIDS) is the sudden, unexplained death of an infant under one year old, and it remains one of the leading causes of infant mortality in the U.S. Documented risk factors include stomach or side sleeping, soft bedding in the sleep area, overheating, and exposure to smoke. The single most protective, consistently recommended practice from pediatric safe sleep guidelines is placing babies on their backs for every sleep, every time — a rule that does not change when a baby has a stuffy nose.
A Common Myth Worth Addressing Directly: Elevated Sleeping Position
Many parents specifically search for whether propping a congested baby up, or using an inclined or elevated sleep surface, helps them breathe more easily at night. It’s an understandable instinct — elevation does help clear sinuses in adults — but for infants specifically, pediatric safe sleep guidance is explicit on this point: elevated, inclined, or propped sleep surfaces are not recommended for infant sleep, congested or not. This includes inclined sleepers, car seats used for routine sleep, swings, and any pillow, wedge, or positioner used to raise a baby’s head. These surfaces can allow an infant’s head to fall forward in a way that restricts their airway, and several inclined infant sleeper products have been recalled in recent years following infant deaths linked to this exact risk. If your baby is congested, the safe approach is a firm, flat sleep surface combined with saline and gentle suctioning before bedtime — not an elevated position.
Proper Sleep Environment Setup
Setting up a genuinely safe sleep space for a congested infant means avoiding inclined sleepers, car seats, or swings as a routine sleep location, since these can compress or block the airway. Don’t use pillows, wedges, or positioners to lift the head under any circumstance. Instead, use a firm, flat sleep surface with a well-fitted sheet and no other bedding.
Dress the baby in warm, breathable sleep clothing (such as a wearable blanket) rather than using loose blankets, and keep the room at a comfortable, moderate temperature rather than overheating it in an effort to help with congestion.
| Safe Sleep Practices | Unsafe Sleep Practices |
|---|---|
| Placing baby on their back to sleep, every time | Stomach or side sleeping |
| Using a firm, flat mattress with a fitted sheet only | Soft bedding, pillows, or loose blankets |
| Dressing in warm, breathable sleep clothing | Inclined sleepers, car seats, or swings used for routine sleep |
| Maintaining a comfortable, moderate room temperature | Using pillows, wedges, or props to elevate the head |
“Ensuring a safe sleep environment is critical for infants, even more so when they have a stuffy nose.” — Common pediatric safe-sleep guidance, reflecting AAP safe sleep recommendations
Hydration and Feeding Tips During Congestion
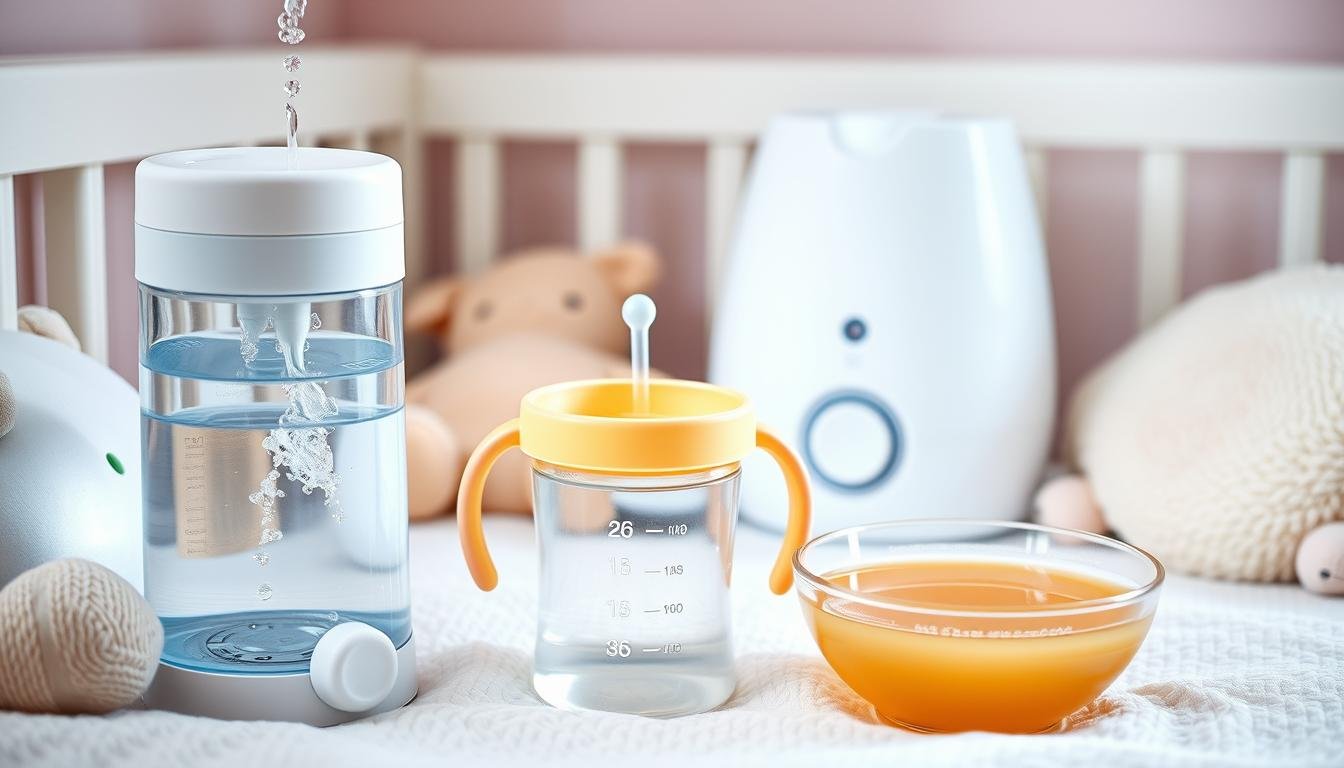
Staying well-hydrated genuinely helps thin mucus, making it easier for a congested baby to breathe. For babies under 6 months, this means continuing regular breastfeeding or formula feeding — there’s no need for additional water, which isn’t recommended for babies this young. Babies older than 6 months who have started solids can also have small amounts of water alongside their usual feeds if your pediatrician has already introduced water into their routine.
If congestion is making it hard for your baby to latch or feed normally, try clearing their nasal passages with saline and gentle suctioning shortly before the feed — this alone often makes feeding considerably easier. If breastfeeding directly becomes difficult during a bad congestion episode, expressing milk into a bottle or cup can help ensure your baby still gets adequate nutrition and hydration.
Offering more frequent, smaller feeds — rather than fewer large ones — can also help a congested baby stay comfortably nourished without becoming overwhelmed by nasal blockage mid-feed.
“Continuing to breastfeed is recommended during a cold or stuffy nose, as breast milk provides antibodies that can support a baby’s immune response.” — Reflecting guidance commonly given by pediatric nurse practitioners on maintaining breastfeeding through minor illness
Keep a close eye on wet diaper counts and overall feeding intake while your baby is congested, and contact your pediatrician if you’re concerned about hydration or if feeding refusal persists.
Steam Therapy and Bathroom Techniques
A steamy bathroom can provide short-term relief for a congested baby by loosening mucus in a similar way to a cool-mist humidifier, just more intensely and for a shorter session.
Creating a Steam Environment
Run a hot shower with the bathroom door closed to build up steam, then sit with your baby in the steamy (but not overly hot) room for a few minutes, holding them close. This can help loosen mucus and ease breathing, and many parents find doing this shortly before bedtime helps their baby settle more comfortably.
Safety Precautions During Steam Sessions
- Make sure the room doesn’t become uncomfortably hot — infants can’t regulate temperature as effectively as adults and overheating is a genuine risk
- Never leave your baby unattended in a steamy bathroom, given the risk of scalding from hot surfaces or water
- Avoid vapor rub products on infants — pediatric guidance from the American Academy of Pediatrics specifically recommends topical vapor rubs only for children older than age 2, not for infants, due to safety concerns at younger ages
- Consider a cool-mist humidifier as a gentler, more sustainable daily alternative to occasional steam sessions
If congestion persists or worsens despite steam therapy, reach out to your pediatrician rather than relying on this as an ongoing solution.
Natural Alternatives to Over-the-Counter Medications
Managing infant nasal congestion safely means avoiding over-the-counter cold medications, which carry real risk for young children and are not considered safe or effective for children under 4 — and in most pediatric guidance, under 6. In fact, OTC cold medications intended for children under age 2 were pulled from U.S. store shelves in 2008 following safety concerns, and clinical evidence has never strongly supported their effectiveness even in slightly older children.
Instead, several gentler, evidence-informed options exist:
- Breast milk as a natural decongestant: Some parents use a few drops of expressed breast milk in the nose, based on the reasoning that it may carry mild antibody and anti-inflammatory properties. This is a longstanding traditional practice rather than one backed by controlled clinical trials, but it carries essentially no risk and is a reasonable option many parents choose to try.
- Honey — but only after 12 months: Honey can help soothe a cough in children over 12 months old, but it must never be given to a baby younger than 12 months, in any form — not raw, not baked into food, not even a small taste on a pacifier. This isn’t a cautious suggestion; it’s a firm safety rule. Honey can contain Clostridium botulinum spores which, in a baby’s immature digestive system, can germinate and produce a toxin causing infant botulism — a rare but genuinely serious illness. An infant’s mature gut microbiome after the first year is what makes honey safe from that point forward, which is exactly why the 12-month cutoff exists.
- Saline nasal drops and suctioning: Covered in full detail above — a safe, medication-free option appropriate for babies of any age.
- Cool-mist humidifiers: Also covered above — a consistent way to help keep nasal passages moist and support natural drainage.
“The AAP does not recommend giving honey to infants under 12 months of age because it could contain a bacterium that causes infant botulism.” — American Academy of Pediatrics, AAP News
Always check with your pediatrician before trying any new remedy, even a natural one, particularly if your baby has any underlying health condition or was born prematurely.
Warning Signs and When to Call the Doctor
Home remedies genuinely help with most infant congestion, but knowing when to escalate to your pediatrician — or emergency care — matters just as much as knowing the remedies themselves.
Call your pediatrician if your baby has persistently fast or labored breathing, a cough that won’t let up, or a fever lasting more than three days. Also reach out if you notice signs of dehydration, such as noticeably fewer wet diapers than usual, unusual lethargy, or a sunken soft spot on the head.
Seek emergency medical care immediately if your baby shows bluish discoloration around the lips or face, has visible difficulty breathing (including chest pulling in with each breath, grunting sounds, or pauses in breathing), or seems unusually unresponsive or difficult to wake.
Healthy infants typically get around six colds in their first year of life, and most resolve within a week to ten days with basic home care. Babies under 3 months with any fever or notable change in behavior should be evaluated by a pediatrician promptly, since very young infants can decline more quickly than older babies. Babies with underlying conditions such as chronic lung disease or a compromised immune system may need a lower threshold for seeking care — if you’re ever unsure, it’s always reasonable to call your pediatrician’s office and ask.
Conclusion
Managing a stuffy nose in your infant comes down to a combination of patience and genuinely safe, evidence-informed techniques. Saline drops, gentle nasal suctioning, a cool-mist humidifier, and attentive hydration and feeding support cover the vast majority of what most babies need to get through a congested stretch comfortably. Just as important is keeping your baby’s sleep environment safe throughout — flat, firm, and on their back, without inclines, props, or elevated positions, even when congestion makes that instinct to prop them up feel tempting.
Most infant nasal congestion resolves at home within a week or so with this kind of consistent, gentle care. Understanding the causes, recognizing the warning signs that warrant a call to your pediatrician, and sticking to remedies with a genuine safety profile for this age group gives you a clear, confident path through a situation that, while stressful in the moment, is almost always temporary and manageable.
People Also Ask
What are the fastest ways to relieve a stuffy nose in a newborn?
Saline drops followed by gentle bulb syringe suctioning, timed just before a feed or before sleep, tend to provide the fastest noticeable relief. Running a cool-mist humidifier in the room overnight supports ongoing relief between suctioning sessions.
Is it safe to use a humidifier every night for a congested baby?
Yes, a cool-mist humidifier is generally considered safe for nightly use, provided it’s cleaned daily to prevent mold and bacterial buildup and placed safely out of the crib’s reach.
Can I put my congested baby to sleep in an inclined position?
No — despite feeling like a natural way to ease breathing, elevated or inclined sleep surfaces are not recommended for infants, congested or not, due to a documented risk of the airway becoming restricted. Always use a firm, flat surface for infant sleep.
When should I worry about my baby’s stuffy nose?
Worry warrants a pediatrician call when congestion comes with labored or rapid breathing, bluish lips or face, a fever lasting more than three days, or refusal to feed. These go beyond typical mild congestion and deserve prompt medical evaluation.
Does breast milk really work as a natural decongestant?
It’s a widely used traditional practice, and it carries essentially no risk, but it isn’t backed by strong controlled clinical research the way saline solution is. Many parents find it a reasonable, gentle option to try alongside saline drops.
Frequently Asked Questions
What are some common home remedies for a stuffy nose in infants?
Home remedies include saline nasal spray or drops, gentle nasal suctioning with a bulb syringe or aspirator, cool-mist humidifiers, occasional steam therapy, and keeping the baby well-hydrated through continued breastfeeding or formula feeding.
What are the common causes of nasal congestion in infants?
Viral infections like the common cold and flu are the most common cause. Allergies, dry indoor air, and environmental irritants such as smoke also play a role.
What are the signs and symptoms of concerning infant congestion?
Watch for labored or rapid breathing, feeding difficulties, disturbed sleep, and bluish discoloration around the lips or face. Seek prompt medical attention if your baby shows any signs of breathing distress.
How can I ensure safe breathing for my congested infant?
Always place the baby on their back to sleep, on a firm, flat surface without soft bedding or inclines. Keep the room at a comfortable, moderate temperature and dress your baby in breathable sleep clothing rather than loose blankets.
How do I use saline drops to help relieve nasal congestion?
Place 2–3 drops of saline solution in each nostril, ideally before feeding or sleep. Tilt the baby’s head back slightly, wait about 30–60 seconds, then follow with gentle suctioning if needed.
What is the proper technique for using a bulb syringe to suction out mucus?
Squeeze the bulb before inserting the tip just inside the nostril, then slowly release to draw out the loosened mucus. Use up to four times in 24 hours, and clean the syringe thoroughly with soap and water after each use.
How can a humidifier or vaporizer help with infant nasal congestion?
Cool-mist humidifiers add moisture to the air, which helps thin mucus and eases stuffy noses. Place the device safely out of the crib’s reach and clean it daily to prevent mold growth.
Are there any natural alternatives to over-the-counter cold medicines for infants?
Yes — saline drops and suctioning, cool-mist humidifiers, and a few drops of expressed breast milk are commonly used natural alternatives. Honey can help with cough relief, but only for babies over 12 months, never younger, due to infant botulism risk. Over-the-counter cold medicines should be avoided for children under 4.
When should I seek medical attention for my baby’s nasal congestion?
Seek immediate medical attention if your baby has difficulty breathing or bluish discoloration of the lips or face. Call your pediatrician for persistently fast breathing, a cough that won’t let up, or congestion accompanied by fever lasting more than three days.
Scientific References
- American Academy of Pediatrics. Simple remedies often best for common colds in young children. AAP News. https://publications.aap.org/aapnews/article/32/12/32/24012/Simple-remedies-often-best-for-common-colds-in
- HealthyChildren.org (American Academy of Pediatrics). My baby has a stuffy nose. How can I help them sleep safely? https://www.healthychildren.org/English/tips-tools/ask-the-pediatrician/Pages/my-baby-has-a-stuffy-nose-how-can-i-help-them-sleep-safely.aspx
- Eunice Kennedy Shriver National Institute of Child Health and Human Development (NICHD). Safe to Sleep: About SIDS and Safe Infant Sleep. https://safetosleep.nichd.nih.gov/about/sids-definition
- Centers for Disease Control and Prevention (CDC). Infant Botulism. https://www.cdc.gov/botulism/infant-botulism.html
- Cleveland Clinic. Why Honey Isn’t Safe for Babies (and When It Is). https://health.clevelandclinic.org/when-is-it-safe-to-give-honey-to-my-baby
- Mayo Clinic. Warm-mist versus cool-mist humidifier: Which is better for a cold? https://www.mayoclinic.org/diseases-conditions/common-cold/expert-answers/cool-mist-humidifiers/faq-20058199
- Mayo Clinic. A baby’s nose and throat viral infection — Common cold in babies: Diagnosis & treatment. https://www.mayoclinic.org/diseases-conditions/common-cold-in-babies/diagnosis-treatment/drc-20351657
- Nationwide Children’s Hospital. Suctioning the Nose with a Bulb Syringe. https://www.nationwidechildrens.org/family-resources-education/health-wellness-and-safety-resources/helping-hands/suctioning-the-nose-with-a-bulb-syringe
- U.S. Consumer Product Safety Commission (CPSC). Safe Sleep for Babies — Inclined Sleep Product Recalls and Guidance. https://www.cpsc.gov/Safety-Education/Safety-Education-Centers/cribs
- Cincinnati Children’s Hospital. Helping Baby’s Congestion: Tips for Using Bulb Syringes. https://blog.cincinnatichildrens.org/healthy-living/helping-babys-congestion-tips-for-using-bulb-syringes/
This article is for informational purposes only and is not a substitute for professional medical advice. Infants are a medically vulnerable group — always consult your pediatrician before trying any home remedy, and seek immediate medical care if your baby shows any signs of breathing difficulty.

Disclaimer: This article is for informational purposes only and is not a substitute for professional medical advice. Most styes resolve on their own with home care, but persistent, worsening, or vision-affecting symptoms should be evaluated by an eye care professional promptly.
A stye rarely announces itself gently. One day your eyelid is fine, and the next it’s a tender, red, swollen bump that makes blinking uncomfortable and makes you self-conscious about how obvious it looks. Naturally, the first thing most people search for is whether to reach for something cold or something warm — and this is one of those topics where the internet gives conflicting, oversimplified answers depending on which article you land on.
Here’s the more accurate picture: this isn’t really an either-or question. Cold and warm compresses do genuinely different things to a stye, and which one is appropriate depends heavily on exactly where your stye is in its progression — a detail that most articles either skip entirely or mention only in passing. Getting the timing right can meaningfully speed up healing; getting it wrong can, in some cases, actually prolong your discomfort.
The Head-to-Head Comparison at a Glance
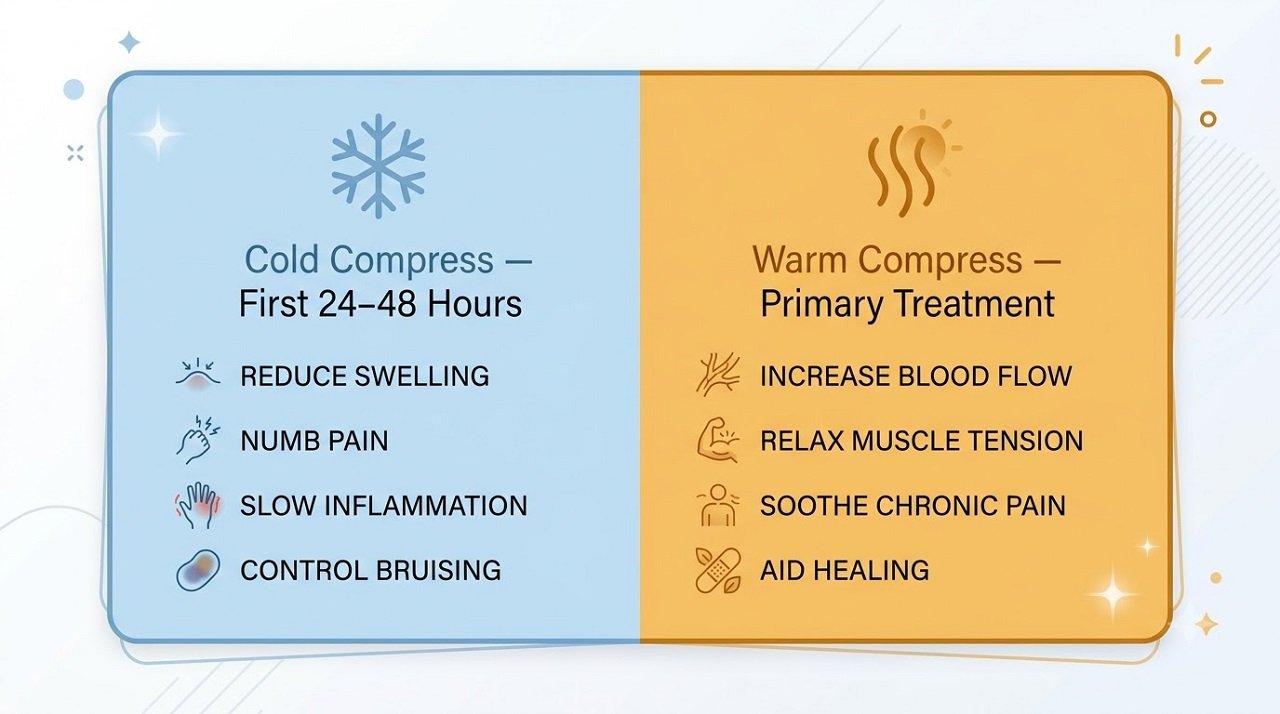
| Cold Compress | Warm Compress | |
|---|---|---|
| Primary mechanism | Constricts blood vessels, numbs nerve activity, reduces acute swelling | Dilates blood vessels, increases circulation, softens blocked gland material |
| Best stage of a stye | Very early — the first 24–48 hours, when it’s freshly red, swollen, and painful, before any visible pus point has formed | Once the stye has progressed — helps it come to a head and drain |
| What it does well | Reduces initial swelling and provides a numbing, pain-relieving sensation | Encourages the blocked gland to open and drain, which is what actually resolves a stye |
| What it doesn’t do | Does not help the stye drain — used alone for the full duration, it can potentially prolong healing | Not ideal in the first few hours of acute, sharp swelling, when it can feel uncomfortable rather than soothing |
| Recommended frequency | Short-term only — a few times during the first day or two | 4–5 times daily, 10–15 minutes each, for as long as the stye persists (usually 3–7 days) |
| Clinical consensus | Optional supporting step, not the primary treatment | The clearly preferred and most widely recommended treatment by ophthalmologists and major medical centers |
What a Stye Actually Is (And Why This Determines the Right Compress)
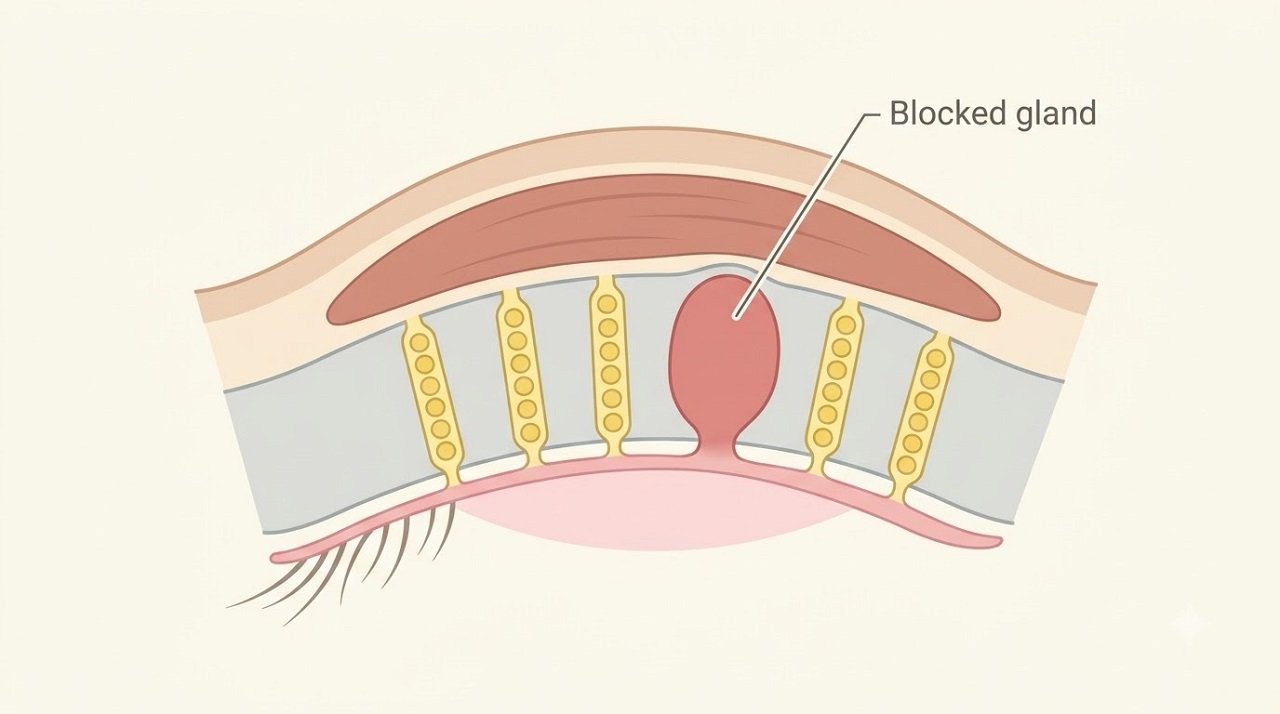
A stye (medically called a hordeolum) forms when a small gland along the eyelid — either an oil gland or a gland connected to an eyelash follicle — becomes blocked and infected, usually by bacteria commonly found on the skin. This creates a localized, walled-off pocket of inflammation and, eventually, pus, similar in principle to a pimple, just on a much more sensitive structure.
This is precisely why the compress choice matters and isn’t arbitrary: a stye needs to progress through drainage to actually resolve, and the two compress types push that process in different directions. Cold constricts and calms; warm dilates and encourages movement of fluid and blocked material. Applying the wrong one at the wrong stage doesn’t cause harm, but it can mean you’re working against the healing process rather than with it.
It’s also worth distinguishing a stye from a chalazion, a related but slightly different eyelid bump caused by a blocked oil gland that isn’t actively infected the way a stye is. Chalazions tend to be less painful and develop more gradually, sometimes over weeks rather than days. The good news is that the compress guidance is largely the same for both conditions — warm compresses are the primary recommended treatment for chalazions as well, for the same drainage-encouraging reason.
Cold Compress: What It Does and When It Actually Helps
The Mechanism
A cold compress works through vasoconstriction — it narrows blood vessels in the applied area, which reduces blood flow and, with it, some of the acute swelling and inflammation. Cold also has a numbing effect on local nerve endings, which is why it provides a genuinely soothing sensation when a stye first appears and feels sharply tender.
When Cold Actually Makes Sense
The window where a cold compress is genuinely useful is narrow but real: the first 24 to 48 hours after a stye appears, while it is freshly forming, visibly red, tender, and swollen, and before any white or yellow pus point has become visible. During this very early window, some eye care sources note that cold can help limit the initial swelling and ease the sharper, more acute discomfort that a fresh stye often brings.
Beyond this early window, cold compresses stop being the more useful tool. Because a stye needs to drain to resolve, and cold works by constricting blood flow and calming tissue activity rather than encouraging drainage, relying on cold compresses for the full duration of a stye can, in principle, work somewhat against the natural resolution process rather than supporting it.
How to Apply a Cold Compress Correctly
Wrap a few ice cubes or a cold gel pack in a clean, thin cloth — never apply ice directly to the skin, which can cause a cold burn. Hold it gently against the closed eyelid for 10–15 minutes. Because pressing anything against an already tender stye can be uncomfortable, use light pressure only, and stop if it becomes painful rather than soothing. Limit this to the first day or two of symptoms.
Warm Compress: The Treatment Every Major Eye Care Source Actually Recommends
The Mechanism
A warm compress works in essentially the opposite direction: it dilates blood vessels, increasing blood flow and circulation to the area. This improved circulation delivers more of the body’s own infection-fighting white blood cells to the site, and — critically for a stye specifically — the heat softens and loosens the thickened, blocked material inside the affected gland, along with any surrounding crust or debris, making it considerably easier for the stye to open and drain naturally.
Why This Is the Consensus Recommendation
This is where the clinical guidance across major eye care institutions is genuinely consistent, in contrast to how often compress advice for other conditions is debated. NYU Langone Health’s eye specialists specifically recommend warm compresses for stye management, applied four to five times daily, explaining that moist heat reduces inflammation and helps shrink the bump by encouraging it to rupture and drain naturally on its own. Cleveland Clinic’s guidance similarly centers on warm compresses as the primary home treatment. Optometrists interviewed on the topic have noted that the ideal warm compress temperature for eye conditions, including styes, is around 104°F (40°C) — warm enough to be genuinely effective without risking burns to the sensitive eyelid skin.
Importantly, the goal of a warm compress for a stye is to help it drain naturally on its own — never to squeeze or pop it yourself. Doing so can push infected material deeper into the surrounding tissue, potentially worsening the infection or causing scarring, which is precisely why patience combined with consistent warm compress application is the recommended approach rather than any form of manual extraction.
How to Apply a Warm Compress Correctly
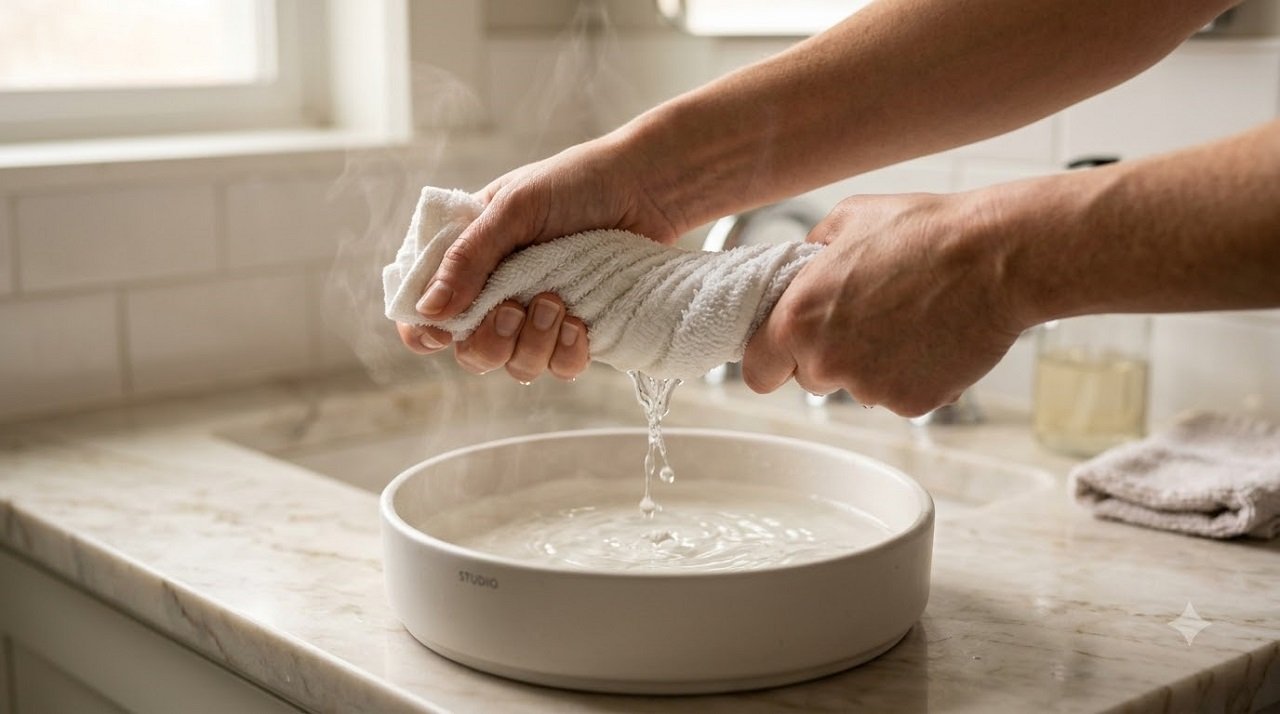
Soak a clean washcloth in comfortably warm — not hot — water, and wring out the excess so it’s damp rather than dripping. Test the temperature against the inside of your wrist first, since eyelid skin is thin and sensitive and burns more easily than you might expect. Close your eyes and hold the warm cloth gently against the affected eyelid for 10–15 minutes. Re-warm the cloth as it cools, since maintaining consistent warmth throughout the application matters more than a single brief moment of heat. Repeat this four to five times per day, and continue consistently for as long as the stye persists — typically 3 to 7 days with regular application, though it can occasionally take a bit longer.
If a washcloth feels difficult to keep at a consistent temperature, alternative warm compress methods people use include a warm, hard-boiled egg wrapped in a thin cloth, or a clean sock filled with dry rice and briefly microwaved, which both hold heat longer than a wet cloth alone.
The Hygiene Details That Matter More Than People Realize
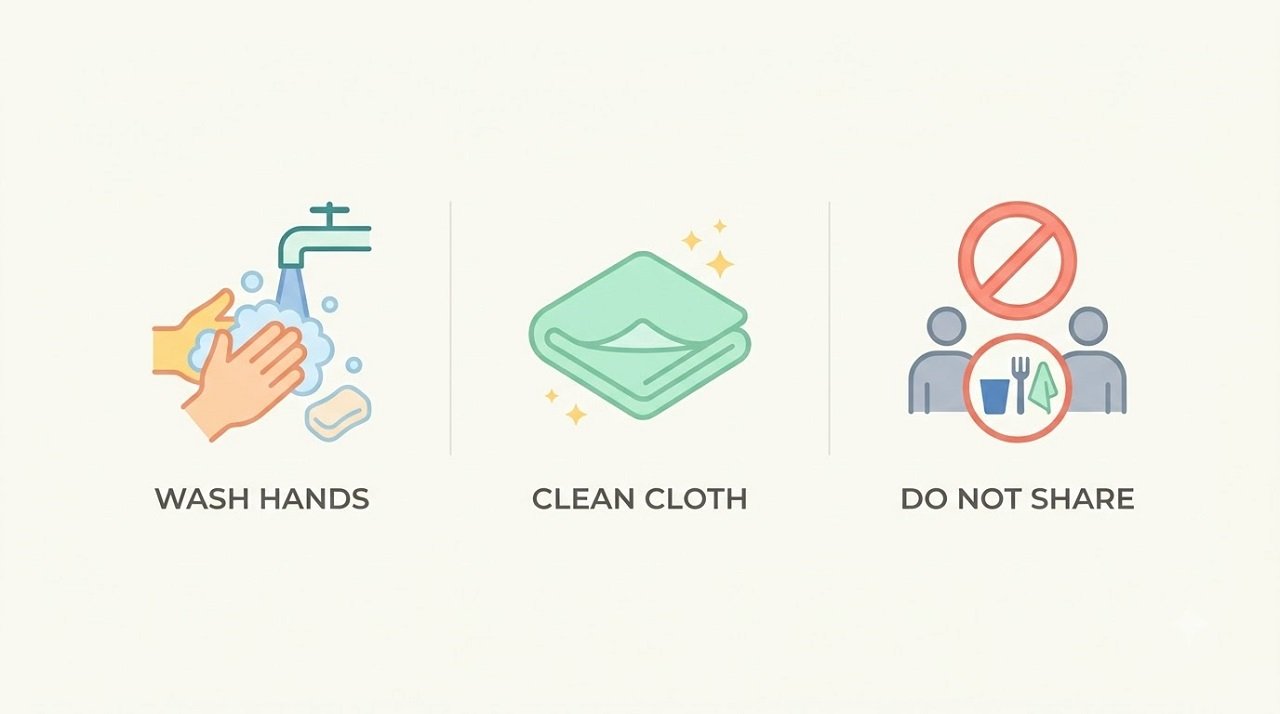
Because a stye is an active bacterial infection, hygiene during compress application isn’t just a generic footnote — it directly affects both how quickly you heal and whether you risk spreading the infection.
Always wash your hands thoroughly before touching your eye area or applying any compress. Use a clean cloth for every application rather than reusing a damp one throughout the day, since a used, moist cloth left sitting out is a reasonable environment for bacterial growth. If only one eye is affected, use a separate cloth for each eye, and avoid touching the unaffected eye with anything that has come into contact with the stye, since styes can spread from one eye to the other or to other people through shared towels, cloths, or direct contact. Avoid wearing eye makeup or contact lenses until the stye has fully resolved, since both can introduce additional bacteria or irritation to an area that’s already actively infected.
So Which One Should You Actually Use?
Given the mechanisms and the consensus among eye care sources, the practical answer is this: warm compress should be your primary treatment for the vast majority of a stye’s course. It’s the approach specifically recommended by ophthalmologists and eye specialists at institutions like NYU Langone and Cleveland Clinic, because it directly supports the drainage process that actually resolves a stye — something a cold compress, working through an opposite physiological mechanism, cannot meaningfully do.
Cold compress has a genuine but narrow supporting role, useful mainly in the very first day or two if the stye feels acutely sharp, swollen, and uncomfortable, and you want some initial relief before transitioning to warm compresses as your primary approach for the remainder of the healing period. Think of cold as an optional, short-term comfort measure at the very start, and warm as the actual workhorse treatment that carries you through to resolution.
If you’re ever unsure which stage your stye is in, or it isn’t clearly forming a visible point after several days of consistent warm compress use, that’s a reasonable point to check in with an eye doctor rather than continuing to guess at home.
When a Stye Needs More Than a Compress
Most styes resolve within about a week with consistent warm compress care and don’t require any further treatment. However, certain signs suggest it’s time to see an eye doctor rather than continuing home care alone.
See an eye care professional if the stye hasn’t improved after a week of consistent warm compress use, if the swelling spreads beyond the eyelid to affect the surrounding face or extends to the point where your entire eyelid becomes significantly swollen, if you experience changes in your vision, if the area becomes increasingly painful rather than improving, if you develop a fever, or if styes recur frequently, which can sometimes point to an underlying condition like blepharitis that benefits from a more structured, ongoing management approach. Also seek prompt care if you have any suspicion the redness and swelling might be spreading beyond the eyelid itself into the surrounding orbital tissue, as this can indicate a more serious infection requiring medical treatment rather than home care.
Frequently Asked Questions
Q: Can I use both a cold compress and a warm compress on the same stye?
Yes, and this is genuinely a reasonable approach in the first day or two — a brief cold compress for initial comfort and swelling reduction, followed by transitioning to warm compresses as your primary treatment for the remainder of the stye’s course. Just avoid relying on cold compresses as your only or main approach beyond the earliest stage, since warm compress is what actually supports drainage and resolution.
Q: How long should I do warm compresses for a stye before seeing a doctor?
Consistent warm compress application, four to five times daily for about a week, is the generally recommended trial period. If there’s no meaningful improvement after roughly 7 days, or if symptoms worsen at any point before that, it’s reasonable to see an eye doctor rather than continuing home treatment indefinitely.
Q: Is it safe to pop a stye myself once it forms a visible head?
No, this is genuinely not recommended. Squeezing or popping a stye yourself can push infected material deeper into the surrounding eyelid tissue, potentially worsening the infection or causing scarring. The goal of a warm compress is to encourage the stye to drain naturally on its own — let it happen on its own timeline rather than manually intervening.
Q: What temperature should a warm compress be for a stye?
Around 104°F (40°C) is the temperature range noted by eye care professionals as effective without risking burns to the thin, sensitive eyelid skin. A simple practical check is testing the cloth against the inside of your wrist before applying it to your eye — it should feel comfortably warm, never hot or uncomfortable.
Q: Can a cold compress make a stye worse?
Using a cold compress briefly in the very early stage is unlikely to cause harm. However, relying on cold compresses as your primary or only treatment throughout the full course of a stye works against the drainage process that actually resolves it, since cold constricts blood flow and calms tissue activity rather than encouraging the blocked gland to open and drain.
Q: Is a chalazion treated the same way as a stye?
Largely yes — warm compresses are the primary recommended home treatment for both conditions, since both benefit from the drainage-encouraging effect of heat on a blocked gland. The main difference is that a chalazion typically develops more gradually and is less acutely painful than a stye, since it isn’t actively infected in the same way, but the compress approach remains essentially the same for both.
Scientific References
- Willmann D, Melanson SW, Grossman ME. Hordeolum (Stye). StatPearls, National Library of Medicine (NIH). Updated 2024. https://www.ncbi.nlm.nih.gov/books/NBK459349/
- Lindsley K, Nichols JJ, Dickersin K. Interventions for acute internal hordeolum. Cochrane Database of Systematic Reviews. 2013. https://pubmed.ncbi.nlm.nih.gov/23633349/
- Wladis EJ, Aakalu VK, Foster JA, et al. Interventions for Hordeolum: A Report by the American Academy of Ophthalmology. Ophthalmology. 2022. https://pubmed.ncbi.nlm.nih.gov/35577547/
- Blackie CA, Solomon JD, Greiner JV, Holmes M, Korb DR. Inner eyelid surface temperature as a function of warm compress methodology. Optometry and Vision Science. 2008. https://pubmed.ncbi.nlm.nih.gov/18594349/
- Goto E, Endo K, Suzuki A, Fujikura Y, Matsumoto Y, Tsubota K. Improvement of tear stability following warm compression in patients with meibomian gland dysfunction. Advances in Experimental Medicine and Biology. 2002. https://pubmed.ncbi.nlm.nih.gov/12137957/
- Jordan GA, Beier K. Chalazion. StatPearls, National Library of Medicine (NIH). Updated 2024. https://www.ncbi.nlm.nih.gov/books/NBK499889/
- NYU Langone Health. Home Treatment for Stye. https://nyulangone.org/conditions/stye/treatments/home-treatment-for-stye
- Cleveland Clinic. 6 Ways To Get Rid of a Stye. https://health.clevelandclinic.org/how-to-get-rid-of-a-stye
A note on evidence quality: It’s worth being transparent here — two separate Cochrane systematic reviews (2013, reaffirmed 2017) looked specifically for randomized controlled trials on non-surgical hordeolum (stye) treatment and found none of sufficient quality to draw firm conclusions from. This means warm compress recommendations rest on physiological rationale, expert clinical consensus, and related evidence from meibomian gland studies (referenced above) rather than a large stye-specific RCT base. This doesn’t undermine the recommendation — it remains the universal first-line advice from ophthalmology bodies including the American Academy of Ophthalmology — but it is a more accurate representation of the evidence than implying a large body of stye-specific trials exists.
This article is for informational purposes only and is not a substitute for professional medical advice. Most styes resolve on their own with home care, but persistent, worsening, or vision-affecting symptoms should be evaluated by an eye care professional promptly.

Disclaimer: This article is for informational purposes only and is not a substitute for professional medical advice. Most sore throats are viral and resolve on their own, but persistent, severe, or worsening symptoms should be evaluated by a healthcare provider.
That scratchy, raw feeling every time you swallow sends most people straight to the kitchen cupboard. And once you start searching for relief, you’ll find two remedies recommended everywhere: a warm salt water gargle, and apple cider vinegar diluted in water. Both are cheap, both are already in your kitchen, and both are described online with almost identical confidence.
But when you actually compare the evidence behind each one, the picture looks quite different than the “try either, they both work” framing that most articles settle for. One of these remedies has been tested in actual randomized controlled trials involving hundreds of participants, with a specific, measurable outcome. The other is supported almost entirely by anecdote and a plausible-sounding mechanism that hasn’t been directly tested for sore throat relief. Knowing which is which changes how you should actually use them — and this comparison lays that out clearly, remedy by remedy, rather than presenting them as interchangeable options.
The Head-to-Head Comparison at a Glance
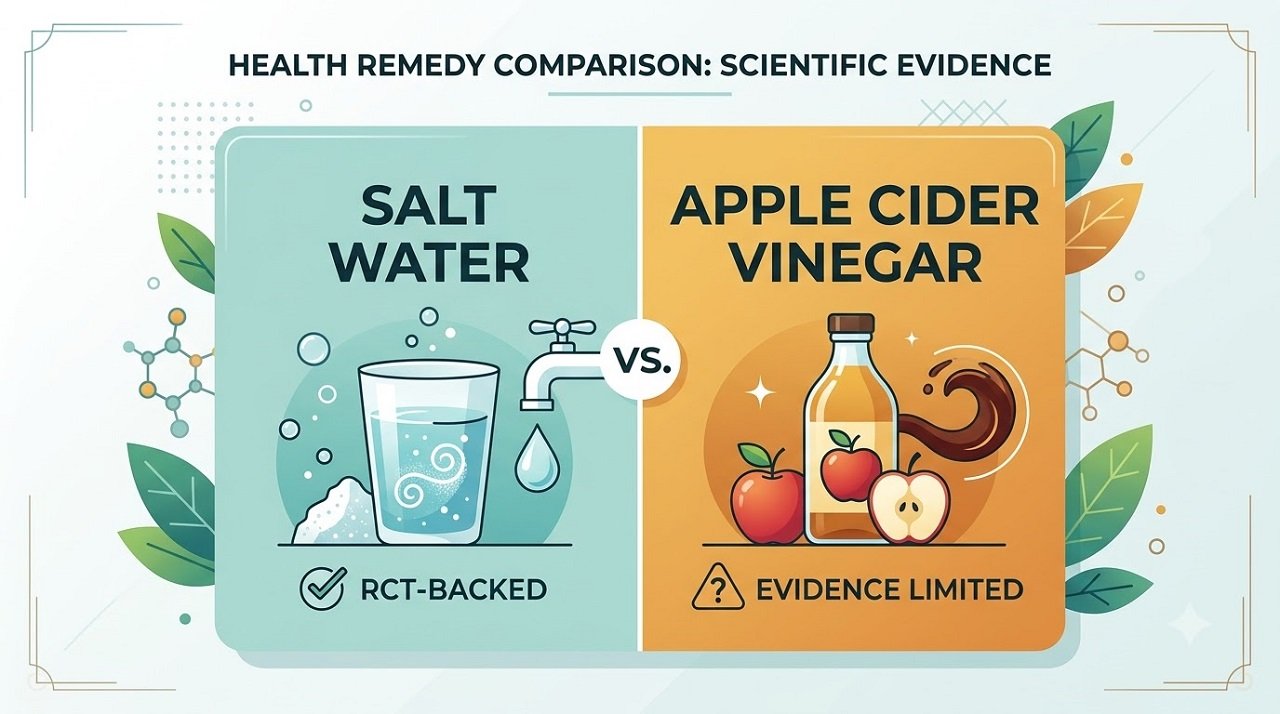
| Salt Water Gargle | Apple Cider Vinegar Gargle | |
|---|---|---|
| Primary mechanism | Osmotic — draws fluid out of inflamed tissue, physically dilutes mucus and irritants | Acidic — theorized antibacterial effect from low pH |
| Clinical evidence for sore throat/URTI | Multiple RCTs, including a 387-person trial showing a 36% reduction in infection incidence | No direct RCTs on sore throat symptom relief found in the literature; evidence is anecdotal |
| Cost and accessibility | Salt and water — essentially free | Apple cider vinegar bottle — low cost, already common in most kitchens |
| Risk profile | Very low; safe for nearly everyone including most children old enough to gargle safely | Meaningful risk of dental enamel erosion and throat irritation with frequent or undiluted use |
| Taste tolerability | Neutral, easy to tolerate repeatedly through the day | Sharp, sour taste that many people find difficult to repeat multiple times daily |
| Best used for | Both symptom relief and genuine infection-risk reduction | Occasional symptom relief only, used cautiously and diluted |
Salt Water Gargle: What It Does and Why It Actually Works
The Mechanism
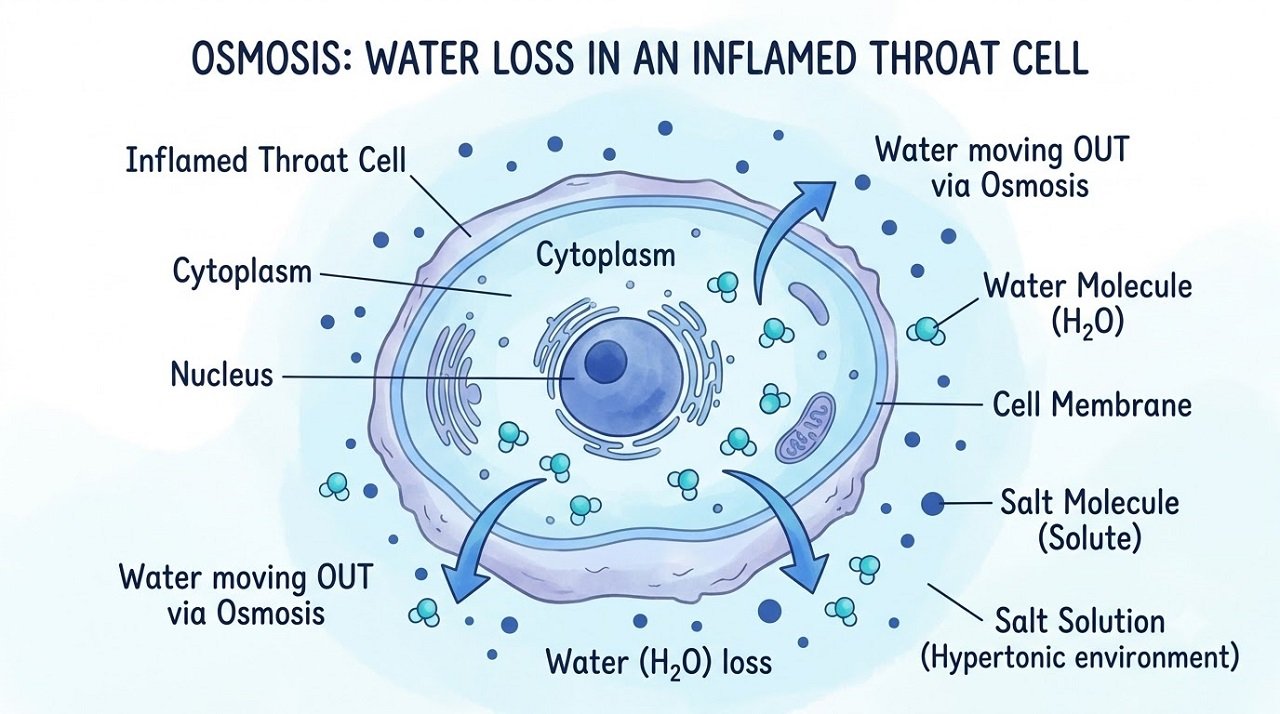
Salt water works through a straightforward and well-understood physical process called osmosis. Your inflamed throat tissue is swollen with excess fluid, which is part of what creates that raw, painful sensation. A properly concentrated salt water solution has a higher salt concentration than the fluid inside your throat cells, so through osmosis, water is drawn out of the swollen tissue and into the salt solution, temporarily reducing swelling and easing discomfort. This same mechanism is why salt water gargles are also standard post-operative advice from oral surgeons and dentists after procedures like tooth extractions — it genuinely helps tissue heal by reducing local swelling and rinsing away debris.
Beyond the swelling-reduction effect, gargling itself — regardless of what specific solution is used — physically loosens and washes away mucus, irritants, and some of the pathogen load sitting in your throat, which is part of why even plain water gargling has shown a measurable benefit, as covered below.
The Actual Clinical Evidence
This is where salt water gargling separates itself clearly from most other home sore throat remedies: it has been tested in real randomized controlled trials, not just recommended based on plausible mechanism.
A landmark study published in the American Journal of Preventive Medicine, a randomized controlled trial involving 387 healthy adults followed over 60 days during cold and flu season, found that regular water gargling reduced the incidence of upper respiratory tract infections by 36% compared to a non-gargling control group. This is a genuinely significant finding — it means gargling didn’t just make an existing sore throat feel more comfortable, it measurably reduced how often participants got sick with an upper respiratory infection in the first place. A follow-up cost-effectiveness analysis of the same trial data found gargling to be a genuinely economical public health intervention given how inexpensive it is relative to its measured effect.
More recent research during the COVID-19 pandemic reinforced this pattern specifically with saline (salt water) rather than plain water. A double-blind randomised trial published via the Journal of Global Health compared low-concentration and high-concentration saline gargling and nasal rinsing regimens in people who had tested positive for SARS-CoV-2, finding both associated with reduced symptom duration. This built on earlier trials showing that hypertonic saline gargling and nasal irrigation had antiviral and anti-inflammatory effects at the epithelial cell level.
Taken together, this is a considerably stronger evidence base than exists for almost any other single home remedy for sore throat and respiratory infection — including apple cider vinegar, as the next section makes clear.
How to Do It Correctly
Dissolve half a teaspoon of table salt into one cup (240ml) of warm — not hot — water and stir until fully dissolved. Take a mouthful, tilt your head slightly back, and gargle for 15–30 seconds, letting the solution reach the back of your throat, then spit it out. Do not swallow the solution. Repeat every 2–3 hours as needed, or roughly 3–4 times per day, while symptoms persist.
A pinch of baking soda can be added to the same solution; baking soda is mildly alkaline and may help further loosen mucus and create an even less hospitable environment for some bacteria, complementing salt’s osmotic effect.
Apple Cider Vinegar Gargle: What the Evidence Actually Shows
The Proposed Mechanism
Apple cider vinegar’s popularity as a sore throat remedy rests on a genuinely plausible-sounding chemical argument: it is acidic, with a pH typically around 4.5–5 when diluted (undiluted ACV sits closer to pH 2–3), and many bacteria and some viruses do struggle to survive in a sufficiently acidic environment. Proponents point to ACV’s documented general antibacterial properties — it has been studied for uses like reducing certain bacterial counts on surfaces and in some food-safety contexts — and extend that reasoning to suggest gargling it could reduce throat pathogen load in a similar way.
The Actual Clinical Evidence — Or Rather, the Lack of It
This is the central finding of this comparison, and it’s one that almost no article covering ACV for sore throat states plainly: there is no direct randomized controlled trial evidence demonstrating that gargling apple cider vinegar reduces sore throat symptoms, duration, or infection risk. Reviewing the available literature, ACV’s antibacterial properties have been studied in laboratory and food-safety contexts, but that laboratory-level antibacterial activity has not been specifically tested as a gargling intervention for human sore throat relief in a controlled trial the way salt water gargling and even plain water gargling have been.
What exists instead is a large volume of anecdotal reporting — social media testimonials, personal blog accounts, and word-of-mouth recommendations — describing individual experiences of relief. This doesn’t mean ACV provides zero benefit; a warm liquid of almost any kind provides some soothing sensation simply through temperature and the physical act of swallowing or gargling, and it’s entirely possible some individuals do experience symptom improvement. But the confident claims made across many wellness articles and social platforms meaningfully outpace what has actually been demonstrated in controlled research, and a fair comparison has to state that plainly rather than implying ACV sits on equal clinical footing with salt water.
The Risk That Almost Never Gets Proper Attention: Dental Enamel Erosion
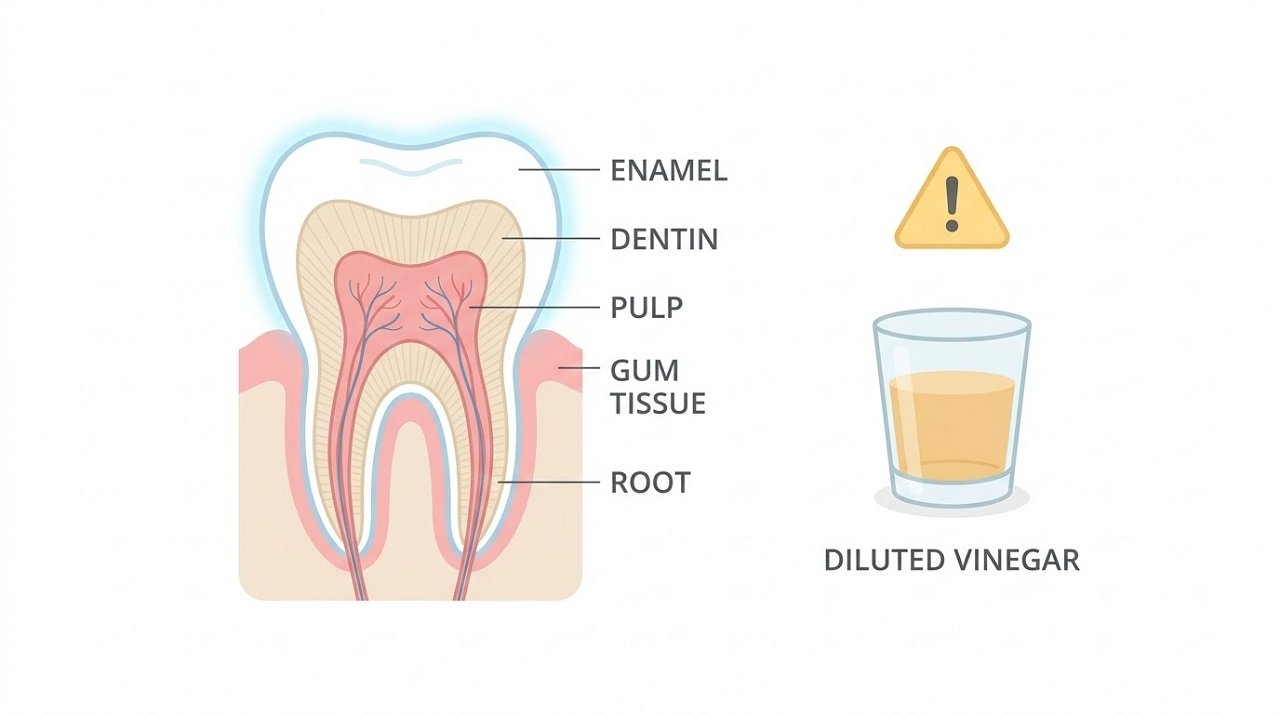
This is a genuinely important safety point that most articles bury in a single vague sentence or skip entirely. Apple cider vinegar is acidic enough that regular or undiluted contact with your teeth can erode tooth enamel over time — this is well-documented in dental research on acidic beverage consumption generally, and vinegar specifically has one of the lower (more acidic) pH levels among commonly consumed acidic liquids.
If you choose to try an ACV gargle, always dilute it substantially (roughly 1 teaspoon of ACV to 8 ounces of warm water, never used undiluted), avoid swishing it directly against your teeth for extended periods, rinse your mouth with plain water immediately afterward, and — importantly — wait at least 30–60 minutes before brushing your teeth, since brushing immediately after acid exposure can be more abrasive to enamel that has been temporarily softened by the acid. This is genuinely practical advice that dental professionals give for any acidic food or drink, and it applies directly here.
How to Do It, If You Choose To
Mix 1 to 2 teaspoons of apple cider vinegar into 8 ounces of warm water, optionally adding a teaspoon of honey for taste and its own mild soothing, antimicrobial properties. Gargle for 20–30 seconds, then spit out — do not swallow the gargle solution regularly, as frequent swallowing of diluted vinegar can affect tooth enamel from the inside as well and may irritate the digestive tract in sensitive individuals. Limit use to two to three times daily rather than gargling continuously throughout the day.
So Which One Should You Actually Use?

Given the meaningfully different evidence bases, the honest, evidence-led recommendation is this: salt water gargling should be your primary, default approach, precisely because it has genuine randomized controlled trial support for both symptom relief and, notably, for reducing how often you get sick in the first place — a benefit that goes well beyond simple comfort. It’s also essentially free, has a very low risk profile suitable for nearly everyone, and is easy to repeat multiple times throughout the day without the taste fatigue or enamel concerns that come with vinegar.
Apple cider vinegar is not unreasonable to try as a secondary or occasional option if you find the taste or sensation genuinely more soothing to you personally, or if you enjoy combining it with honey and warm water as a comforting drink rather than a gargle. But it should not be relied upon as your primary strategy in place of salt water, given the current lack of direct clinical evidence behind it, and it does require more careful handling — proper dilution, moderate frequency, and a delayed tooth-brushing window — to avoid the genuine enamel-erosion risk that comes with its acidity.
Many people also find real relief in combining approaches through the day: salt water gargle as the primary, frequent intervention, alongside a warm honey-lemon drink or an occasional diluted ACV-honey mixture for variety and personal comfort. There’s nothing wrong with this combined approach, provided the frequency and dilution guidance above is followed for the vinegar component specifically.
When a Sore Throat Needs More Than a Gargle
Most sore throats are caused by viruses and resolve within about a week regardless of which gargle you use — gargling primarily improves comfort and, in the specific case of salt water, appears to genuinely reduce overall infection frequency and duration rather than functioning as a cure for an already-established infection.
See a doctor if your sore throat is accompanied by a fever above 101°F (38.3°C), if you have significant difficulty swallowing or breathing, if you notice white patches or pus on your tonsils, if swollen lymph nodes in your neck are pronounced and tender, if the sore throat lasts longer than a week without improvement, or if you were recently exposed to someone with confirmed strep throat. Strep throat, caused by bacteria rather than a virus, requires antibiotic treatment and will not resolve with gargling alone — no home remedy, however well-supported, substitutes for that diagnosis and treatment when it’s genuinely a bacterial infection.
Frequently Asked Questions
Q: Is apple cider vinegar bad for your throat if you gargle it too often?
Yes, potentially. Frequent, undiluted, or prolonged ACV gargling can irritate the already-sensitive throat tissue you’re trying to soothe, in addition to the dental enamel erosion risk. Limiting use to two or three times daily, always properly diluted, reduces this risk considerably.
Q: Does salt water gargling actually kill the virus causing my sore throat?
Not directly in the way an antiviral medication would. Its primary mechanism is osmotic — reducing tissue swelling and physically washing away some viral and bacterial load along with mucus and irritants. That said, the clinical trial data showing reduced upper respiratory infection incidence with regular gargling suggests a genuine, measurable protective effect, even if the precise mechanism for that broader benefit isn’t limited to simple osmosis alone.
Q: Can I use apple cider vinegar and salt water together in the same gargle?
Yes, some people combine a small amount of ACV with a standard salt water solution. This doesn’t have direct clinical trial support as a combined formula specifically, but it isn’t unsafe provided the vinegar portion remains well diluted and the combination isn’t used excessively throughout the day.
Q: How many times a day should I gargle salt water for a sore throat?
Every 2–3 hours as needed is a reasonable, well-tolerated frequency, roughly 3–4 times daily. Salt water’s low risk profile means it can be used more liberally than an acidic gargle like ACV without the same concerns about tissue or enamel irritation.
Q: Is warm salt water better than cold salt water for gargling?
Warm water is generally recommended and more comfortable, as it helps relax throat muscles and may enhance the soothing sensation, though the core osmotic mechanism relies on the salt concentration rather than water temperature specifically. Avoid water that’s uncomfortably hot, which can further irritate already-inflamed tissue.
Scientific References
- Satomura K, et al. Prevention of Upper Respiratory Tract Infections by Gargling: A Randomized Trial. American Journal of Preventive Medicine. 2005. https://www.sciencedirect.com/science/article/abs/pii/S0749379705002588
- Satomura K, et al. Cost-effectiveness of gargling for the prevention of upper respiratory tract infections. BMC Health Services Research (economic evaluation of the above RCT). https://www.ncbi.nlm.nih.gov/pmc/articles/PMC2651874/
- Double-blind randomised trial of saline solution for gargling and nasal rinsing in SARS-CoV-2 infection. Journal of Global Health. 2024. https://jogh.org/2024/jogh-14-05044
- A pilot, open labelled, randomised controlled trial of hypertonic saline nasal irrigation and gargling for the common cold. Scientific Reports. 2019. https://www.nature.com/articles/s41598-018-37703-3
- Cleveland Clinic. Best Sore Throat Remedies for Fast Recovery. https://health.clevelandclinic.org/sore-throat-remedies-that-actually-work
- Healthline. Apple Cider Vinegar for a Sore Throat — evidence review. https://www.healthline.com/health/apple-cider-vinegar-for-a-sore-throat
This article is for informational purposes only and is not a substitute for professional medical advice. Most sore throats are viral and resolve on their own, but persistent, severe, or worsening symptoms should be evaluated by a healthcare provider.


From Leaky Gut to Resilience: The Beta Glucan Breakthrough

Chamomile Tea for Sleep: How Much to Drink (And When)

Instant Relief for Trapped Gas Pain: Why Direction Matters More Than the Pose

PEMF Webinar

Why You Can’t Trust Big Pharma

The Anti-Cancer Body with Dr. Michael Karlfeldt
-
 Events2 months ago
PEMF Webinar
-
 Events3 months ago
Why You Can’t Trust Big Pharma
-
 Events4 months ago
The Anti-Cancer Body with Dr. Michael Karlfeldt
-

 Events3 months ago
The Cancer Conversation Your Oncologist Cannot Have in 15 Minutes
-

 Natural Sleep Remedies4 months ago
The 4-7-8 Breathing Technique: Step-by-Step Guide and What the Research Actually Shows
-

 Events5 months ago
Beyond the Brain
-

 Events4 weeks ago
HBOT ( Hyperbaric Oxygen Therapy ) Webinar
-

 Gut Health3 months ago
Unlock Incredible Gut Health Hacks and Transform Your Well-being Today!