
Gut Health
Bone Broth Recipe for Leaky Gut: What It Can (and Can’t) Do for Your Gut

The content on this website – including articles, event announcements, personal experiences, and recommendations – is for informational and educational purposes only and is not medical advice. Always consult a qualified healthcare professional before making any changes to your diet, exercise, supplements, sleep habits, or wellness routines, especially if you are pregnant, nursing, on medication, or have any medical condition.
Disclaimer: This article provides general educational information and is not a substitute for medical advice. “Leaky gut” (increased intestinal permeability) is not a diagnosis you can treat with a recipe. If you have ongoing digestive symptoms, see a doctor. Check with a healthcare professional before using bone broth regularly if you are pregnant, have a kidney condition, are on a sodium-restricted diet, have histamine sensitivity, or are feeding it to a child.
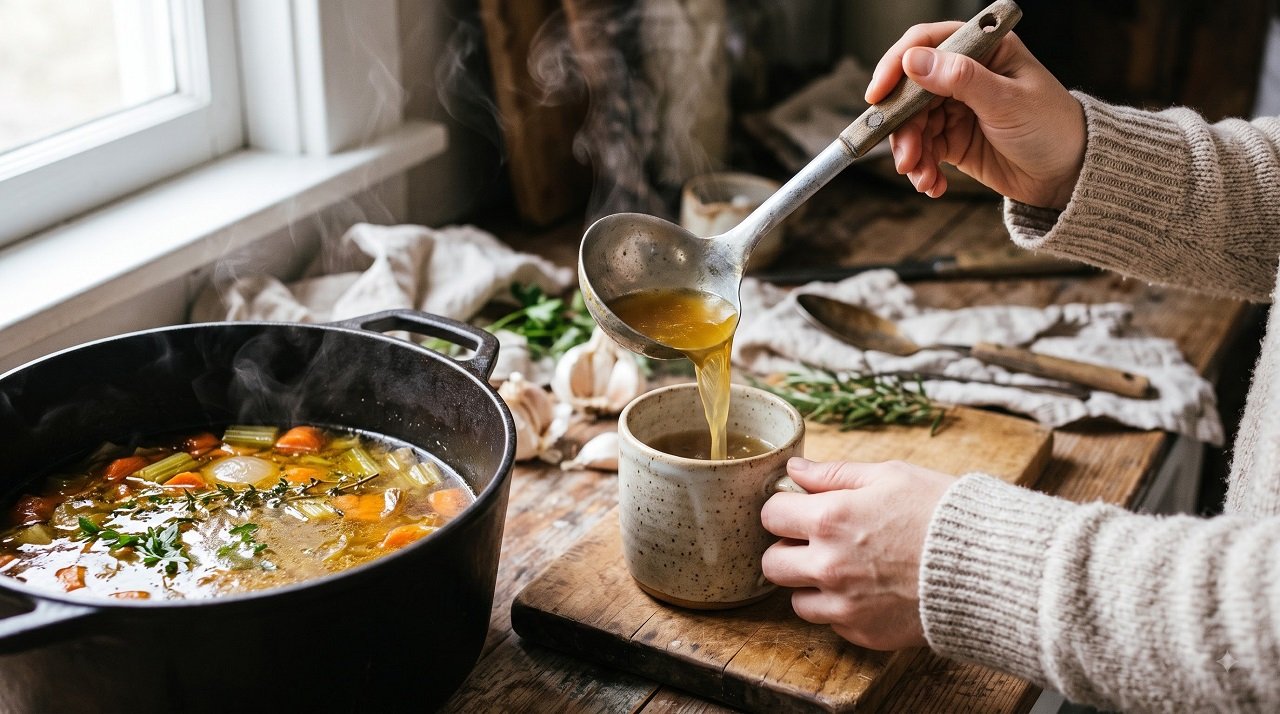
A good bone broth recipe for leaky gut is a gentle, long-simmered broth made from bones, water and mild vegetables, with no onion or garlic if those upset you. It’s a nourishing food that may support your gut, but there’s no proof it “heals” leaky gut. Here is the recipe, and the honest version of the evidence that most recipe posts skip.
First, What “Leaky Gut” Actually Means

Your intestinal lining is a barrier. It lets nutrients through and keeps bacteria and larger particles out. “Increased intestinal permeability,” the scientific term for leaky gut, means that barrier is less tight than it should be. Researchers can measure it, and it shows up alongside several conditions.
What it is not is a standalone medical diagnosis with a proven home treatment. That’s why a recipe can’t “cure” it, and why any post promising a bone broth fix deserves some skepticism.
What the Evidence Says About Bone Broth
Here is where things stand:
- Why people believe it works: bone broth contains amino acids, especially glutamine and glycine, plus minerals. A 2025 review in Digestive Diseases and Sciences concluded that these components may support the gut barrier, reduce inflammation in the intestinal lining and help nutrient absorption, with particular interest in inflammatory bowel disease. The authors used careful wording (“may,” “possibly”) and called for more research.
- What’s missing: that review looked at animal and human work on these nutrients. It doesn’t show that drinking homemade broth heals leaky gut in people. Registered dietitian Kate Scarlata told Today’s Dietitian, “I have not seen any research to support the use of bone broth for gut health.”
- Nutrition varies a lot: there’s no standard USDA entry for bone broth. Homemade chicken stock was listed at about 6 g of protein per cup and a commercial chicken bone broth at about 9 g per cup. Your pot won’t match anyone else’s.
Bottom line: bone broth is a warm, easy-to-digest, protein-containing food that many people tolerate well when their gut is irritated. Treat it as a supportive food, not a treatment.
The Recipe: Simple Gut-Friendly Bone Broth

Makes: about 2.5 to 3 litres (10 to 12 cups) | Active time: 15 minutes
Ingredients
- 1 to 1.5 kg (2 to 3 lb) bones: chicken carcasses, wings or feet, or beef and marrow bones
- 3 to 4 litres (12 to 16 cups) cold water, enough to cover
- 2 carrots, roughly chopped
- 2 celery stalks, roughly chopped
- A thumb of fresh ginger, sliced (optional, for a soothing note)
- A few sprigs of parsley and 1 bay leaf
- 1 teaspoon salt, to taste at the end instead if you’re watching sodium
- Skip onion and garlic if you’re sensitive to them: both are high in fermentable carbohydrates (FODMAPs) that can trigger bloating in some people
Method
- Optional roast: for deeper flavour, roast the bones at 200°C (400°F) for 30 minutes. Skip this for a lighter, more neutral broth.
- Start cold: put the bones in a large pot, cover with cold water and bring slowly to a gentle boil.
- Skim: remove the foam that rises in the first 20 minutes.
- Simmer low: add the vegetables, ginger and herbs. Keep it at a gentle simmer, not a hard boil. Chicken bones need roughly 6 to 12 hours, beef bones 12 to 24 hours. A slow cooker on low works, and a pressure cooker can do it in about 2 hours.
- Strain: pour through a fine sieve and discard the solids.
- Cool fast: divide into shallow containers so it cools quickly, then refrigerate. It should set to a jelly when cold, which is normal and a sign of gelatin.
- Skim the fat from the top once it’s chilled.
Storage: refrigerate within 2 hours of cooking and use within 3 to 4 days, or freeze in portions for several months. Reheat until steaming hot.
How Much, and How to Start
There’s no official dose. A cup (about 240 ml) a day is a sensible starting point for most healthy adults. Scarlata also cautions that drinking it several times a day is probably unnecessary and “may be risky, especially in kids.” Start with half a cup and see how you feel.
Things Most Recipes Don’t Mention
- Lead: a 2013 Medical Hypotheses study noted that bones can absorb heavy metals, so bone broth may carry a risk of lead contamination. The authors advise caution, especially for children. Using bones from well-sourced animals and not drinking large amounts daily are sensible precautions.
- Sodium: commercial broths vary widely, and even homemade stock carries some salt. Choose low-sodium products and salt your own at the end.
- Histamine: long-simmered broths may be high in histamine, which can bother people with histamine sensitivity. If you get flushing, headaches or hives after broth, a shorter simmer or skipping it is worth trying.
- Not a replacement for care: broth does not replace treatment for IBD, celiac disease or other gut conditions.
When to See a Doctor
See a doctor if you have persistent diarrhea or constipation, bloating that doesn’t settle, blood in your stool, unintended weight loss, ongoing abdominal pain, or symptoms that interrupt daily life. These can have causes that need proper testing, not home remedies.
Frequently Asked Questions
Does bone broth heal leaky gut?
There is no solid human evidence that it does. Bone broth contains amino acids like glutamine and glycine that are being studied for gut barrier support, but researchers say more studies are needed.
How long should bone broth simmer?
Roughly 6 to 12 hours for chicken bones and 12 to 24 hours for beef bones on the stovetop. A pressure cooker can do it in about 2 hours.
How much bone broth should I drink a day?
There’s no official dose. Around one cup a day is a reasonable starting point for most healthy adults; start with half a cup and avoid large daily amounts, especially for children.
Is bone broth safe for everyone?
Not necessarily. Be cautious if you’re pregnant, have kidney disease, follow a low-sodium diet, are sensitive to histamine, or are giving it to a child. Check with your doctor first.
Can bone broth make bloating worse?
It can, particularly if you add onion or garlic (high-FODMAP) or if you’re sensitive to histamine. Try a plain version with just carrots, celery, ginger and herbs.
Sources Referenced in This Article
- Bone Broth Benefits: How Its Nutrients Fortify Gut Barrier in Health and Disease. Digestive Diseases and Sciences, 2025 (PubMed)
- Today’s Dietitian: Ask the Expert: What’s the Deal With Bone Broth?
- The Leaky Gut: Mechanisms, Measurement and Clinical Implications in Humans (PMC)
- Leaky Gut Syndrome: Myths and Management (PMC)










Disclaimer: This article provides general educational information and is not a substitute for medical advice. Ginger can interact with blood thinners and other medications — check with your doctor if you take medication regularly or are pregnant.
Most ginger tea recipes give you one method regardless of what you’re trying to fix. Here’s the detail that actually matters: fresh ginger and long-simmered or dried ginger aren’t chemically the same thing, and which one you use changes what the tea actually does for you.
The Compound Science, Briefly
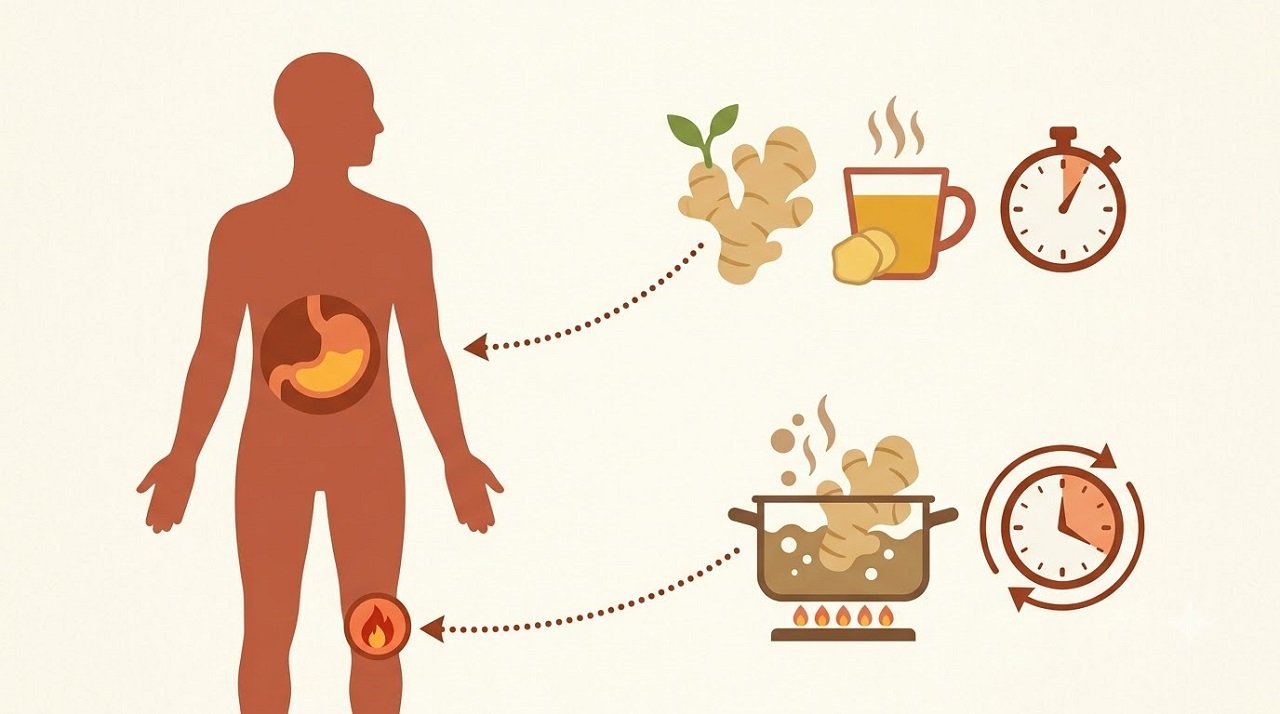
Fresh ginger is dominant in gingerols — the compounds better studied specifically for nausea relief and supporting gastric motility (how efficiently your stomach empties). When ginger is heated for an extended time or dried, gingerols convert into shogaols, which are more potent for anti-inflammatory activity but are less studied for the direct digestive and anti-nausea benefit gingerols are known for.
What this means practically: if bloating and sluggish digestion are your main concern, fresh, lightly-steeped ginger is the better-targeted choice. If general inflammation is more your concern, a longer-simmered or dried-ginger tea shifts the compound profile in that direction instead. Most recipes don’t make this distinction — they just say “steep ginger” without specifying which outcome that preparation actually favors.
The Recipe: Fresh Ginger Tea for Digestion
Ingredients:
- 1-inch piece of fresh ginger root
- 2 cups water
- Optional: a squeeze of lemon, a small amount of honey
Instructions:
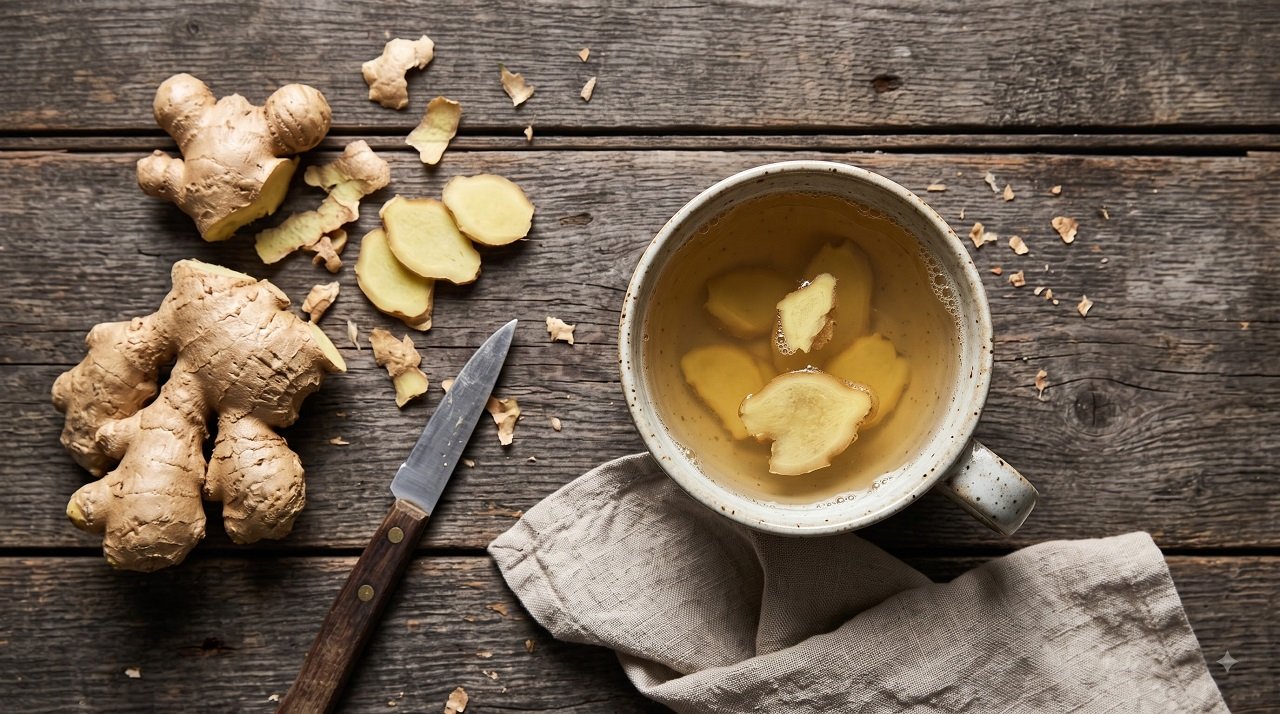
- Peel and thinly slice the fresh ginger (thin slices expose more surface area, extracting more of the gingerol content into the water without needing prolonged heat).
- Bring water to a boil, then remove from heat.
- Add the ginger slices and steep for 5-10 minutes — this shorter steep time is intentional, since a brief steep in hot-but-not-actively-boiling water extracts gingerols effectively without pushing the extended, high-heat conversion toward shogaols.
- Strain, add lemon or honey if desired, and drink warm.
When to drink it: ideally 20-30 minutes before a meal you expect to be heavy or gas-producing, or after eating if bloating has already started — either timing has reasonable support, since gingerols support gastric emptying either way.
If You Want More Anti-Inflammatory Effect Instead
If general inflammation (rather than acute bloating) is your goal, simmer the same ginger slices gently for 15-20 minutes instead of a short steep — the extended heat exposure shifts more of the gingerol content toward shogaols, which are the more potent anti-inflammatory compound. This is a genuinely different tea for a genuinely different purpose, not just a stronger version of the same thing.
A Dose Caution Worth Repeating
More isn’t automatically better — more than about 4 grams of ginger daily has been associated with worsened heartburn and nausea in some people, particularly on an empty stomach. One to two cups of freshly-steeped tea daily is a reasonable, moderate amount for most people; if you notice any burning or worsened nausea, scale back.
When Ginger Tea Isn’t Enough
Ginger tea supports mild, occasional digestive discomfort — it’s not a treatment for a diagnosed digestive condition. See a doctor if bloating and digestive discomfort are frequent, worsening, or accompanied by unintended weight loss, blood in your stool, or severe pain.
Frequently Asked Questions
Does ginger tea help with bloating?
Yes, particularly fresh, lightly-steeped ginger tea — gingerols support gastric motility, which can help move things along and ease the feeling of fullness and bloating.
Is fresh or dried ginger better for digestion?
Fresh ginger, briefly steeped, is better targeted for digestion and nausea specifically, since it’s gingerol-dominant. Dried or long-simmered ginger shifts toward shogaols, which are better for general anti-inflammatory effect rather than direct digestive support.
How long should I steep ginger tea?
For digestive/bloating relief specifically: 5-10 minutes in hot, not actively boiling, water. For a more anti-inflammatory-focused tea: a gentler 15-20 minute simmer.
Can I drink ginger tea every day?
Generally yes, in moderate amounts (1-2 cups) — but more than about 4g of ginger daily has been linked to worsened heartburn and nausea in sensitive people, so more isn’t automatically better.
Sources Referenced in This Article
- ScienceDirect — Conversion of Gingerols to Shogaols in Ginger by Puffing
- Food Engineering Progress — Physicochemical Properties of Repetitive Heat-Treated Ginger and Its Quantitative Conversion of Gingerol to Shogaol
- QueenBee — Gingerol vs. Shogaol: Understanding Ginger’s Active Compounds
- Acibadem Hospitals Group — Ginger Tea and Stomach Acid: What the Evidence Shows
Disclaimer: This article provides general educational information about home fermentation and is not a substitute for food safety guidance from a qualified source. If a ferment develops fuzzy, colored growth (mold) or a putrid smell, discard the entire batch — don’t attempt to salvage it.
Most sauerkraut recipes tell you to add “a few tablespoons of salt” — which sounds simple, but salt measured by volume varies significantly depending on the type (fine table salt packs differently than flaky sea salt), which is a real reason home ferments sometimes fail or turn unsafe. Food scientists and fermentation guides consistently recommend measuring salt by weight, as a percentage of your cabbage, not by spoonfuls.
The Actual Ratio: 2% Salt by Weight
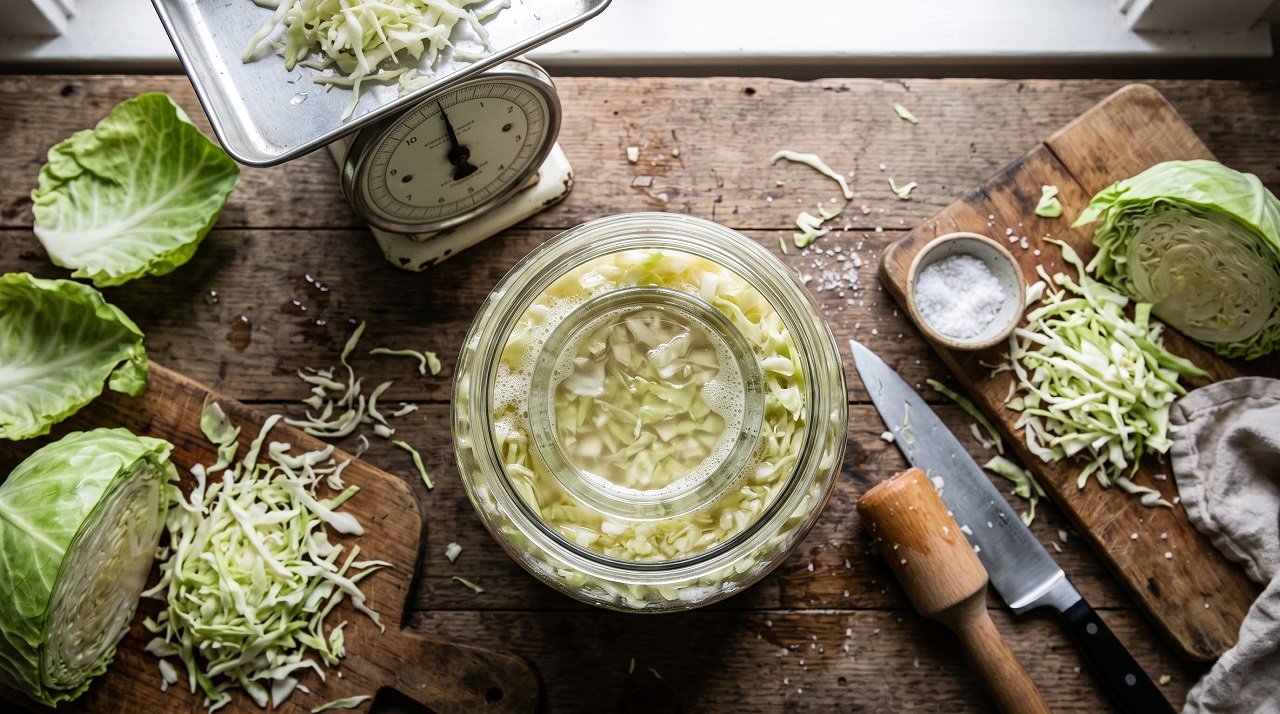
The consistently recommended ratio across fermentation science sources is 2% salt by weight of your cabbage (or vegetables). In practical terms: for every 1,000 grams (about 2.2 lbs) of shredded cabbage, use 20 grams of salt.
This precision matters for two real reasons: too little salt lets undesirable bacteria and mold compete with the beneficial lactic acid bacteria you actually want; too much salt can slow or stall fermentation entirely. A kitchen scale makes this simple and removes the guesswork that volume-based measurements introduce.
What You’ll Need
- 1 medium head of cabbage (about 2-3 lbs / 900g-1.4kg), any variety
- Salt, measured at 2% of your cabbage’s weight (non-iodized — iodized salt can interfere with fermentation)
- A clean glass jar or fermentation crock
- A fermentation weight (or a smaller jar/bag filled with water to weigh the cabbage down)
- A kitchen scale
How to Make It
- Weigh your shredded cabbage after removing the core, then calculate 2% of that weight in salt (e.g., 1,000g cabbage = 20g salt).
- Shred the cabbage thinly and place it in a large bowl.
- Add the salt and massage it into the cabbage with clean hands for 5-10 minutes, until the cabbage releases its own liquid and becomes noticeably limp.
- Pack tightly into your jar, pressing down firmly so the released liquid rises above the cabbage. This is the single most important step for safety — vegetables that stay fully submerged in brine create an oxygen-poor environment that favors the lactic acid bacteria you want and discourages mold.
- Weigh the cabbage down so it stays under the brine throughout fermentation. If there isn’t quite enough liquid to fully submerge it, a small amount of additional 2% saltwater brine (20g salt per liter of water) can top it off.
- Cover loosely (a cloth or a fermentation lid that allows gas to escape) and leave at room temperature, ideally below 75°F — warmer temperatures can produce a softer, mushier texture.
- Taste starting at day 3-5. A good ferment smells increasingly sour and tangy as it progresses; early on, a slightly funky “green” smell is normal. Continue fermenting to your taste preference, typically 1-4 weeks, then refrigerate to slow fermentation and preserve texture.
Kahm Yeast vs. Mold: How to Tell the Difference (Without Panicking)

This is the part that causes the most anxiety for new fermenters, and it’s worth knowing clearly before you start:
Kahm yeast is a flat, white-to-cream colored film that can form across the surface. It’s not mold, and it’s not dangerous — it’s a wild yeast that sometimes appears when vegetables are exposed to oxygen at the surface. If you see this: skim it off with a clean spoon, make sure your cabbage is still fully submerged, and continue fermenting. The ferment isn’t ruined.
Mold looks distinctly different — fuzzy, raised, and usually clearly colored (blue, green, black, or pink), rather than flat and white. If you see actual mold: discard the entire batch. Don’t try to skim mold off and continue — mold’s filaments extend below what’s visible on the surface, unlike kahm yeast’s flat film.
The practical rule: flat and white/cream = probably fine, skim and continue. Fuzzy and colored = discard, no exceptions. If you’re ever genuinely unsure, err on the side of discarding — a ruined batch of cabbage is a minor loss compared to the risk of eating something contaminated.
Why This Actually Supports Gut Health
Properly fermented sauerkraut contains live lactic acid bacteria, which is why keeping vegetables submerged and using the correct salt ratio matters beyond just food safety — an improperly fermented batch may not develop the beneficial bacteria you’re making it for in the first place. Look for “unpasteurized” on store-bought versions if you’re not making your own, since pasteurization (common in shelf-stable, non-refrigerated sauerkraut) kills the live cultures that make fermented sauerkraut different from simply pickled cabbage.
Frequently Asked Questions
How much salt do I need to make sauerkraut?
2% of your cabbage’s weight — for 1,000g of cabbage, use 20g of salt. Measuring by weight, not by spoonfuls, gives more consistent and safer results.
Is white film on sauerkraut safe?
Usually yes, if it’s flat and white or cream-colored — this is typically kahm yeast, which is harmless. Skim it off and continue. Fuzzy, colored growth is mold and means the batch should be discarded.
How long does homemade sauerkraut take to ferment?
Most ferments are ready to taste starting around day 3-5, with many people continuing to ferment for 1-4 weeks depending on how sour they prefer it, then refrigerating to slow the process.
Does store-bought sauerkraut have the same gut health benefits?
Only if it’s unpasteurized — pasteurized, shelf-stable sauerkraut has been heat-treated in a way that kills the live bacteria responsible for the gut health benefits typically associated with fermented foods.
Sources Referenced in This Article
- Frugal Organic Mama — Kahm Yeast vs Mold on Fermented Vegetables
- Frugal Organic Mama — Sauerkraut Troubleshooting
- 123 Food Science — Home Fermentation Safety: Kimchi, Kefir, Sauerkraut, and What Can Go Wrong
- FermentFoundry — Kahm Yeast: What It Is, How to Prevent It, When Safe
- National Center for Home Food Preservation guidance on sauerkraut salt ratios
Disclaimer: This article provides general educational information and is not a substitute for medical advice. If nausea is severe, persistent, or accompanied by chest pain, severe abdominal pain, or vomiting blood, seek medical care rather than relying on home remedies.
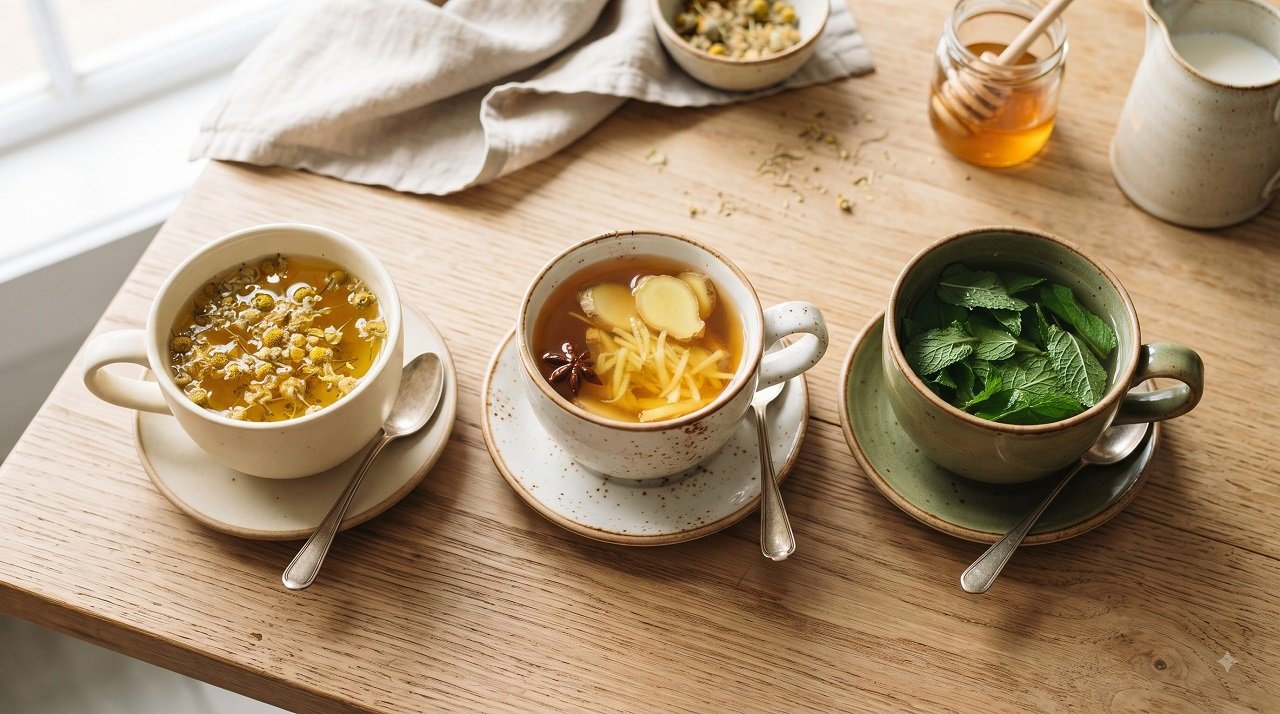
Most “tea for upset stomach” lists treat ginger, peppermint, and chamomile as interchangeable. They’re not — and getting this wrong can actually make things worse. If your upset stomach involves acid reflux, peppermint (the most commonly recommended option) can worsen it.
Why Peppermint Isn’t Always the Safe Default
Peppermint relaxes the lower esophageal sphincter (LES) — the muscular valve that keeps stomach acid where it belongs. That relaxing effect is exactly why peppermint works well for intestinal cramping and IBS-type discomfort lower in your gut, but it’s the same mechanism that lets acid travel back up into your esophagus if you have reflux. Clinical guidance specifically lists peppermint as something to approach with caution in reflux disease, and the effect is even more relevant for silent reflux (LPR), where menthol can also loosen the valve at the top of your esophagus.
The practical takeaway: if your stomach upset comes with any burning, regurgitation, or a sour taste — signs of reflux — skip peppermint and reach for chamomile or ginger instead.
Matching the Right Tea to Your Symptom

For Reflux-Related Nausea or Burning: Chamomile
Chamomile doesn’t affect the LES the way peppermint does, and it contains apigenin, a compound with genuine anti-inflammatory effects in the digestive tract. It also has real, well-documented calming effects on stress and anxiety — relevant since stress itself can worsen reflux. This is the safer general default if you’re unsure which type of upset stomach you’re dealing with.
For General Nausea (Motion Sickness, Mild Stomach Upset): Ginger
Ginger has the strongest research base of any single remedy here, particularly for nausea specifically — its active compounds (gingerols and shogarols) affect serotonin pathways involved in nausea, and separate research has found ginger measurably speeds up gastric emptying. A real dose limit worth knowing: more than 4 grams of ginger daily can paradoxically worsen heartburn and nausea in sensitive people, and drinking strong ginger tea on an empty stomach is a common way people trigger exactly the irritation they were trying to avoid. Keep it moderate — a lightly brewed cup with a small amount of fresh ginger, ideally with food rather than on an empty stomach.
A caveat specific to reflux: ginger is generally reasonable for nausea associated with reflux, but if your reflux is severe or triggered by nearly everything you eat, ginger’s mild LES-relaxing effect may add to the problem rather than solve it — this is a case where “natural” doesn’t automatically mean “safe for your specific situation.”
For Nervous Stomach or Stress-Related Nausea: Chamomile or Lemon Balm
Both work partly through calming the nervous system rather than acting directly on your gut — genuinely useful if your nausea is tied to anxiety or stress rather than something you ate.
What to Avoid Adding
Fizzy ginger drinks, sweetened bottled “ginger” beverages, and caffeinated blends behave differently from plain brewed ginger tea and can introduce their own irritation (caffeine, carbonation, added sugar) — if you’re using ginger specifically for its digestive benefit, a simple hot tea from fresh ginger or a quality tea bag is more reliable than a flavored commercial drink.
When It’s More Than Occasional Upset
- Nausea lasting more than a couple of days
- Vomiting blood or material that looks like coffee grounds
- Severe abdominal pain
- Chest pain (always rule out cardiac causes rather than assuming it’s reflux)
- Signs of dehydration from persistent vomiting
Frequently Asked Questions
What tea is best for an upset stomach?
It depends on the cause — chamomile is the safer general default, especially if reflux might be involved; ginger is better specifically for nausea without reflux symptoms; peppermint is best reserved for lower-gut discomfort like IBS-type cramping, not reflux.
Is peppermint tea bad for acid reflux?
Yes, for many people — peppermint can relax the valve that keeps stomach acid down, potentially worsening reflux symptoms, despite being a commonly recommended “soothing” tea.
How much ginger tea is too much?
Research points to roughly 4 grams of ginger daily as a threshold above which some people experience worsened heartburn and nausea rather than relief — moderate amounts, taken with food, are the safer approach.
Can I drink ginger and peppermint together?
They can be combined for general stomach settling, but if reflux is part of your symptoms, it’s worth trying them separately first to see whether peppermint specifically worsens your symptoms before making a blend a habit.
Sources Referenced in This Article
- Acibadem Hospitals Group — Ginger Tea and Stomach Acid: What the Evidence Shows
- Wipeout Reflux — Is Peppermint Tea Good for Acid Reflux? Why It Makes It Worse
- Wipeout Reflux — Is Ginger Good for Acid Reflux? Benefits, Risks & Evidence
- Healthline — Herbs and Supplements for GERD
- Teavity — Herbal Tea for Nausea Relief: Ginger, Peppermint, and Chamomile

How to Get Rid of Alcohol-Induced Heartburn: Effective, Fast Relief

Bone Broth Recipe for Leaky Gut: What It Can (and Can’t) Do for Your Gut

Lifestyle Medicine Summit

PEMF Webinar

The 4-7-8 Breathing Technique: Step-by-Step Guide and What the Research Actually Shows

HBOT ( Hyperbaric Oxygen Therapy ) Webinar
-
 Events1 month ago
PEMF Webinar
-
 Natural Sleep Remedies5 months ago
The 4-7-8 Breathing Technique: Step-by-Step Guide and What the Research Actually Shows
-
 Events3 weeks ago
HBOT ( Hyperbaric Oxygen Therapy ) Webinar
-

 Events5 months ago
Why You Can’t Trust Big Pharma
-

 Events5 months ago
The Anti-Cancer Body with Dr. Michael Karlfeldt
-

 Events4 months ago
The Cancer Conversation Your Oncologist Cannot Have in 15 Minutes
-

 Home Remedies5 months ago
Natural Home Remedies for Restless Legs at Night
-

 Events6 months ago
Beyond the Brain